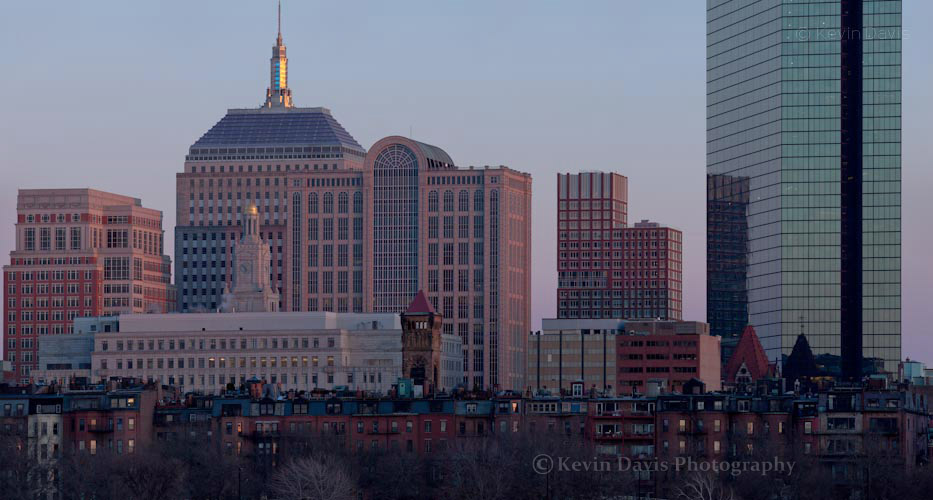
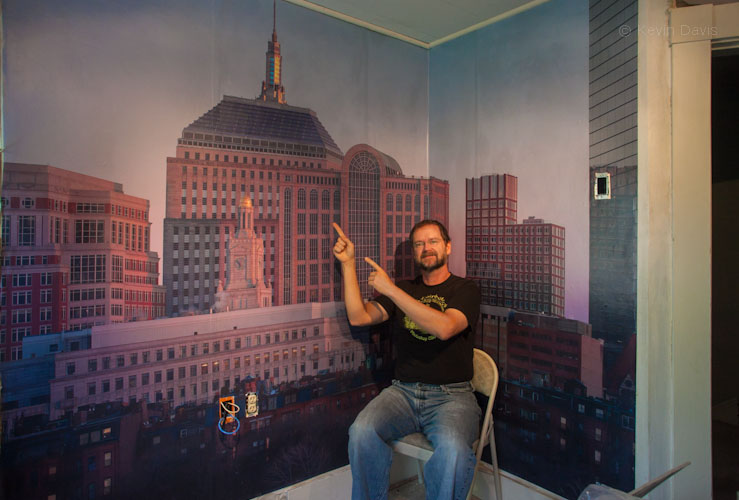
The image of the Boston skyline was created with a full-frame DSLR, a 400mm lens, and a tripod. Twelve separate frames were stitched together (using Adobe Photoshop) into a single image.
The final result was a single image 16,000 x 8600 pixels (137 megapixels). Cropping this to fit my wall, the JPEG that I submitted for wallpaper was 12,320 x 8726 pixels. When printed to a size of 119.5” x 86.5”, that implies a resolution just above 100 dpi. But the wallpaper vendor will interpolate this higher, to the native resolution of the printer.
The wallpaper
After a bit of research on the internet, I selected three possible vendors to print my wallpaper. My first vendor choice ended in a confusing experience with their website. I abandoned that vendor and then selected Blue River Digital (www.blueriverdigital.com). BRD offers several substrate choices; the choice depends largely upon two factors, (1) exposure to direct sunlight and (2) longevity of the intended display. I chose premium vinyl wallpaper and the cost was about $400. (This was a year ago; today’s options and prices have surely changed.) Depending upon the vendor and the material you choose, the cast generally ranges from $3 to $9 per square foot.
Sharpness, color, … the image quality of the final printed wallpaper is excellent.
In terms commonly used to describe photographic paper, this wallpaper has surface that is perhaps between matt and satin. Side light from a window causes a glare on the surface of the wallpaper.
For my wallpaper, the side-to-side ordering was obvious. However, depending upon the particular image, maybe with a repeating pattern, the sequence of the separate panels might not be obvious. Because of this, Blue River Digital includes a number on the back side of each panel.
The installation
You can hire a professional wallpaper installer or do it yourself. I have hung wallpaper myself on a few occasions (not recently), so opted to install the photo mural myself. A professional could have installed it in far less time than I … and with less cursing. (To install any wallpaper yourself and avoid the cursing, it’s a good idea to have help from a second person.)
As with any wallpaper installation, the wall does need to be properly prepared before installing the wallpaper.
After applying paste the back of a panel, the panel is folded in half and allowed to sit for a bit. (This is called Booking and is standard practice for wallpaper.) Blue River Digital provides a list of name brand wallpaper pastes that they have actually tested. I took that list to my local hardware store and found that they did carry one of those paste products. My local big-box home improvement warehouse stocked only a generic brand; I expect that would suffice, but I chose to use a paste that was Blue-River-tested.
My print consists of four panels, each 30” wide. At the edge of a panel, the image on a panel overlaps with the image on the adjacent panel, by about one inch. So, when applying each panel to the wall, the panels overlap by one inch.
Because my particular image has some strong vertical and horizontal lines, I was very particular about getting that first piece level and plumb. I removed that first panel from the wall and re-applied it probably three times before I was satisfied. Then I applied the remaining panels, which were easier to install than the first, but still can be difficult to get the two panels exactly aligned.
