The ONE Filter Every Outdoor Photographer Needs

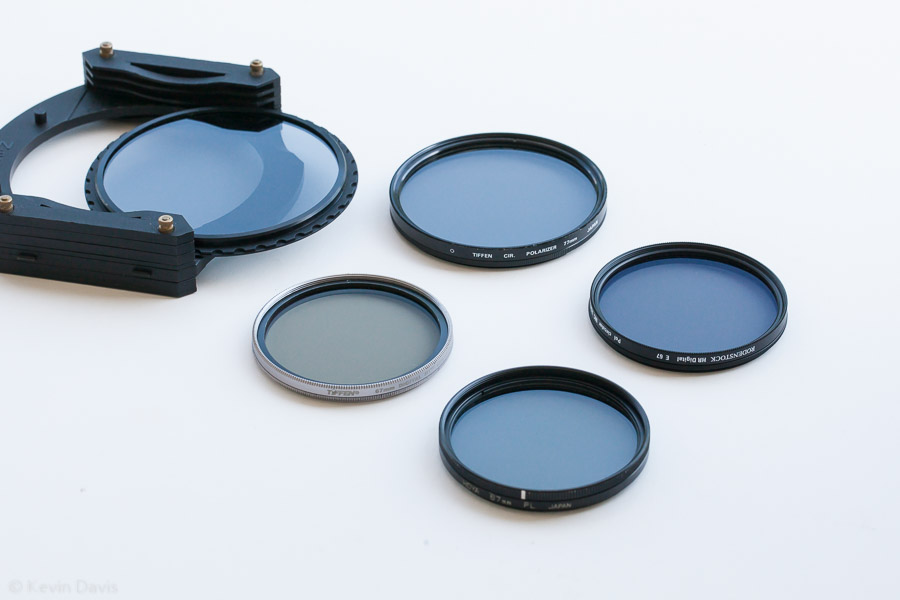
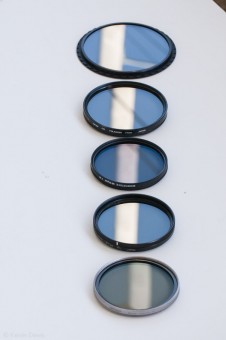
Clockwise from top left: Singh-Ray cir.pl., Tiffen cir.pl. (77mm), Rodenstock Digital HR cir.pl., Hoya pl., Tiffen HT Digital cir.pl.

We need polarizing filters and I am not going to explain why.  Many other photographer-authors have already done that and I see no need to put my own spin on it.   But there may be differences between two polarizing filters, either from two different manufacturers, or from the same manufacturer.  That is what we’re going to look at here.

Frankly, choosing a polarizing filter from a dozen or more options is a pain.  If you have a limited budget, you might select the cheapest filter.  If you have used filters before, you will likely stick with a brand that you know and trust.

The photo above shows five polarizing filters. All attach to the front of a camera lens; four include a screw thread to attach directly to the lens and one is designed for a filter holder.  Most are constructed from a glass element and a metal ring, but the most expensive filter is mostly plastic.

Clockwise from top left: (1) Singh-Ray LB Neutral Circular Polarizer for Z-Pro holder, (2) Tiffen circular polarizer 77mm, (3) Rodenstock Digital HR circular polarizer, (4) Hoya polarizer, (5) Tiffen HT Digital circular polarizer.

In true Sesame Street manner … which one of these does not belong with the others?  While Singh-Ray does offer standard screw-in filters, this version shown here is designed specifically for a Cokin Z-Pro filter holder.  Filter holders such as this allow the use of rectangular graduated filters.  If you need both grad filters and polarization, you have two choices: attach a polarizing filter to the lens and then add the filter holder onto that, or use a special filter that fits directly in the holder.  The Sing-Ray LB series (LB = lighter and brighter) isn’t quite as dark as most polarizing filters – you lose less light compared to others.  And, while some polarizers have a color tint, the LB Neutral does not.  This filter is ridiculously expensive.

Next, consider the silver-ring filter, which is a Tiffen Digital HT circular polarizer (HT = High Transmission).  Like the Singh-Ray LB, this filter is not as dark as most polarizers, so you lose less light through the filter.  Unlike the Sing-Ray LB Neutral, this filter has a color tint.  This filter is low-profile; however, while “low profile” usually implies there is no female thread on the front, this filter does have a front thread.

In the specific case of the Digital HT, the front threading and the rear threading are both shallow, allowing the filter to be thinner. But after eight years of use, the rear thread has worn and this filter sometimes does not stay attached to the lens – that’s a problem.  I recently replaced this filter with the Rodenstock HR Digital filter.  The color is more neutral compared to the Tiffen Digital HT.  However, it is not HT or LB, and I do miss that.

What is a low-profile filter?  It is simply thinner than usual, in order to solve a particular problem.  The problem with adding filters to the front of a lens is that they can cause vignetting, particularly if you stack multiple filters together.  Low-profile filters often omit the female thread on the front, meaning you cannot attach another filter in front of it.  The thinnest filters I have seen are from Vu Filters (http://www.vufilters.com).  Frankly, unless you are experiencing a vignette problem, I suggest avoiding low-profile filters.

In addition to the Tiffen Digital HT, the photo here shows another Tiffen.  This is a basic circular polarizing filter.  It is good quality and I have relied upon frequently.  However, I am replacing it with a B+W F-Pro circular polarizer (not shown), which I think is a bit better.

Just as lenses often have optical coatings on the glass, the same can be true for filters.  The second photo (below) shows a telephone pole reflected on the filters.  You can see that some filters are less reflective than others, which is achieved through coatings applied to the surface of the glass.  From the top of the photo, first is the Singh-Ray, followed by the 77mm Tiffen, and then the 67mm Rodenstock Digital HR.  See how the Rodenstock is a bit less reflective than the others? It has multiple coatings on the surface of the glass.

(Click on the image below to view it larger size.)

Singh-ray, Tiffen cir.pl., Rodenstock HR Digital cir.pl., Hoya pol., Tiffen Digital HT cir.pl.

The one polarizing filter that I have not yet mentioned is an old Hoya filter, which is a linear polarizer, not a circular polarizer.  Any linear polarizer can interfere with electronic auto-focus.  Circular is generally preferable because you can always use a circular polarizer in place of a linear polarizer, but the reverse is not true.  None-the-less, I did use this filter quite recently in a situation where I was relying upon manual focus.  I have owned this filter for twenty years … since before I owned autofocus lenses.

Once upon a time, photographers needed an array of color-correction filters to compensate for peculiarities in the light.  However, with the advent of digital cameras that include a color temperature adjustment, color correction can be done in-camera, largely eliminating the need for such filters.  So, today, I carry only three types of filters, polarizing, neutral density, and graduated neutral density.  While ND and grad ND are rather specialized devices that many folks do not need, the one filter every outdoor photographer needs is a polarizing filter.


Tall Ships

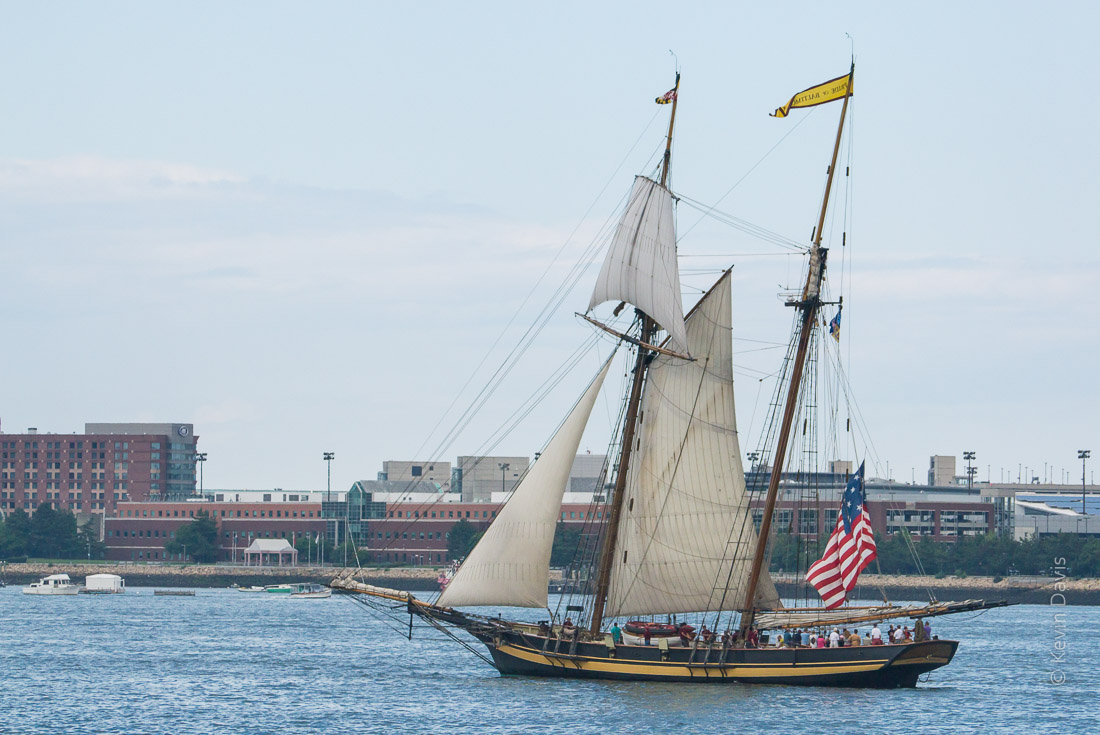
Schooner visits Boston Harbor - OpSail 2012
Schooner visits Boston Harbor – OpSail 2012

.
The phrase “tall ships” means tall-mast rigged sailing ships.  Historically important … modernly fascinating … and just plain fun.  These ships remind us of the golden age of sail, before the rise of motor power.

The largest tall ships are referred to as Class A, having a length more than 40 meters. (The bowsprit is Not included in that measure.)  Vessels shorter than Class A are designated as Class B, C, and D; these are not the largest but are still very impressive.

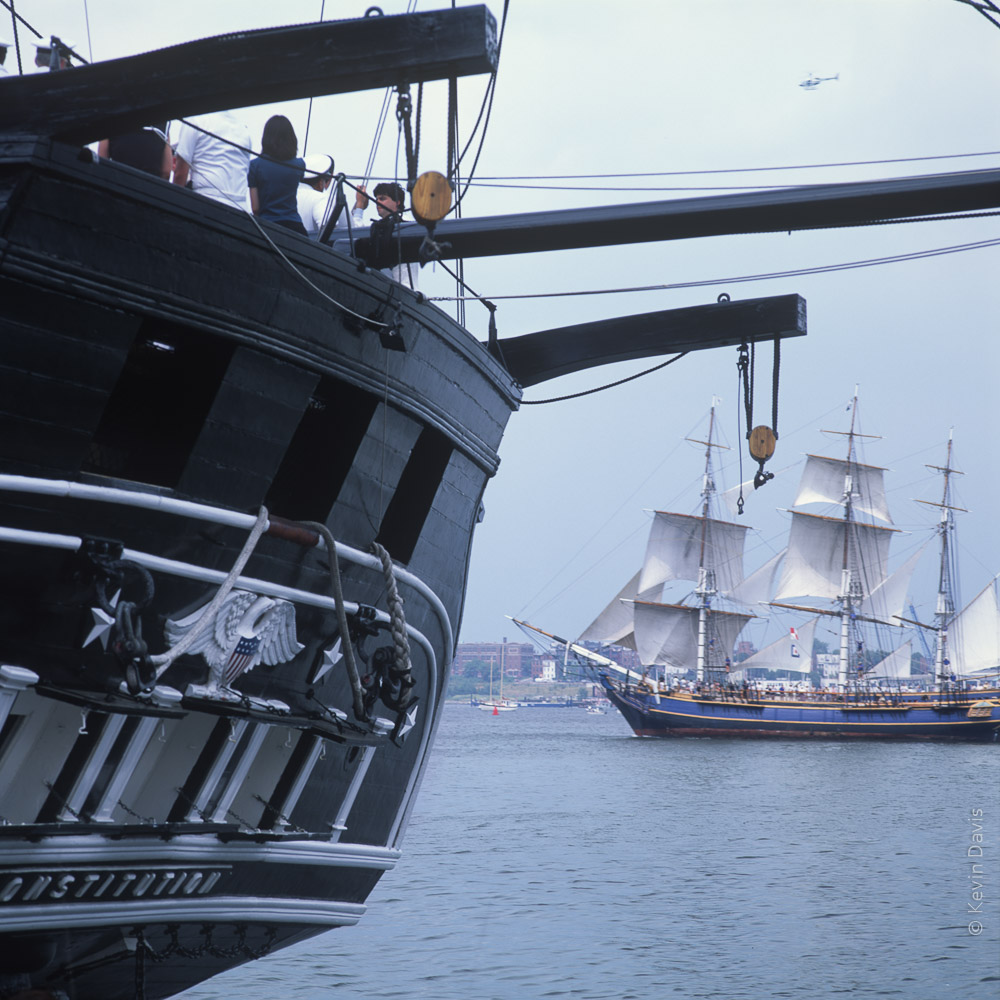
Today, we have more than sixty Class A tall ships across the globe.  More than half are European and eight are American.  This includes the U.S.S. Constitution, which is based here in Massachussetts.  U.S.S. Constitution, also known as Old Ironsides (a nickname earned in active battle), is retired from service but retains the title “the world’s oldest commissioned naval ship”, meaning it is officially staffed with Navy officers and sailors.

A gathering of tall ships is often referred to as Operation Sail or OpSail; but these events do not happen very often. The largest gathering in my memory occurred in 2000 under the moniker Sail Boston. We last saw OpSail on the east coast in 2012, in part to commemorate the 100th anniversary of the War of 1812.

Sail Boston happens once again in 2017 – more than fifty tall ships!
>>   SailBoston.com


Upcoming 2015 tall ship events

Philadelphia PA … June 25 – 28, 2015  … more than a dozen ships

Tall Ships Challenge 2015
• Greenport NY … July 4 – 7   www.greenportvillage.com/tall-ships-2015
• Portland ME … July 12 – 20  www.tallshipsportland.com/invitedships

And more
• Boston MA … July 1 – July 5
Maybe four ships (Liberty Clipper, Liberty Star, USCG Eagle, USS Constitution)

Hermione :
• Baltimore MD … June 19 – 21, 2015
• NYC … July 2 – 4, 2015

Kalmar Nyckel :
• Provincetown MA … July 10 – 19, 2015

USS Constitution stands watch as a parade of sail passes by
Sand Sculpting Competition

Sand Sculpting Competition

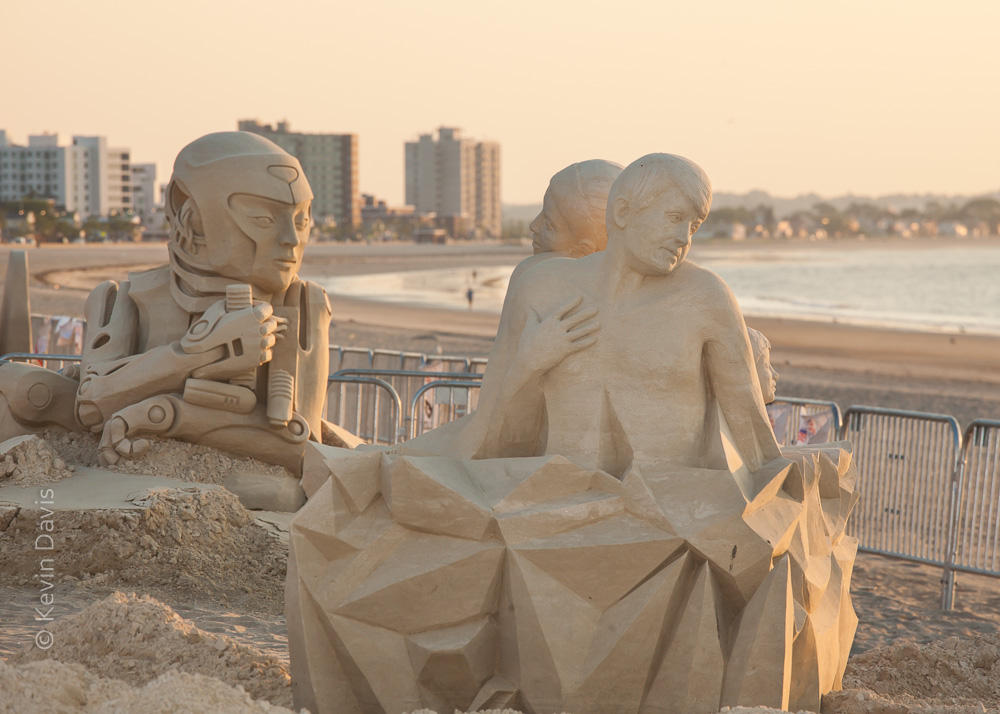
Dawn at Revere Beach Sand Sculpting Competition

Among dozens of annual sand-sculpting competitions across the United States, some are open to amateurs, some are limited to proven master sculptors, and some include both.  Of the master competitions, two occur within New England.  By invitation only, master sculptors participate and compete to win cash prizes.

You can visit during the competition and see the artists at work, or you can visit during days following the competition.  Sculptures are created at a distance away from the surf, so that they will not be washed away. Barring rain or strong winds that erode the sculptures, the completed works may remain on display for a week or more.   A visit at sunrise or sunset can be particularly rewarding as the warm light of the sun rakes across the beach.

Hampton Beach Sand Sculpting Competition (Hampton Beach, NH), June 18-20, 2015. Now in its fifteenth year, this competition will bring together ten master sculptors.  Also, one giant sculpture will be created by a team of sculptors on behalf of one corporate sponsor.
Website:  www.hamptonbeach.org/sandcastle-competition.cfm.

Revere Beach Sand Sculpting Festival (Revere, MA) , July 24-26, 2015.
An annual event since 2004, this festival also includes live music and a fireworks display. Revere is close to Boston and you may choose to visit via the MBTA public rail system; Revere Beach Station is only one block away from the beach.
Website: reverebeach.com.


More master sand sculpting events beyond New England:

AIA Sandcastle Competition (Galveston, TX), American Sandsculpting Championship (Fort Myers Beach, FL), Arts In Action (Port Angeles, WA), Blue Water SandFest (Port Huron, MI), Cannon Beach Sandcastle Contest (Canon Beach, OR), Headlands BeachFest (Mentor, OH), Navarre Beach Sand Sculpting Festival (Navarre Beach, FL), SandSations (Long Beach, WA), Sandcastle Days (South Padre Island, TX), Sanding Ovations Sand Sculpting Competition and Music Festival (Treasure Island, FL), Siesta Key Crystal Classic (Siesta Key, FL), U.S. Sand sculpting Competition (Sand Diego, CA), Virginia Beach International Sandsculpting Championship (Virginia Beach, VA).

The Next Phantom Quadcopter Drone – Phantom 3

Last October, I listed Drones for Under $2000.  A week later, DJI announced a new quadcopter drone, Inspire 1, which was notable, but far above the $2000 price point. This week, DJI announced the third incarnation of it’s original Phantom, which now incorporates some features from Inspire but retains the more affordable price tag of the Phantom line.  Here are the broad brush strokes.

Phantom 3 (DJI press release photo)

Phantom 3

  • Improved camera system supports video and stills. Phantom 3 “pro” supports 4K video resolution.
  • 3-axis gimbal, similar to Phanom 2 Vision
  • The new gimbal seems to pan, unlike its predecessor on the Phantom 2 Vision+
  • Digital video downlink sends live video feed to your mobile device on the ground (up to 720p)
  • Downward-facing visual and ultrasonic sensors allow position hold without GPS (indoors), like the Inspire 1
  • Improvements in motors and motor control provide better stability and longer battery life.

Phantom 3 vs Inspire 1

  • Inspire 1 is larger than Phantom and can fly faster
  • Inspire 1 allows unobstructed 360 degree camera rotation – retracting landing struts will not obstruct the view.
  • Inspire 1 supports dual pilot operation.
  • Phantom is theoretically much more durable than Inspire
  • Phantom costs far less than Inspire
  • Phantom provides a slightly longer flight time.

Not to be left behind, 3D Robotics will soon release their new quadcopter, currently known as SOLO.

How to Print Photographs

How to Print Photographs

You have three primary options for printing digital photographs on paper; I will offer a bit of insight to each of these.

  1. Have a photo lab print it onto photographic paper
  2. Have a photo lab print it via inkjet printing
  3. Print it yourself via inkjet printing

_1280502

Photo lab – print on traditional photographic paper

Traditional photographic paper has been used since before digital photography existed.  Embedded within the paper, a chemical process reacts to light.  With the advent of digital photography, the method of projecting the image onto the paper has changed, but the paper itself is basically the same technology as was used forty years ago.  Once the paper has been exposed to light, it must be processed through several chemicals, washed, and dried.  Though it may seem to be a complex process, the process is typically done by machines and is inexpensive.  Because a the image is formed by a chemical change within the paper, no ink or dye is applied to the paper surface.

The light sensitive paper (produced by Kodak, Fujifilm, Ilford, and others) is available with a glossy surface, matte surface, of something in between, typically referred to as semi-gloss or luster.  Some paper produces black & white (a.k.a. grey-tone) image, while other papers produce a color image.  Metallic color paper is a widely available option that has reflective specs embedded in the paper; an image on metallic paper can be quite stunning, but should be displayed under very good light to achieve the best effect.

Photo lab – print via inkjet printing

Inkjet paper is a far more simple material compared to light-sensitive paper.  There is no chemical process built into the paper; it is basically just paper, made from wood fiber, cotton fiber, etc.  However there are many options available with varying characteristics of surface sheen, surface texture, tonality, brightness, and contrast.  Each photo printing lab will offer a limited range of paper options, papers with which they have experience and of which they understand the characteristics.  If you are uncertain which paper to choose, you can discuss this with the lab, particularly considering the specific image(s) you want to print.

Though I can print images on my own inkjet printer, I have sometimes chosen to use a professional print lab for a few different reasons.

  1. Printing can be a pain.  For example, when printing on thick paper, I have to feed paper into my printer one sheet at a time.
  2. To print on a paper size larger than my own printer capability.
  3. To experiment with some different papers, without buying a full package of that paper.

Just because you send your images to a professional print lab, doesn’t guarantee that what the print will look like the image on your display screen … what you see is what you get (wysiwyg).  You still need to do some work BEFORE you send your image to the lab.  The necessary preparation is the same as printing it yourself, so jump ahead to Print it yourself.

Photo lab – print via dye sublimation

Dye sub printing is far less common than other methods.  I have not used it and we’ll just leave it at that.

Print it yourself

As inkjet printers are widely available for personal and business use, making photo prints is entirely within your grasp.  If you are unsatisfied with prints made by photo labs, you can take matters into your own hands.

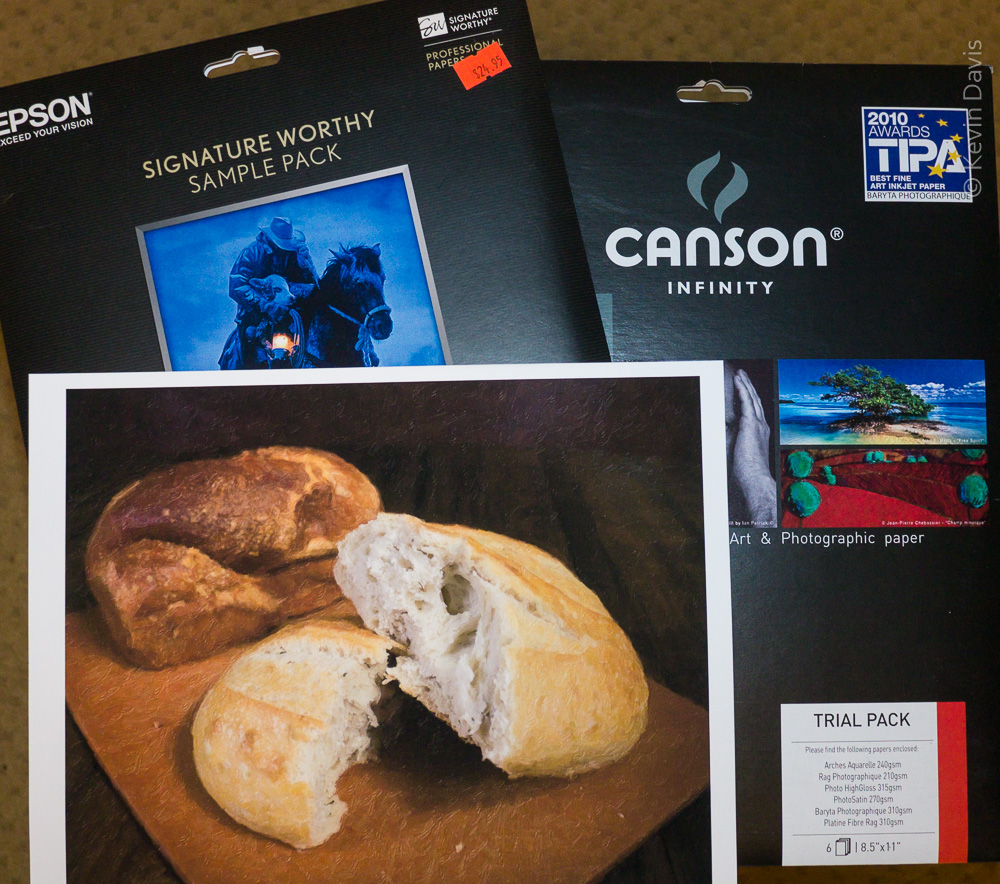
Manufacturers of inkjet paper may offer a sample pack containing a variety of different papers.  See the image at top of this post.

Most digital photographs are represented via RGB color space … red, green, blue.  In general, inkjet printers do Not use RGB inks.  This implies that a conversion is necessary.  Your printer likely will attempt this conversion.  Your computer software may also attempt this conversion.  Very possibly, the resulting print will not be quite as you hoped.

How can we best insure that the print will be as we expect?  Achieving a good print requires a few steps BEFORE sending the digital image to print.

Color-manage your computer display

In general, most computer displays do not render colors accurately.  What you see on your display screen can be very different to what comes out of your printer.  To insure that your display is accurate, use a device called a colorimeter.  This device measures the actual colors coming out of your display screen and then places a correction table into your computer so that colors are corrected.  The two most popular brands are ColorMunki (by Xrite) and Spyder (by DataColor).

Who you gonna trust?

You can either trust your printer to manage color properly, or trust your computer application to manage color properly.  If both are trying to manage colors, then that’s going to be a problem.  Pick one or the other.

If you choose to trust your printer, then be certain that your computer application (that which is sending the image to the printer) is Not managing color.  Then, depending upon the ink and paper you choose to use, you may need to update the RIP firmware of your printer, if that is even possible.

The more common approach is to control color within the computer application.  In the printer settings, disable the printer’s own color processing.  With this feature disabled, the job of insuring correct color is entirely in the realm of the computer software application.  Not all applications have this ability.  (I generally print from Adobe Lightroom or Adobe Photoshop.)

Three things can impact print color:  the specific printer are you using, the specific ink, and the specific paper.  For example, you might be using a warm-tone paper or a bright-white paper.   A “color profile” includes everything your computer application needs to make a print using the specific combination of printer + ink + paper.  For example, if I am printing with an Epson 3880 printer, with Epson ink, printing on Canson Infinity Photo Satin paper, the paper manufacturer provides a “color profile” absolutely free.  After downloading the color profile from the paper manufacturer, I can specify this color profile when sending an image to my printer; this insures that the colors are rendered accurately for that specific combination of printer, ink, and paper.

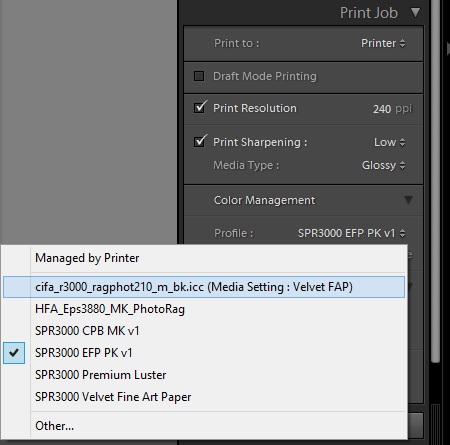
Color profile selection in Lightroom

In the screen snapshot here (Lightroom), notice that the first option is “Managed by Printer”; the remaining options are all different color profiles, meaning the printer is Not managing color.

If the paper manufacturer does not have a color profile for your specific printer+ink combination, then you have a problem.  You might experiment with some available profiles and find one that that seems to produce good results.  Else, you have to make your own color profile.  This requires the use of a colorimeter.  This may or may not be the same device you used to profile your display screen.  The difference here is that the device must measure light reflecting off printed paper rather than measure light emanating from a display screen.  If you want to, you could print on a white paper shopping bag – there is no color profile for that, but you could potentially make your own using a colorimeter.


Bread Art (Photographing Bread)

For the purpose of illustrating a theme, I was recently offered the task of photographing bread.

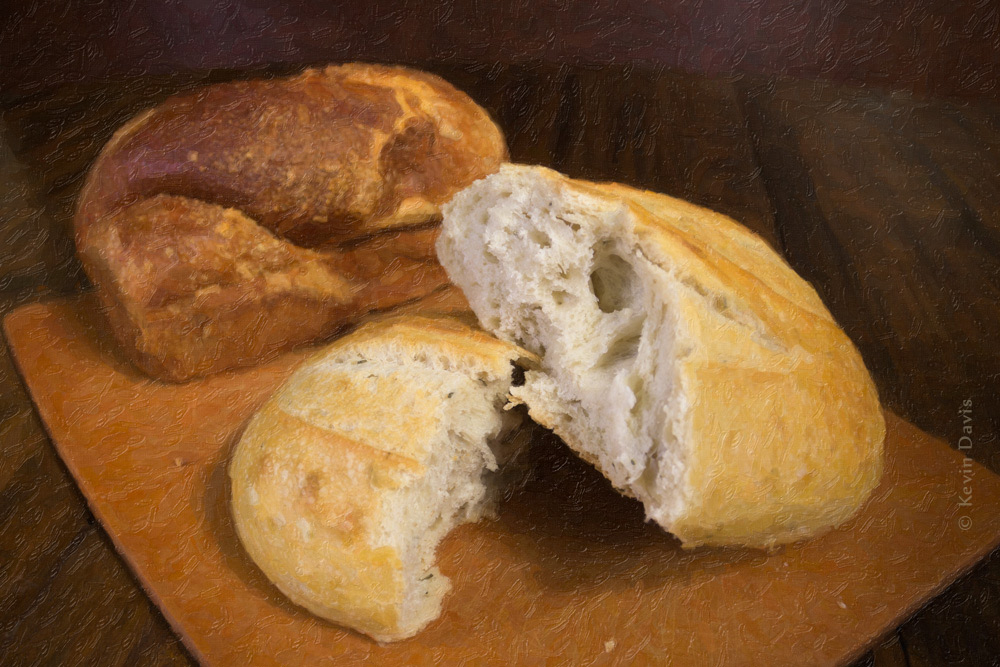
Final image (digitally modified using photoshop)

Here are the steps in making this image.

Although I originally thought this shoot might require actually baking my own bread, I quickly discarded that thought and went to my local market.  The market sells specialty loaves that are far more attractive than anything I can make.  So I purchased two different loaves of bread.

Initially, I photographed the unbroken/unsliced loaves.  Then I thought to slice the bread, but instead chose to tear it in half for a more natural look.  Good call.

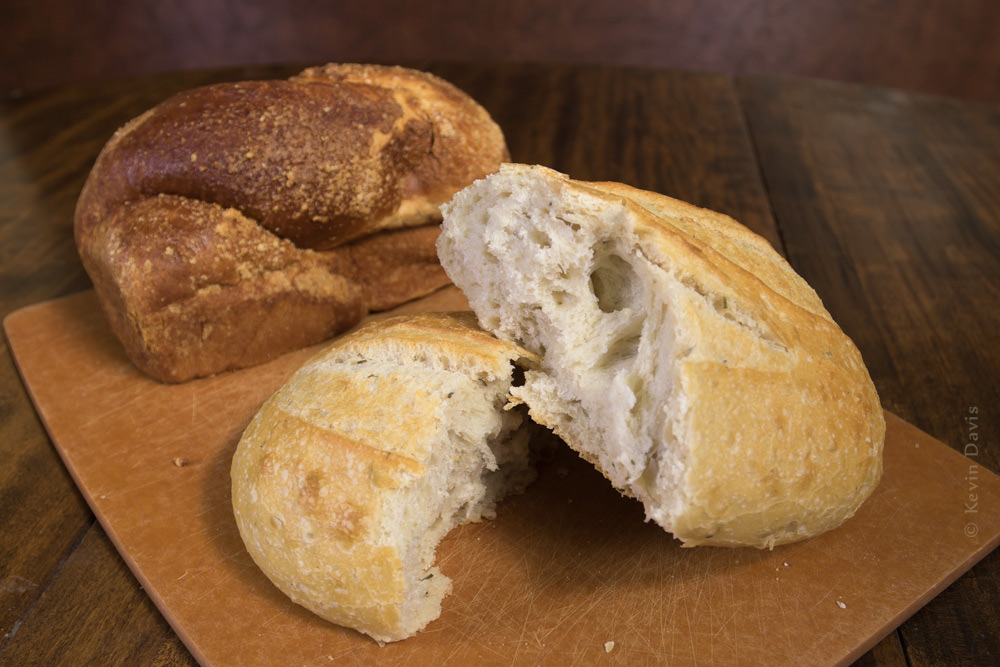
Original bread photo unmodified

After photographing for a half hour, this is the image I chose as the best.
Compare this original to the final image (shown before it).  For a larger view, click on either image.

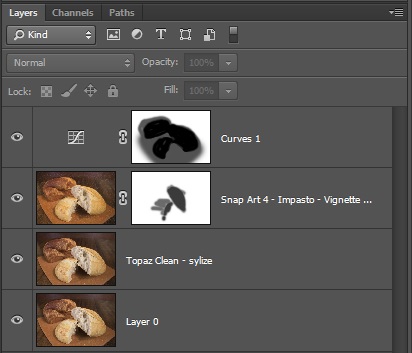
In Photoshop, I copied the image onto two new layers and applied a different filter to each layer.  The first is a stylized using a plugin by Topaz Labs. But the effect is largely obscured by the next layer above it.

The next layer applies an artistic painting look using a plugin filter called Snap Art by Alien Skin.   Through the use of a layer mask, the effect is not applied to the inside of the bread loaf.  See the layers panel snapshot below.  Where the mask is dark, you see the underlying layer.

Finally, to highlight the bread, I created a darkened vignette using a curves layer.  The final image is shown at the beginning of this blog post.

U9A3235_bread_art-layersHere is a look at my layers in Photoshop.


Photography promo card

Here’s a marketing/promotional item I created recently.

Accordion card
Accordion card


This accordion card has 5 pages front & back, for a total of 10 faces.  The five images you can see on this side are scenic photos.  The other side has four event photos, two sporting events, and two non-sport.  The last panel has info about me, including my contact info.

The quality of the piece is excellent.  I am very pleased with how it printed.  It was printed by Miller’s Lab on “classic felt” paper, 130# / 325 GSM.  Each folded card is 3.5 x 5″. In retrospect, I am very happy with the size; small enough to fit in any pocket, yet large enough that the photo quality is clearly evident.  Although Millers does offer an optional coating on the felt paper, I had their paper samples in hand and judged that a coating wasn’t necessary; I am glad for that decision. Unfortunately, the lab does not fold them, as you can see the flattened cards in the background of the photo here.  I had to fold them all.  Envelopes are provided.

Here are a few vendors that provide accordion cards.
# of pages / # of panel faces / dimensions

Apollo      …     4  /  8  /  4.25×5.5″
Miller’s    …     5  /  10  /  3.5×5.5″
Miller’s    …     3  /  6  /  4.25×5.5″
Miller’s    …     3   / 6  /  5×5″
H+H        …     4  /  8  /  4×5.5″
Bay Photo  …  3  /  6  /  5×7


Winter Light (photography)

Winter Light (photography)

The grey season.  In the northeast, wintertime without snow is a drag, particularly for outdoor photographers.  I need some snow here.  Not just on the ground – we need snow sticking to tree branches.

This winter has brought a fair amount of precipitation, but it’s been rain rather than snow.  What little snow we’ve seen has quickly washed away as snow turned into rain. So here are a few shots from last winter.

Old grist mill, in winter


The first is an old grist mill. It is pretty – I hope that much is obvious. However, the light may not be obvious. The orientation of the mill and surrounding trees doesn’t catch much direct sunlight. The sun is setting on the other side of those trees. The light is what it is and there’s no changing it.

In photography, we have to be aware of the orientation of the subject with regard to the light.   When the light on the subject is not what we would prefer, you can sometimes move the subject, but not if the subject is a building.  You can sometimes move the light, but not if the light happens to be the sun.  You might come back at a different time of day, when the sun is in a different position.  However, I believe this mill is in shadow of the trees both morning and evening.

Church at sunset
Church at sunset

Sometimes, in outdoor photography, using only available light, there’s nothing you can do to change the light on the subject. But you might find a different subject to photograph. Across the street, a church was catching the light of the setting sun. So, I photographed the church. And next to the church is a historic one-room schoolhouse. Nice light, eh?


(To see a larger view, click on any image. )

One-room schoolhouse

I included this last image (schoolhouse) in a recent 2015 wall calendar.

Memory Cards – What Speed Do I Need?

Memory Cards – What Speed Do I Need?

CF, SD, and micro SD memory cards

The photo here shows some of the memory cards I have used in my digital cameras.  The oldest is the SD card at center, rated at 20MB/sec.  The newest and fastest is at the top (SanDisk, CF card), rated at a maximum speed of 120 MB/sec.

Historically, CF cards have supported faster data transfer (read and write) than SD cards.  The reason is simple – a CF card can transfer 16 bits all at once, whereas a SD card can only transfer 4 bits at once.  Count the electrical contacts on an SD card – there are 9 pins.  Count the pin holes on a CF card – there are 50 pins.

SD-class-symbolsStandard SD cards (SDHC, SDXC) are deemed UHS class I.  A recent evolution of the SD card format has introduced SDXC UHS class 3.  These cards have 7 additional electrical contacts and allow faster data transfer up to a theoretical limit of 300 MB/sec (equal to the limit for CF cards).  These cards should be backward compatible with older cameras that support only the 9-pin UHS-I interface, but you will not see the speed advantage of the faster interface.

For historical reasons, the maximum speed of a memory card may be shown as a multiplier, such as 100x, 266x, etc.  The baseline is 150 KB/sec.  So 300x means 45 MB/sec (45,000 KB/sec).

Instead of an”x” rating, CF cards will typically be labelled with a simple speed rating in MB/sec.  For SD cards, a speed class rating is newer than the old “x” rating .  Class 6 means that the card can support at least 6 MB/sec.  Class 10 means 10 MB/sec or more.

The speed class rating has been supplanted by the UHS speed class rating (Ultra High Speed).  UHS Class 1 means the card will support a write speed of 10 MB/sec or better.  UHS Class 3 (a.k.a. U3) means the card will support a write speed of 30 MB/sec or better.

 How fast does a memory card need to be?

Writing to the card and reading from the card are really two different considerations.  If you’re capturing 1080 HD compressed video, a momentary burst up to 30 MB/s is possible, but the sustained data rate is not that high.  You need a Class 10 card.  For 4K ultra-HD video recording, you need UHS Class 3.  If your card can’t quite keep up, your camera will likely abort recording.

If you are a sports photographer, capturing ten images per second may amount to 300 MB/sec but this speed need not be maintained constantly.  If your card cannot keep up, your camera will report “busy” for a second or two, during which new images cannot be captured.

At the end of the day, you need to upload the photos and video to a computer.  That’s when you want to have the fastest speed reading from a card.

 Card Readers

For years, photographers relied upon Rob Galbraith (http://robgalbraith.com) for his work measuring the read/write speeds of both memory cards and card readers.  Then Rob moved to a full-time job and could no longer maintain the database.  Recently there has been an update, seen here by PhotoShelter:

http://blog.photoshelter.com/2014/10/photoshelter-card-reader-database-why-you-should-upgrade/

Three tables are presented.  The first shows data transfer rate when reading from memory cards to a 2013 Mac Pro.  The second is the same, but using a 2014 Macbook Pro.  The third table regards XQD cards, which are new and relatively uncommon (notably, the Nikon D4 supports XQD cards).  Higher number means faster data copy – the numbers are MB/sec.

The fastest card readers for (SD and CF cards) are:

The best speed requires that you connect the card reader to a USB 3.0 port on your computer.  USB 2.0 is limited to 50 MB/sec, while USB 3.0 is limited to 145 MB/sec.

“You’re wasting time and not using your expensive gear to its full potential if you haven’t upgraded your cards and readers in the past two years or so.”
(Photoshelter, Allen Murabayashi)

I don’t entirely agree with Mr. Murabayashi.  If you haven’t upgraded your cameras, then you probably don’t need to update your cards and readers.  My general practice is to always buy new cards when I buy a new camera.


Giant Pumpkin – world record

Giant Pumpkin – world record

Giant pumpkin weigh-off competition

As recently as 1983,  the world record for largest pumpkin was still less than 500 lbs.

Just twenty-nine years later, 2012, the world record had increased four fold … 2009 lbs, established at the Topsfield Fair.  The first pumpkin ever to weigh more than one ton.

The photo here shows the giant pumpkin weigh-off competition at the 2012 Deerfield Fair.  A new world record was established, but the record only lasted one day, as the record was beaten the very next day at Topsfield Fair.  (Happily, I was preset at both these competitions.)

In 2014, the title moved to Europe.  2323 lbs, grown in Switzerland.


#giantpumpkin