“Creativity is a process of discovery. It’s worth the risk. Dream. Dare. Jump.”
– John Paul Caponigro (artist/photographer)
Interestingly, John Paul wrote this at the END of a list of fears that creative people may face. Allowing oneself to express creativity is commonly risky. Some folks may fear failure while other folks may fear changes inherent in success.
You’re afraid the reward you receive won’t be worth the financial investment you make.
You’re afraid that when compared with someone else’s creation your creation will seem insignificant.
As creatives, we endure a tension between two competing forces. On one hand, we must dance to our own tune (sing your own song), regardless of whether it achieves mass appeal. On the other hand, art should communicate something to others, so we need to be concerned with the impact of our work upon other people.
If you believe that your creative spark is a gift from above, from the divine, then you should engage and pursue it. That does not mean you should pursue it recklessly. (Don’t quit your day job just yet.) But as each person seeks validation – is my work good or a waste of time? – the first place to seek an answer is from your divine source.
Creatives are commonly at a disadvantage because our initial motivation is not strongly connected to capitalistic success. We’re creative because we just are. In the words of musician John Lee Hooker, “You’ve got to let that boy boogie woogie, ’cause it’s in him and it has to come out.”
If the thought of NOT pursuing your creative passion feels like misery … then definitely pursue it. Yes, “it’s worth the risk. Dream. Dare. Jump.”
A friend had trouble emailing photos from his smartphone. His photos were more than eight megapixels and he was trying to email two dozen of them in a single email. His email did not want to send an email totaling 400 megabytes. The resolution of his smartphone camera captured far more pixels than he needed and the files were … not small.
Problem #2
If you upload a small photo to an online service, particularly social media, that service will likely attempt to enlarge the photo … and you may not like the quality of the result. While shrinking a photo typically does not have a negative impact on photo quality, enlarging can possibly have undesirable results because the enlarging process is attempting to invent pixels that did not originally exist.
Display on a smartphone
If you primarily look at photos on your phone, then 5 megapixels is more than you need.
Consider the display resolution of some popular smartphones:
Google Pixel 3 is 1080 x 2160 … 2.3 MP
iPhone X is 1125 x 2436 … 2.7 MP
Razor Phone 2 is 1440 x 2560 … 3.6 MP
Samsung Galaxy S9 is 1440 x 2960 … 4.2 MP
Print
Printing a photo onto paper is the most demanding application. As a general rule of thumb, high-quality printing requires between 240 to 300 pixels per printed inch. The bigger your print, the more pixels you need.
Example: A 5-megapixel photo should print well up to 8×10 inches
(8×240) x (10×240) = 4.6 megapixels
Facebook
The recommended upload size is 1,200 × 630 pixels. You can certainly upload a larger photo, but Facebook will automatically shrink it.
Instagram
By design, Instagram favors square photos. You can post a rectangular photo, the Instagram default is a square crop. Upon first uploading your photo, you have an opportunity to undo that crop, but you cannot subsequently edit the photo to change it after your posting is complete.
The recommended size ix 1080 × 1080 pixels. You can certainly upload a larger photo, but Instagram will automatically shrink it. If you upload a rectangular photo, it will be cropped to width 1080 pixels.
Twitter
Recommended upload size is 1200 × 675 (aspect ratio: 16:9): You can certainly upload a larger photo, but Twitter will automatically shrink it.
Display on a tablet
Consider three tablets.
Amazon Kindle Fire HDX 8.9” : 2560 × 1600 pixels, 8:5 aspect ratio
Apple iPad 10.2” (2019) : 2160 × 1620 pixels, 4:3 aspect ratio
Samsung Galaxy Tab A 10.1” (2019) : 1920 × 1200 pixels, 16:10 aspect ratio
If you size an image 2560×1600, it will display full-screen on the Kindle HDX 8.9” but may seem too large for both the iPad 10.2” and the Galaxy Tab A 10.1”. Not to worry, the tablet includes the necessary smarts to dynamically make your photo fit the device screen without modifying your stored photo.
You can certainly store photos with higher resolution than the device display; the only consequence is that the photos consume more storage space than is necessary.
eBook, part 1 – cover photo displayed in the ebook store
For the Kindle store, Amazon recommends 2500 x 1563 pixels.
eBook, part 2 – photos inside the book
In large part, this comes back tablet display screens. As the Kindle and iPad (described previously) are similar regarding 1600 pixels in the smaller dimension, you might size your photos to 1600 pixels. Amazon recommends twice this, 3200 pixels, but I don’t know why.
Upon uploading your eBook to the Kindle store, your photos will be automatically compressed. My latest ebook manuscript (with photos) was more than 12 megabytes before submitting, but Kindle compression reduced it to 4 megabytes.
The amount of royalty you earn from each book sale may be reduced because total eBook file size may incur a larger “delivery fee” per individual sale, perhaps fifteen cents per megabyte. An e-book with many high-resolution photos may incur a higher delivery charge and therefore reduce the royalties paid to the author.
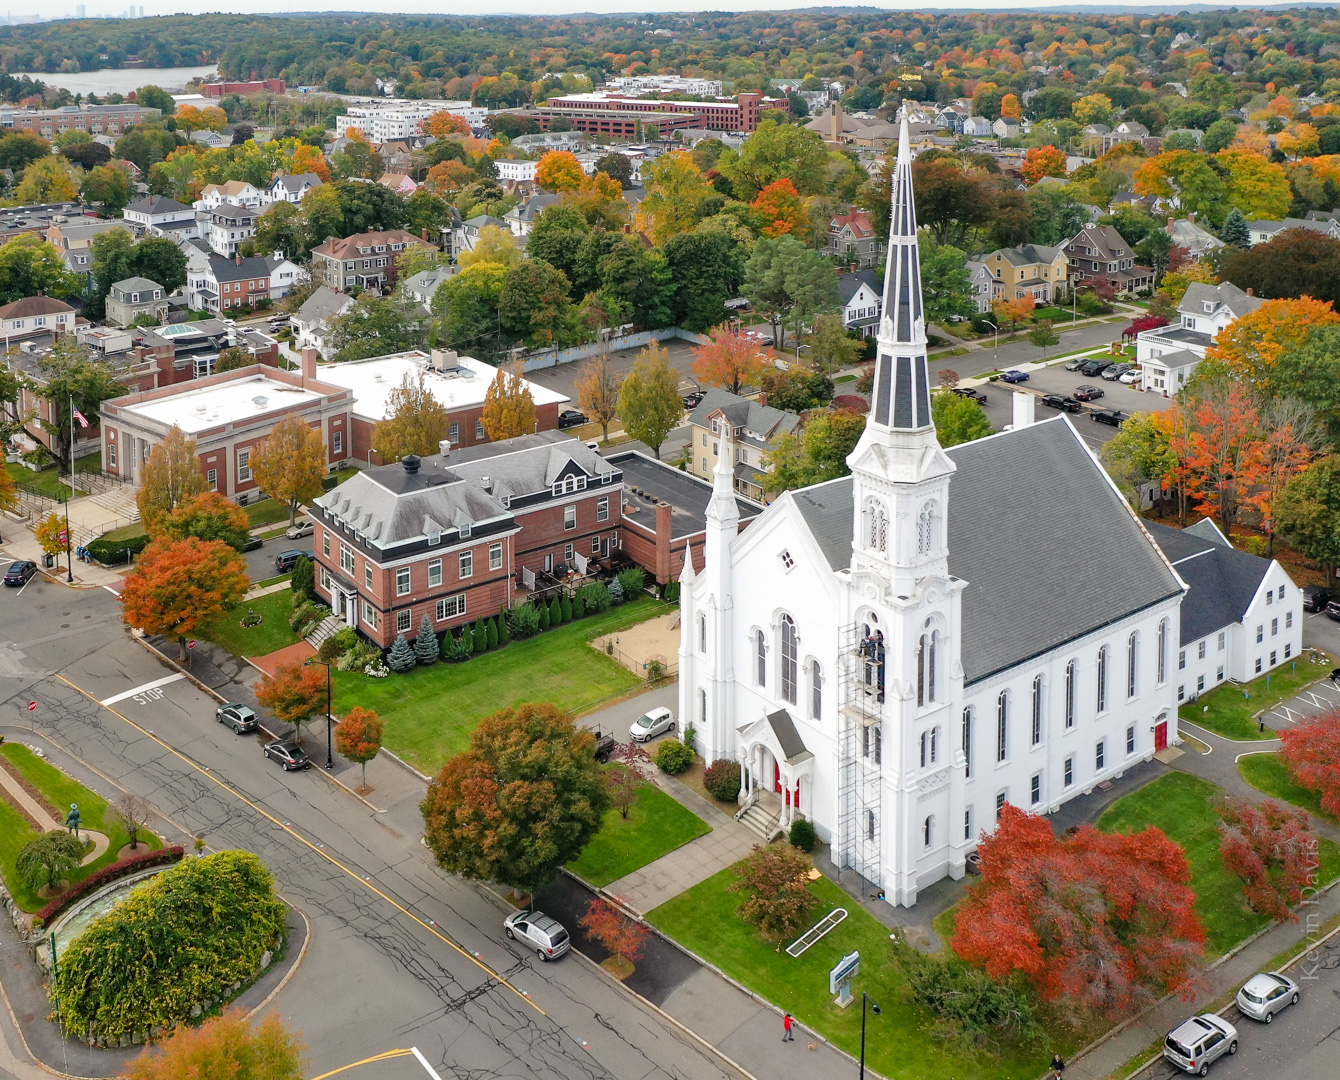
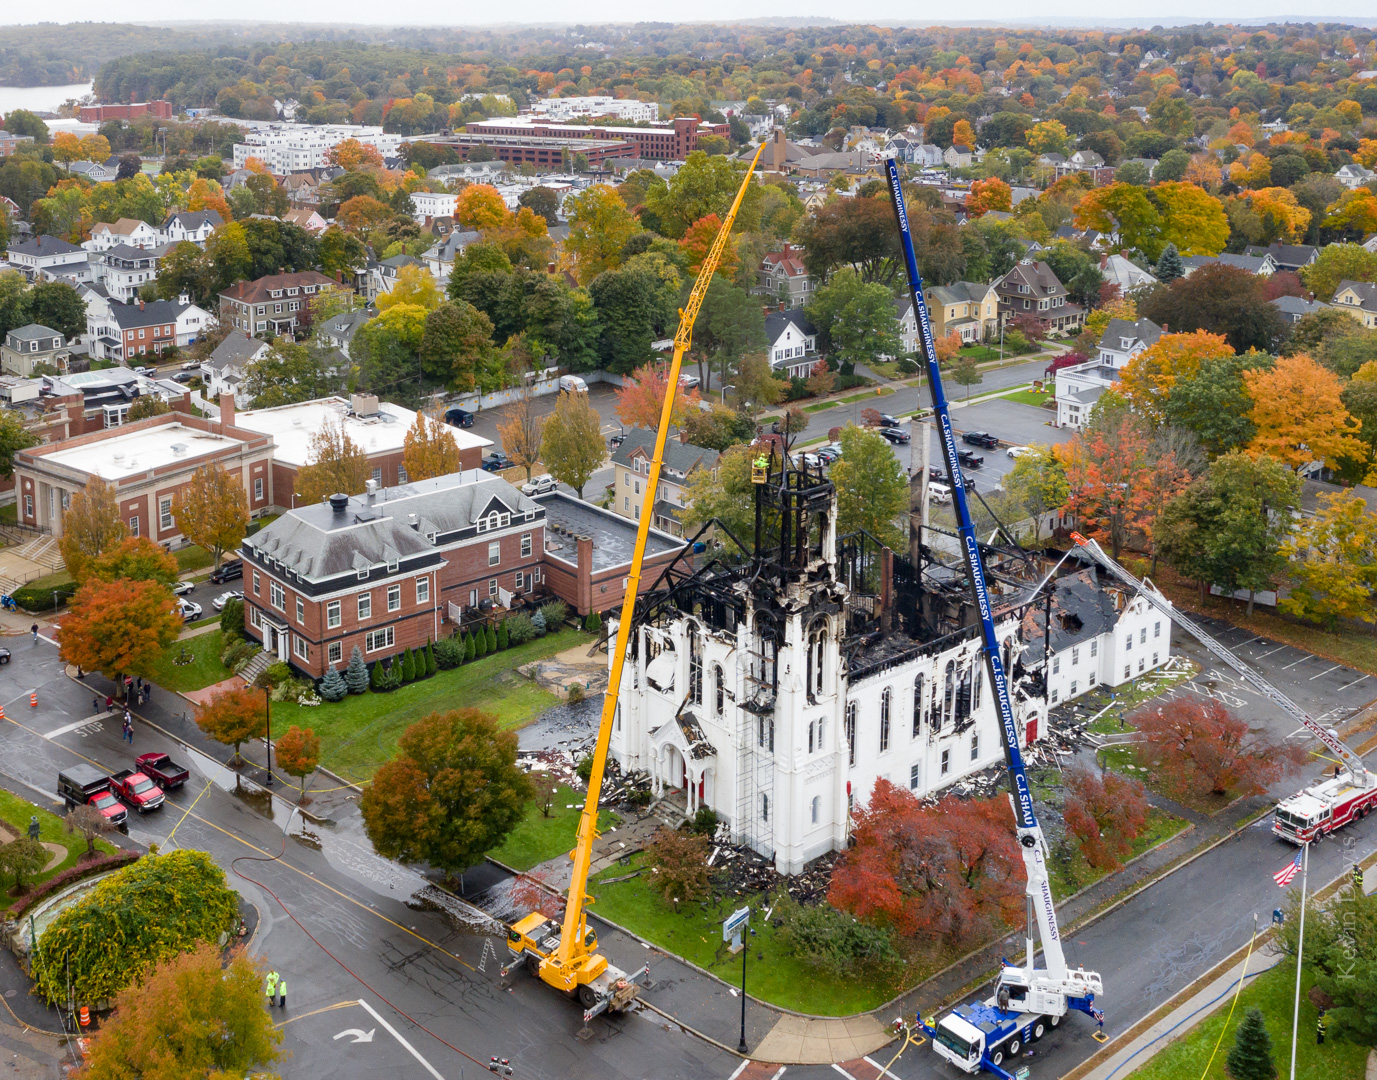
Mid-October 2018, I photographed Wakefield Massachusetts using an aerial drone. As the autumn colors were not well developed yet, I returned a week later to make the same photo again. That’s the first photo here, October 23, 2018.
Some renovation work was in progress that day. You can see scaffolding against the steeple and one of the tall windows is laying on the grass.
In the evening later that day, a lightning storm passed through the area and this presumably sparked the fire that destroyed the First Baptist Church. The next day, I again put the drone in the air to photograph the aftermath of the fire.
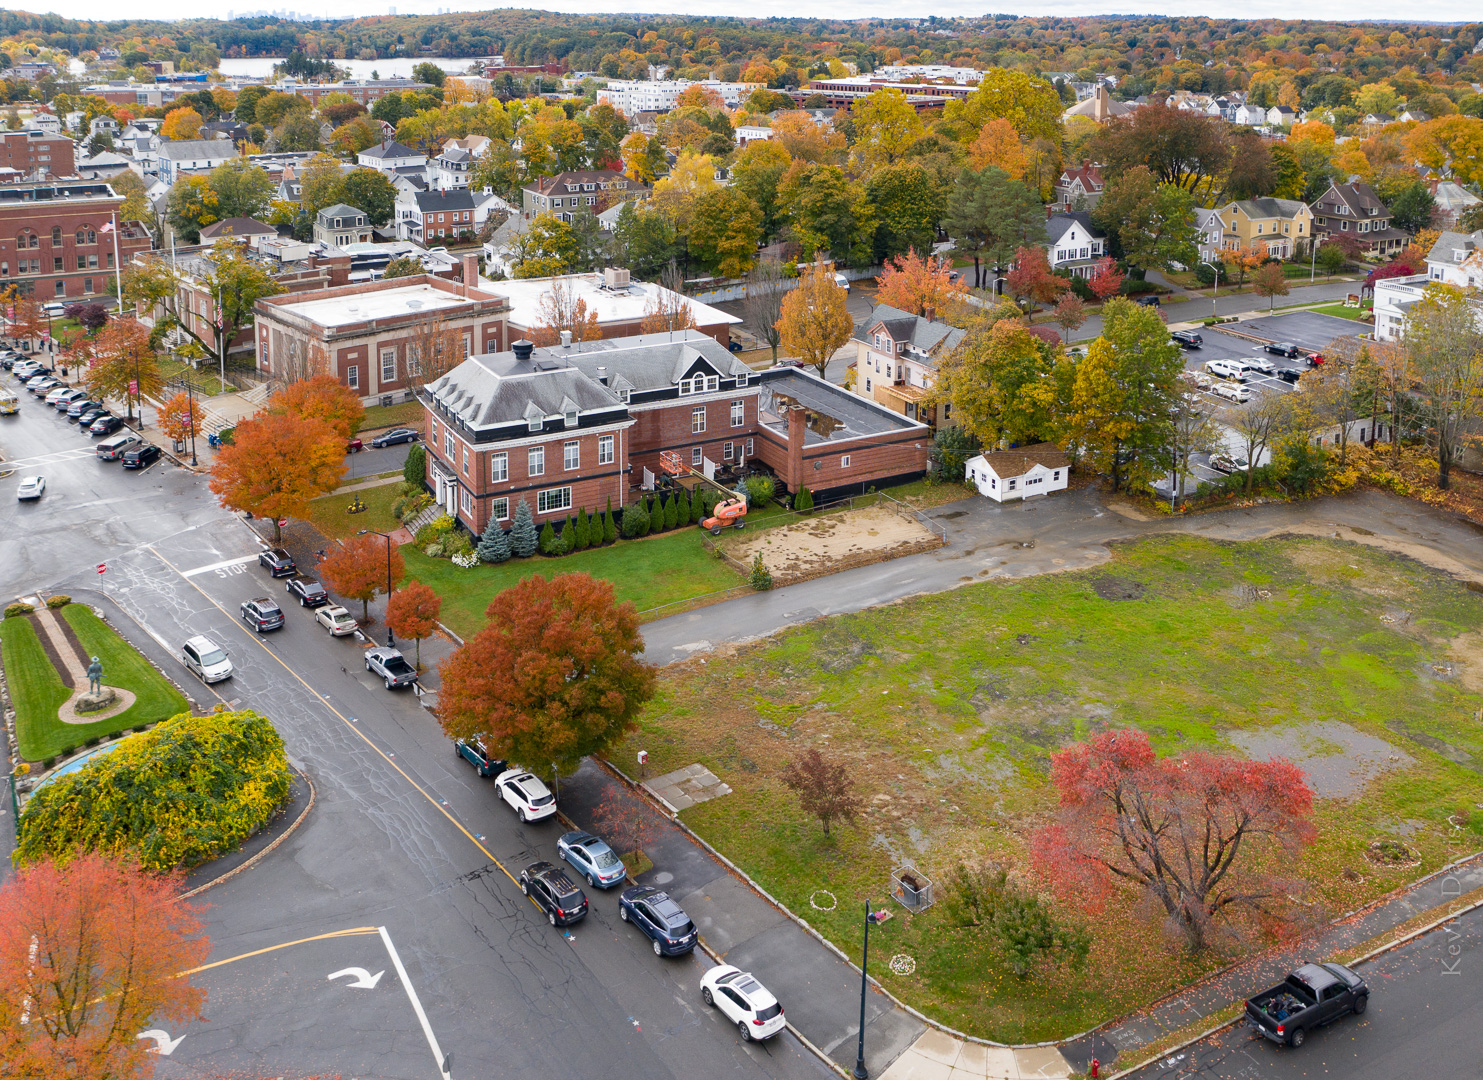
Today is the one-year anniversary of that fire, so I returned to again make the same photograph, but without the church.
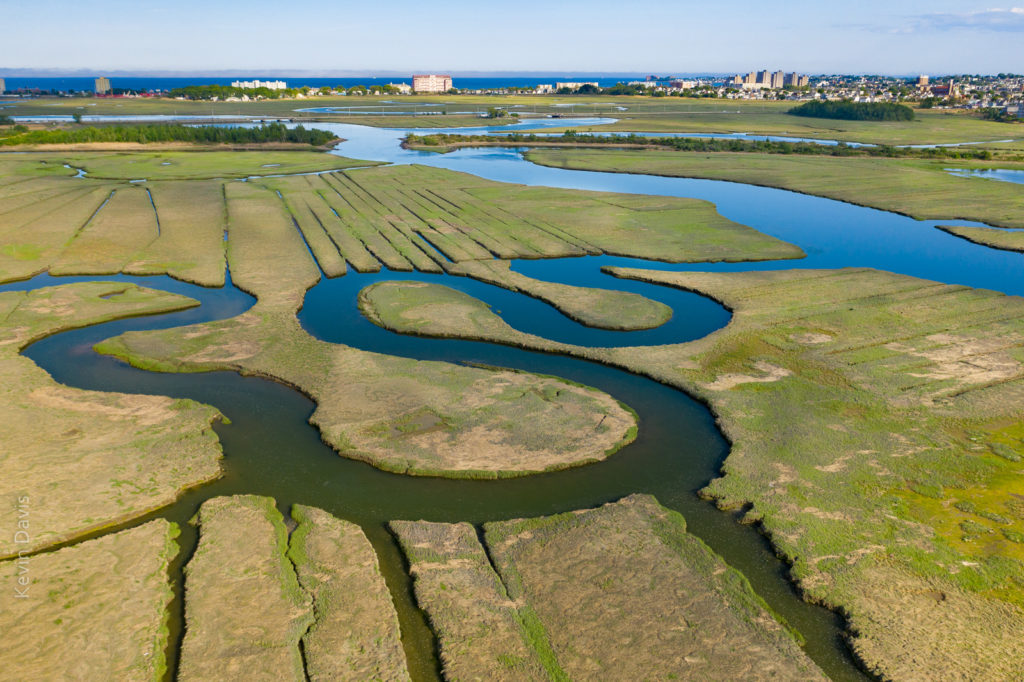
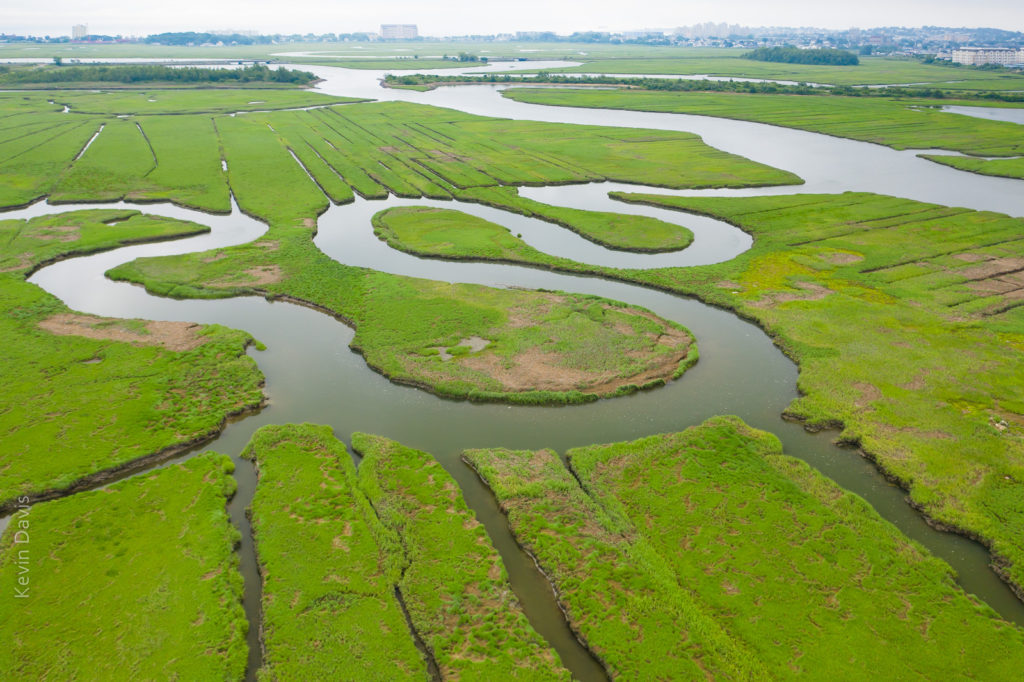
I first visited Rumney Marsh in the month of May. Although I discovered some great photo compositions, the marsh was mostly brown. Presuming that the grasses would fully transform the landscape into a greener palate, I vaguely planned to return some weeks later. Shown here below is my first image from the May visit:
.
This year, spring in New England has featured more rain than normal. Dry days are a bit like currency – have to spend them judiciously. Five or six weeks later I returned to the marsh on a dry day and found the green grasses covered the land, as expected. Unexpectedly, coastal clouds were lingering and the water reflected white sky (not blue sky).
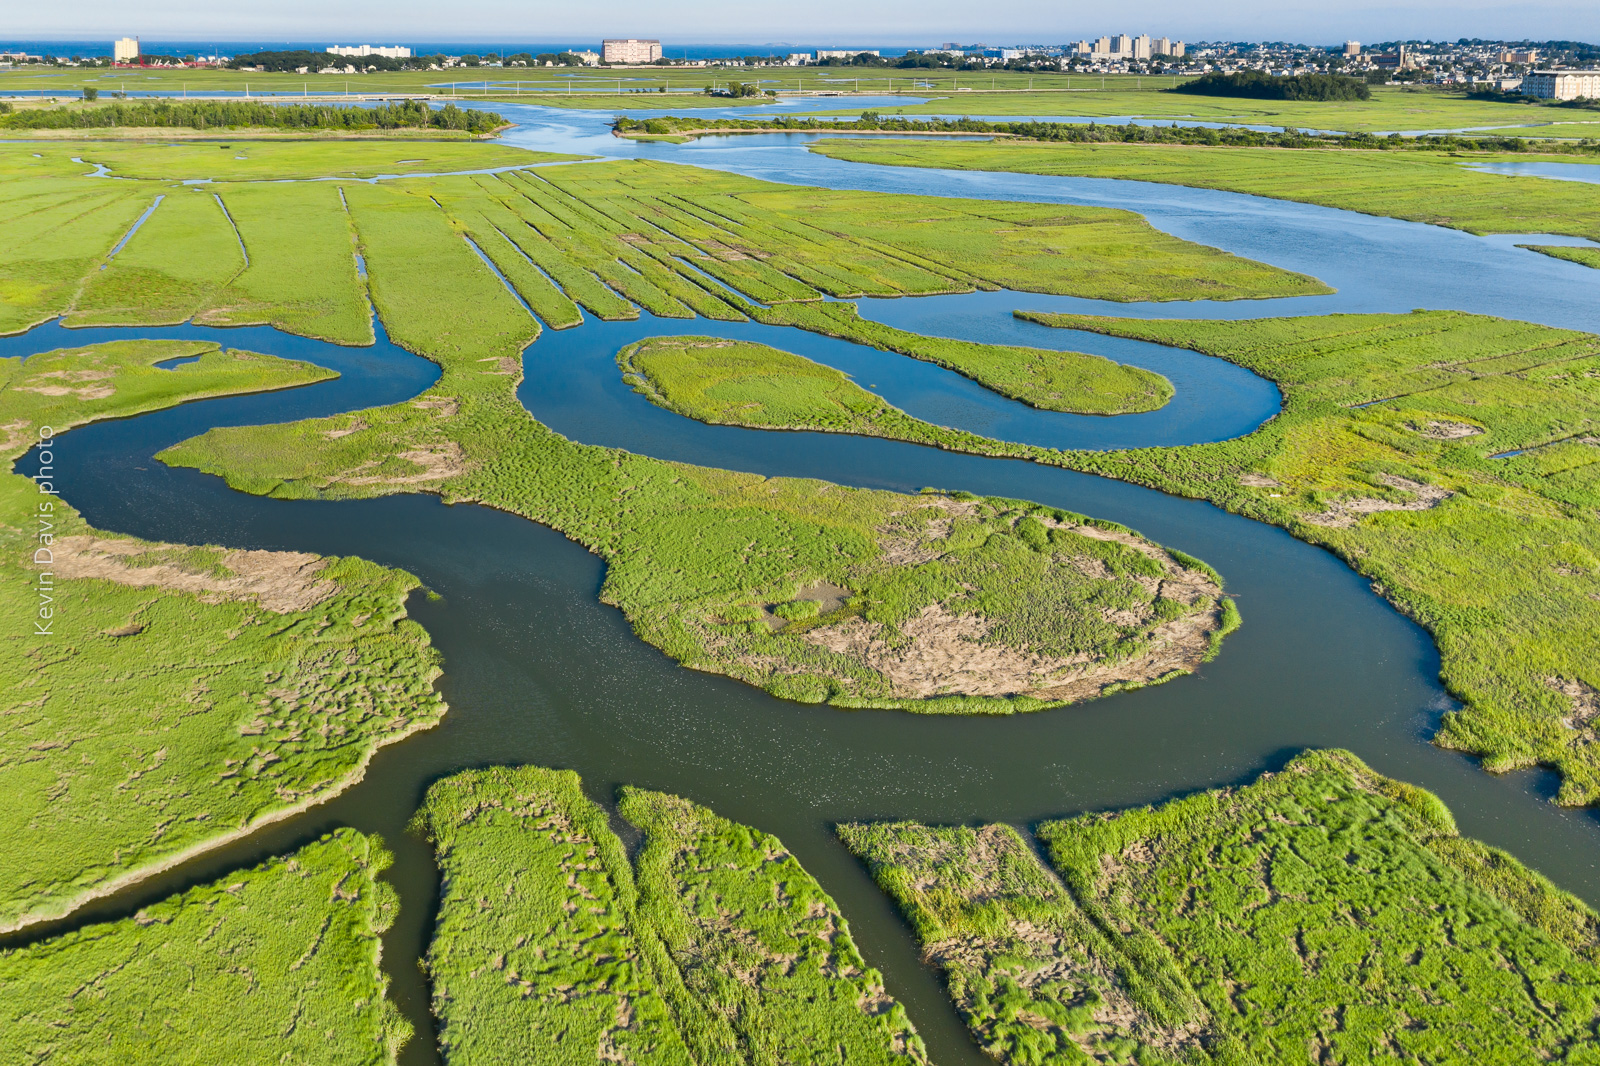
While that is a nice image, … I had imagined the water reflecting a blue sky. So, I returned later that same day after the clouds cleared away. That final image is shown at the top of this article.
In all three instances, the image required post-processing for HDR, particularly because the buildings on the horizon were too bright. So each of these three instances is a combination of multiple exposures, simply to control the dynamic range of light.
Flowers blooming on Cherry trees is a harbinger of spring because Cherry trees bloom first, before other flowering trees. While these blooms are a much anticipated spectacle, predicting when the cherry trees will bloom … is difficult business.
From Macon Georgia to Boston Massachusetts, you can visit well-known groves of cherry trees. The trees bloomed in Georgia last week. Unfortunately, I missed it because of car trouble.
The very first blooms appeared in Macon GA around March 10. The very first blooms appeared in Washington D.C. just a few days ago.
The general blooming of Cherry trees in Washington D.C. has not happened yet, but should begin by end of this week. Midweek temperatures this week are still cool with overnight temperatures close to freezing. The current weather forecast tells that the temperature will warm this Thursday. So, blooms should be popping this coming weekend.
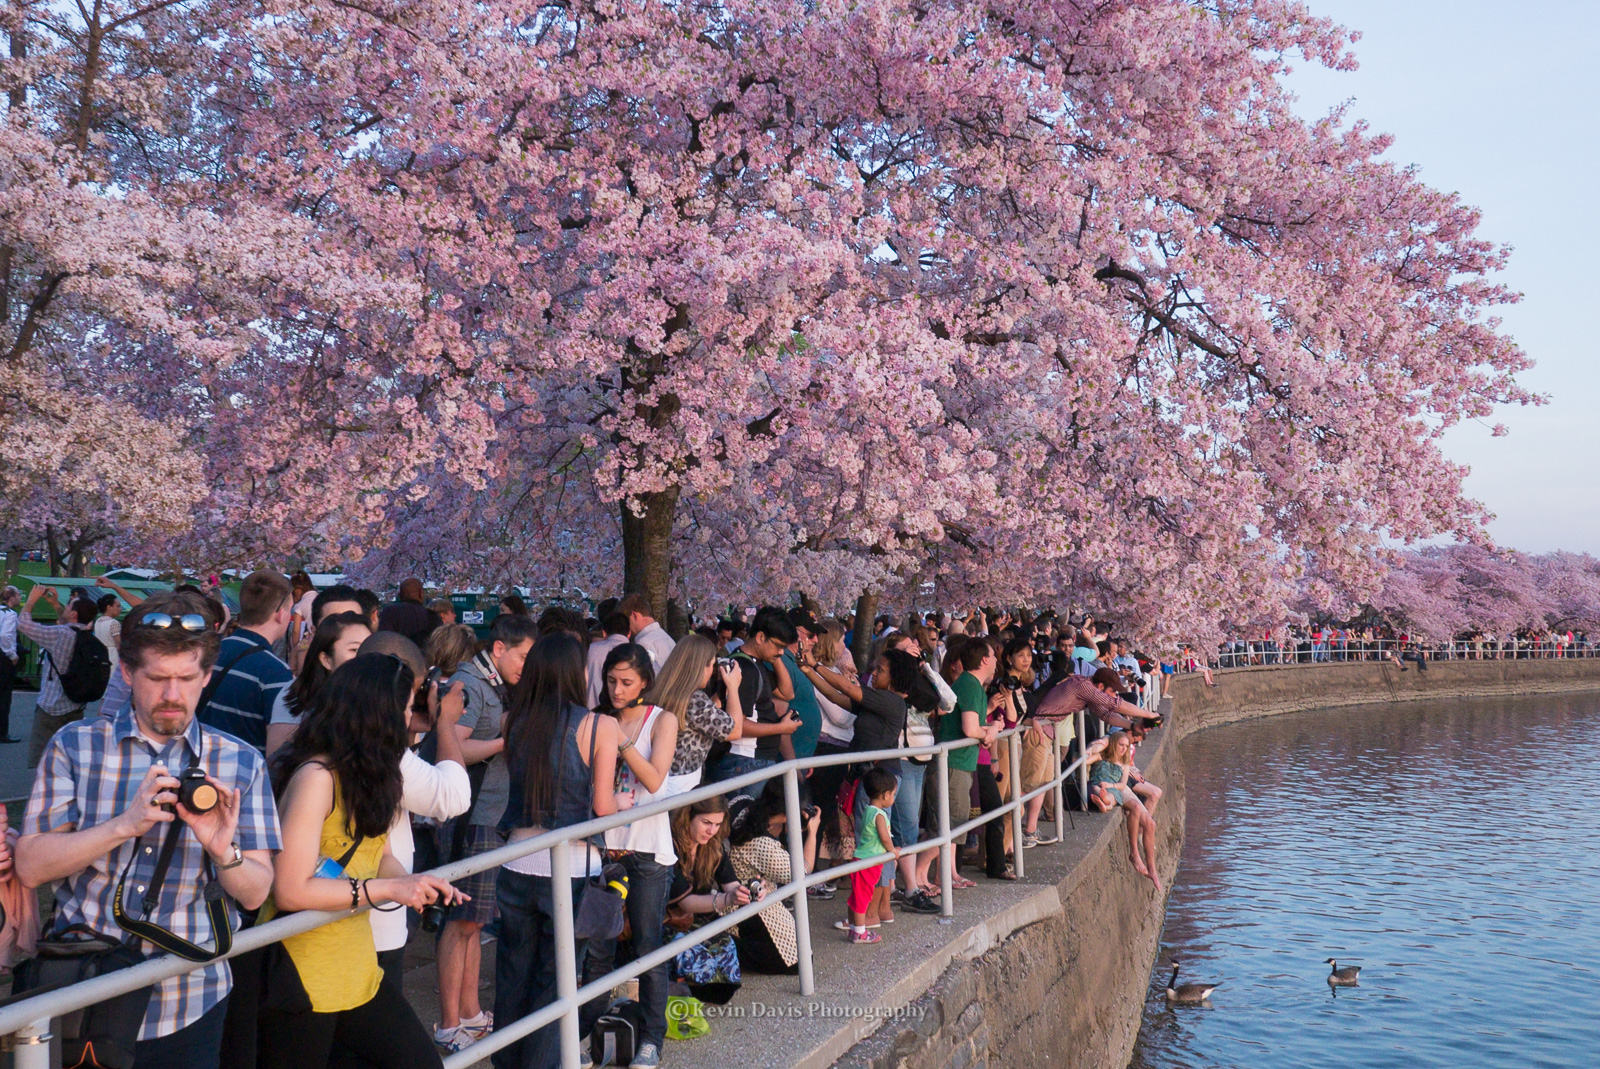
The best-known location around D.C. is the tidal basin, shown in the photo above. As you can see in this late-day photo, it can draw a dense crowd. You will not find crowds like this early in the morning.
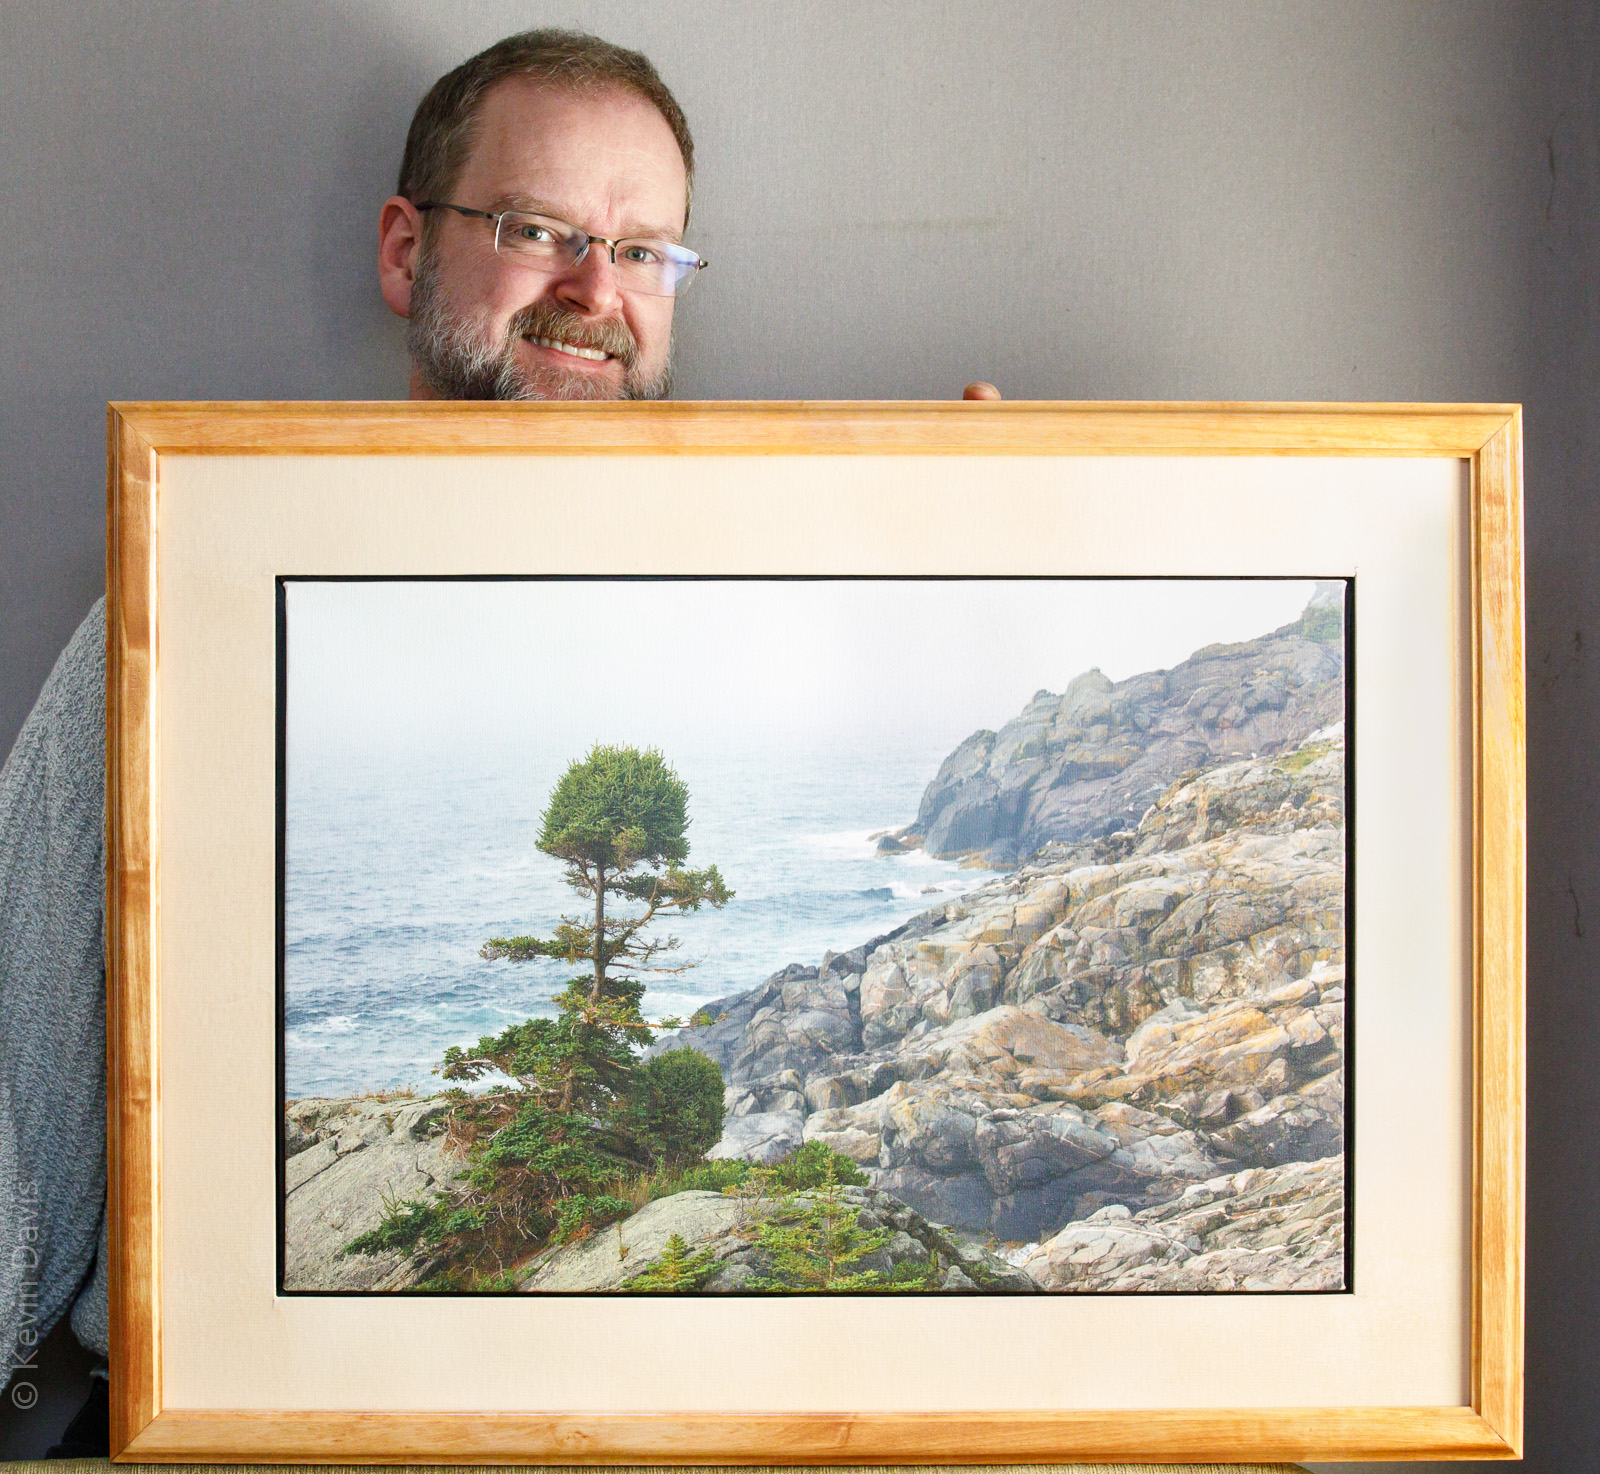
Here’s one of my favorite photographs (from the coast of Maine) printed on canvas and mounted in a custom frame that I designed and constructed. As the print is on canvas rather than paper, there is no glass in front of the print.
As there are many options available for displaying photograph prints, here is a video to share some methods that I have used:
Paper
Traditionally, photographs are printed on paper, either a light-sensitive paper or an inkjet paper. Because such a print is typically not durable, the displayed print is protected behind a sheet of glass or acrylic (a.k.a. plexiglass). Furthermore, the print should not be placed directly against the glass/acrylic and the common separator is matboard, with an opening cut in the middle to show the print. The mat also provides visual space around the print, separating it from the frame; consequently, the outermost frame has larger dimension of height and width.
Note: Alternatively, you can use small spacer (instead of matboard) and the frame is then sized to exactly fit the dimensions of the print.
A print on paper is either adhered to a backer board or possibly suspended using an archival hinge. Collectively, the backer board, print, matboard, and glazing (glass or acrylic) are commonly inserted into the frame in one of two ways. If using a sectional aluminum frame, assemble three sides, slide the materials into the frame, and then attach the fourth piece of the frame. Any other frame is typically fully assembled first and the materials then inserted from the back side.
Canvas
The print shown here was printed by by Artistic Photo Canvas (APC). Having experienced their very good service and products, I recommend APC.
Canvas prints are commonly stretched around a wood stretcher frame. The result has a thickness unlike paper prints and that calls for a different type of framing. One common method is called a floating frame. Though this is “L” shaped like a regular picture frame (for paper prints), the foot of the L is behind the print rather than in front. The canvas print is inserted from the front and secured with screws from behind.
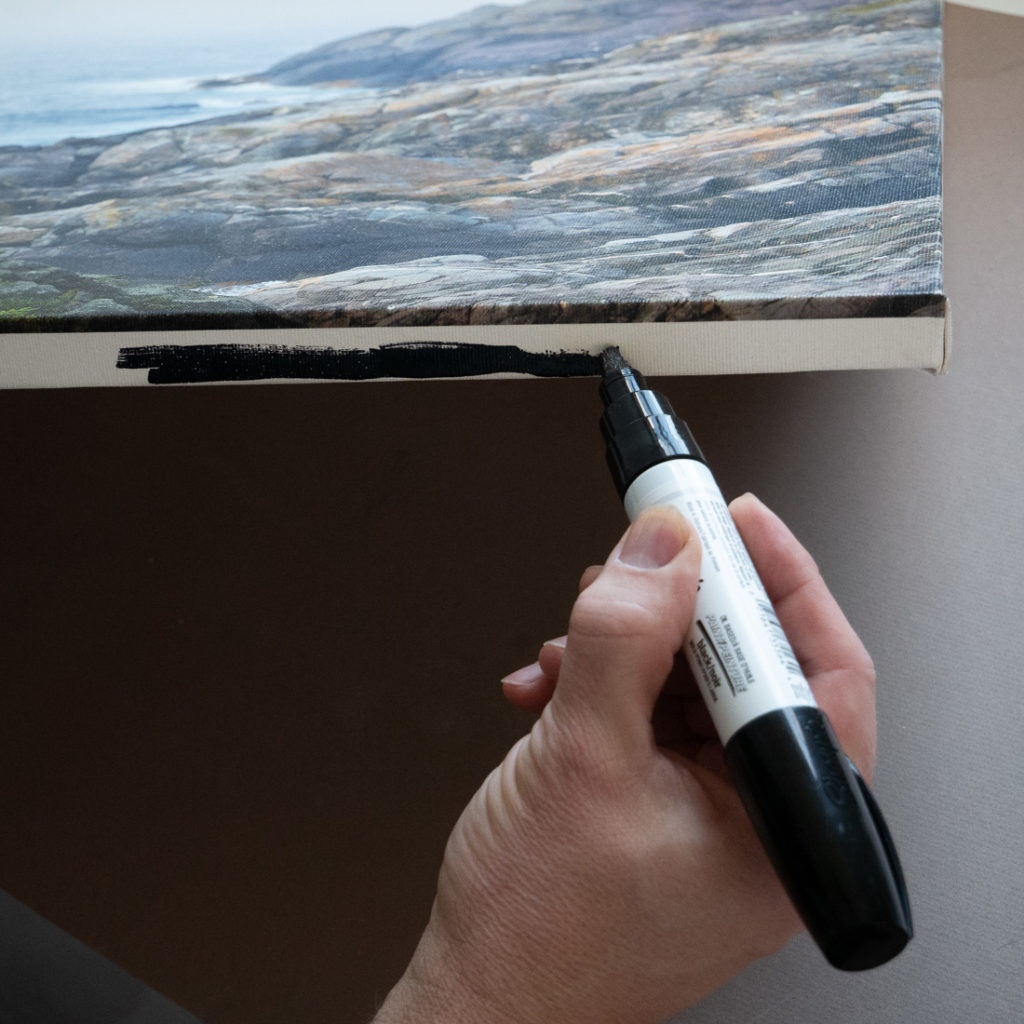
The floating frame allows for a gap around the perimeter of the canvas such that the print seems to float within the frame, without touching the frame. Depending upon the width of the gap, the edges of the canvas may be visible. For the particular print shown at the beginning of this article, I darkened the white sides of the canvas using an oil paint pen, shown here in the photo below.
Aluminum
Unlike a print on paper, which needs to be protected behind glazing, a print on aluminum provides a flat print that is inherently durable and does not need to be protected.
Typically, the cost of an aluminum print is 2.5x to 3.5x the cost of an inket print on paper. I checked ten vendors; the cost of a 20×30 aluminum print ranged from $22 to $140. I see no reason why some vendors charged more than $100. Before ordering a print on aluminum, I recommend that you shop around.
Custom Picture Frames
If you’ve ever taken a photo, drawing, or painting to a frame shop, you probably know that framing can be very expensive. I have sometimes invented my own frames; here’s more information:
The day of the new Mavic 2 release one week ago, numerous sites and YouTube channels already had reviews prepared. DJI had judiciously provided new Mavic 2 drones to people who would do these reviews. I have no intention of rehashing that stuff. I am interested specifically in the camera performance. Because I am largely interested in image quality, we’re talking about the Mavic 2 Pro, not the Mavic 2 Zoom. As for video quality, we’ll have to leave that for another day.
For high-quality images, DJI now provides this choice: Phantom 4 Pro, Mavic 2 Pro, Inspire 2 with Zenmuse X5s, Inspire 2 with Zenmuse X7. The unique value proposition of any Mavic is that it folds down to a size that can fit in a camera bag. A Mavic drone and remote controller requires physical space similar to a DSLR camera body and a zoom lens.
For photographers, is the upgrade worth it, from Mavic Pro to Mavic 2 Pro?
Yes, after brief testing this morning, there is no doubt in my mind.
With the advent of Mavic 2 Pro, the camera difference between Mavic and Phantom has been erased. Both the variable aperture (f/2.8 to f/11) and the sensor resolution (5472×3648) are on par with the pre-existing Phantom 4 Pro and superior to the original Mavic Pro. Note that this is a 2:3 aspect ratio compared to a 3:4 aspect ratio of Mavic Pro, Mavic 2 Zoom, and Zenmuse X5s.
Note that camera is new and not exactly the same as P4P. DJI bought a majority stake in Hasselblad a couple years ago and this apparently is the first fruits of that partnership. (Yes, DJI essentially owns the legendary Hasselblad company.)
According to the numbers, the angle of view is a bit different, though I did not notice during actual use. Mavic 2 Pro provides a FOV equivalent to 28mm lens on a full-frame camera. This is narrower than the original Mavic Pro’s equivalent 26mm and narrower than the Phantom 4 Pro’s equivalent 24mm. Despite being less wide angle, vertical lines can still keystone strongly and you may choose to correct for that in post processing.
Here are the problems with Mavic Pro that I hope are improved with Mavic 2 Pro.
Dynamic range in the Mavic Pro was not very good. In high-contrast scenes, highlights can easily blow out and/or the shadows block up. To mitigate this, I have sometimes captured multiple RAW exposures and then post-processed for HDR.
Using RAW capture, if the highlights do not blow out entirely, the camera still fails to resolve details in the highlights. For example, houses with clapboard siding in full sun – the separation of the clapboards may be entirely absent in the image. This seems surprising to me … if the story is true that the RGB color space has finer granularity in the highlight range compared to the shadow range.
Image noise, particularly in shadows. To mitigate this, I have relied upon heavy-handed post-processing. While noise reduction in Adobe Lightroom is very good, there is a price to pay – higher levels of noise reduction can deteriorate details throughout the brightness range.
With high magnification, images lack sharpness. In post-processing, I have found it necessary to apply twice as much sharpening compared to my hand-held cameras.
Color from RAW images is typically worse than any other camera I have used (except perhaps GoPro Hero3) and the images require heavy-handed post-processing. Of course, RAW images from any camera will always require some degree of post-processing.
Blue/red chromatic aberrations. I commonly see this around white baluster railings. Lightroom’s ability to mitigate chromatic aberration typically fails to resolve the problem.
In summary, the Mavic 2 Pro does achieve small improvements in all of these problem areas. So let’s look at some actual images from the new Mavic 2 Pro compared to the original Mavic Pro.
In high-contrast situations such as this scene with white boats and white houses, Mavic 2 Pro still has difficulty retaining detail in the highlights, but is not so bad that it requires HDR techniques to overcome it. It is still necessary to reduce the exposure by 1/3 stop to protect the highlights (this does not jeopardize shadow details) and also apply highlight reduction in post-processing.
[Click on an image to see the full resolution.]
[Images shown here are all RAW and individually post-processed to the very best of my ability using Adobe Lightroom.]
Noise reduction is still necessary but far less than with the original Mavic Pro.
Color of RAW images is much better, requires less correction.
Here’s an example (not a particularly good one) that shows Mavic Pro was unable to resolve the balusters and suffered chromatic aberration. Mavic 2 Pro did not exhibit either of these problems.
Finally, a few notes that do not regard image capture.
If you’ve ever fumbled with the gimbal clamp on the original Mavic Pro, or worse yet have forgotten to remove the clamp before powering on the drone, rest assured that the new Mavic 2 Pro does provide an improvement. The gimbal clamp is integrated into the protective dome cover – remove the dome necessarily removes the gimbal clamp. See the photo below showing both the Mavic Pro and the Mavic 2 Pro.
Unlike the original Mavic Pro, the Mavic 2 includes 8GB on-board memory in addition to a micro SD slot. To access this memory from another device, connect a USB cable (included) to the Mavic 2 USB-C port and turn on power to the Mavic 2. (Remember to remove the gimbal clamp before turning on the Mavic.) After having inserted a micro SD card, the DJI GO app prompted whether to use that instead of the on-board memory. I am assuming that we must select one or the other and automatic switch-over is not supported, but I don’t know that for certain.
The transmission system between the drone and the controller is theoretically the most robust of any DJI product to date. Mavic 2 utilized second generation Occusync 2.0, while the Phantom line has yet to adopt the Occusync transmission system. Although Occusync 2.0 reportedly can operate at distances up to five miles, I personally have no need of that. Increased robustness of the signal is welcome, as I have seen unexplainable video signal loss when using the original Mavic Pro.
Stopping at a coffee shop downtown, I put a quarter in the parking meter. When I returned, 20 minutes remained on the meter, so I took a short walk. That’s when I happily discovered art on a utility box … and another … and another.
While I prefer a camera with interchangeable lenses, at times like this I am happy to have a mobile phone with a camera. My phone-camera is not a great camera, but as the saying goes … the best camera is the one you have with you.
I must also note that Android / Google Photos includes some photo post-processing functions that I rarely use but did use here. The leftmost image was badly overexposed. The problem was very well solved by applying “auto”.
(No, I’m not giving up my big interchangable-lens cameras.)
In a recent on-line discussion, someone offered a very confused (wrong) explanation of electronic flash options for photographic lighting. To straighten out the confusion, here’s a very brief overview of light sources for photography.
Light sources that strobe/flash
Studio strobe : Generally requires power from an AC wall-outlet
More power (more than batteries) enables more light and shorter recycle time.
Most studio strobes include a modeling light, which is a low-power continuous light that helps a photographer setup the light.
Monolight (a.k.a monoblock) : Self-contained studio strobe (does not have an external power pack). Some have an option to operate from battery.
Speedlight : a small battery-powered strobe with hot shoe; can be used on or off camera
Small strobe like a Speedlight but without hot shoe … is there a term for that?
Camera built-in flash
Light sources that do Not strobe/flash
Natural light, a.k.a. available light, ambient light … light not supplied by the photographer.
Continuous light (a.k.a. video light) … is a light source that does not strobe/flash.
Absolutely necessary for video applications, but can also be useful for still photography.
Hot light … a “continuous light” that generates much heat.
Tungsten and HMI (a.k.a. arc light) are examples of hot light technologies.
LED is an example of continuous light technology that is Not hot.
Flashlight / Light painting … this is a bit obscure, but some photographers have used a simple hand-held flashlight to “paint” light onto a subject during a very long exposure.
Light modifiers
Umbrella (There are reflective umbrellas and shoot-through umbrellas.)
Soft box
Beauty dish
etc.
Why would you want to trigger your camera when the camera is not in your hand? The most common reason is to make a selfie … where the resulting image doesn’t look like you are holding the camera at arm’s length. Here’s another example from personal experience about one month ago. On a pedestrian walkway that crossed a highway, my photo opportunity was inhibited by a tall fence; to make the photo, I placed the camera atop a telescoping pole and extended it above my head and above the height of the fence. (See the photo at the end of this article.)
Here are four methods to make a photo while the camera is not in your hand, beginning with the most rudimentary and finishing with the most sophisticated
1) Self-timer (Old-fashioned method #1)
Most people are likely familiar with this. Place the camera on a stable surface, push the button, then run away from your camera to join your family and friends in the captured photograph. Self-timer is a relatively ubiquitous feature, though it may be seldom used today by your average selfie photographer who doesn’t mind the look inherent in holding a camera with an outstretched arm. Every camera I have ever owned has included a self-timer,; he Android camera app in my smartphone is no exception.
This is a physical cable that must be connected to the camera. Although this is inexpensive and is still available for many cameras, it has fallen out of favor because it is inherently limited by the length of the cable.
Before the digital camera revolution, most professional cameras included a threaded hole to accept a universal cable release. It was a simple mechanical plunger. Experienced photographers carried a spare release cable because sooner or later the threaded connection to the camera was likely to break
While the mechanical cable release was both universal (compatible with most cameras) and ubiquitous, it was largely supplanted by an electronic cable release. The design is more like a light switch – the cable contains electrically conductive wires as part of an open circuit and pushing the button closes the circuit. This allows for longer cables and sophisticated external triggers (e.g. intervalometer, motion-activated trigger, etc). Unlike the universal mechanical cable, the connection to the camera is specific to the particular camera manufacturer; you need a cable designed to fit your camera.
For making selfie photographs with your smartphone, some selfie sticks include an electronic shutter release cable that connects a handle-mounted trigger button to the phone/camera. However, as the cable is subject to some physical stress, a wireless trigger is preferable and we consider that next.
3) Wireless shutter release
This achieves all the same goals as an electronic cable release but without the limitation of cable. These devices are widely available today for many cameras.
Some cameras include an infrared sensor and can be triggered using a remote infrared trigger. Some cameras can be controlled by a universal infrared trigger (not camera-specific) which may cost less than $15. Other cameras require use of a remote trigger specifically from the camera manufacturer. In either case, because the communication uses infrared light, it generally requires unobstructed line-of-sight between the remote and the camera.
Some cameras include wi-fi and and the ability to trigger the camera from a remote device via wi-fi. This does not have the line-of-sight limitation of infrared.
Similarly, if your camera supports Bluetooth, you may find a remote trigger that uses Bluetooth. For making selfies with a smartphone camera, some selfie sticks include a wireless Bluetooth trigger mounted in the handle. The distance limit for Bluetooth is typically far less than wi-fi. A Bluetooth remote might function at a maximum distance of 30 feet (9 meters), while a wi-fi remote might function at ten times that distance.
If your camera does not include infrared, wi-fi, or Bluetooth, you may be able to use a radio trigger, which consists of two parts, a transmitter and a receiver. I’ve used at least two different types. One is designed only to trigger the camera. The other (which I still use) is designed primarily a flash trigger, where one device mounts on the camera hot-shoe and a second mounts underneath a remote flash/strobe. However, a third device (all three are identical) can be used as a remote trigger for both the camera and the flash. As a prerequisite, the camera must have a special port/socket to connect an external trigger (the same port used in method #2 above) and the device mounted to the hot-shoe must also connect to the trigger socket.
In some cases, you may be able to wirelessly control camera functions far beyond basic shutter trigger. The GoPro Hero (versions 3, 4, 5, and 6) includes a smart remote that provides limited control of some camera features.
4) Smartphone or tablet app
An application for a smartphone (or other mobile device) can provide the ultimate remote control, including a live video image exactly as you would see if you were looking at the display screen on the camera. While this is only supported by specific camera models, the feature is becoming more common. I have one camera that supports this feature using wi-fi and another that can use either wi-fi or Bluetooth.
Some cameras may allow you to connect to an existing wi-fi network. More typically, you activate independent wi-fi within the camera; then, on your mobile device, use network selection to connect to the camera. (When connecting to your camera’s wi-fi, your mobile device will likely warn you that no Internet is available; this is normal.) After the connection is established, then launch the camera control application on your device.
As some cameras do not include this capability, you may be able to add this feature through a device such as the CamRanger Wireless Remote Control or the Case Air Wireless Tethering System.