In Tennesee, anybody can enjoy Great Smoky Mountain National Park at no cost. There are no entrance fees and no parking fees. Apparrently this was part of the deal when the land was acquired (from native American Indians). And you can simply drive to the top of Clingman’s Dome.
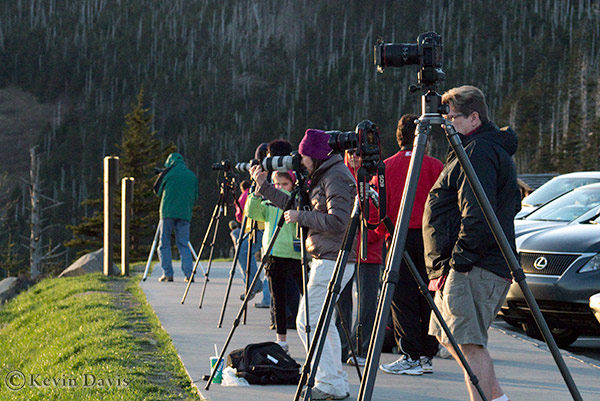
Any evening on Clingman’s Dome, there can be a bevy of photographers lined up to photograph sunset. (Probably sunrise too, but I have not witnessed that.)
But as most photographers point their cameras toward the sun, they may miss out on some of the best scenes … which do not directly include the sun.
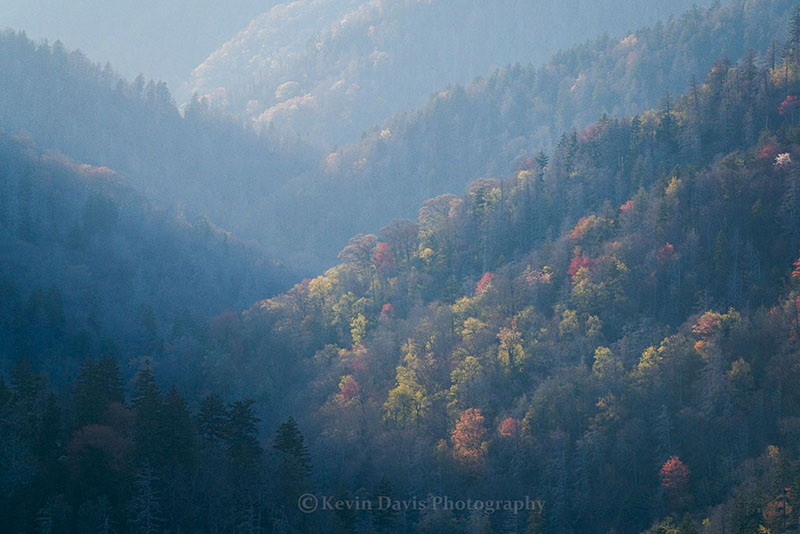
This image was shot with a micro-four-thirds camera (Panasonic Lumix G3) and captured as RAW. While JPEG images have already been processed (by the camera), RAW images receive no processing. In my experience, RAW images tend to look flat and require some post-processing (by me). While this scene appeared well to my human eyes, the camera capture was very low contrast. So the significant post-processing was to increase the contrast.
At a campground inside the Smokey Mountain National Park, there is no wi-fi or internet of any sort, no cell-phone service, and no 120v electric to plug-in anything. So, at some point, I had to leave the park in order charge batteries, check email … and clean up with a warm shower. (Actually, I did find one valid 120v electric socket hidden near the vending machines.)
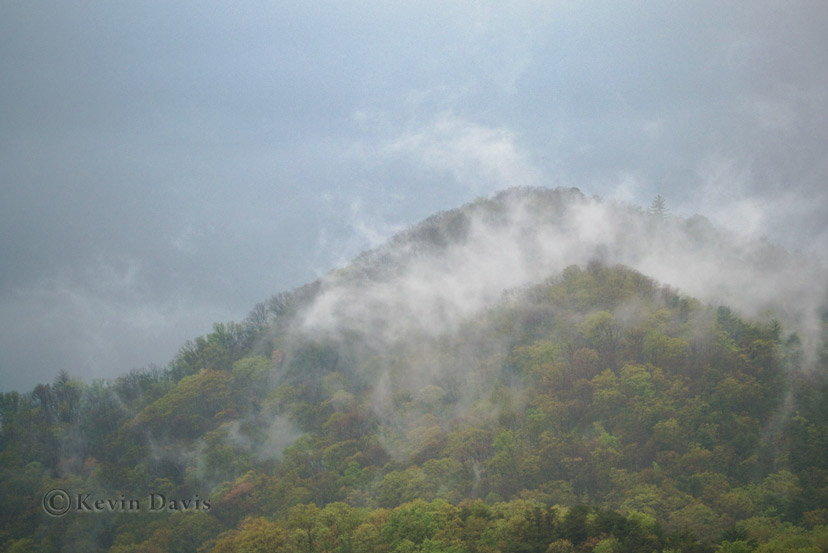
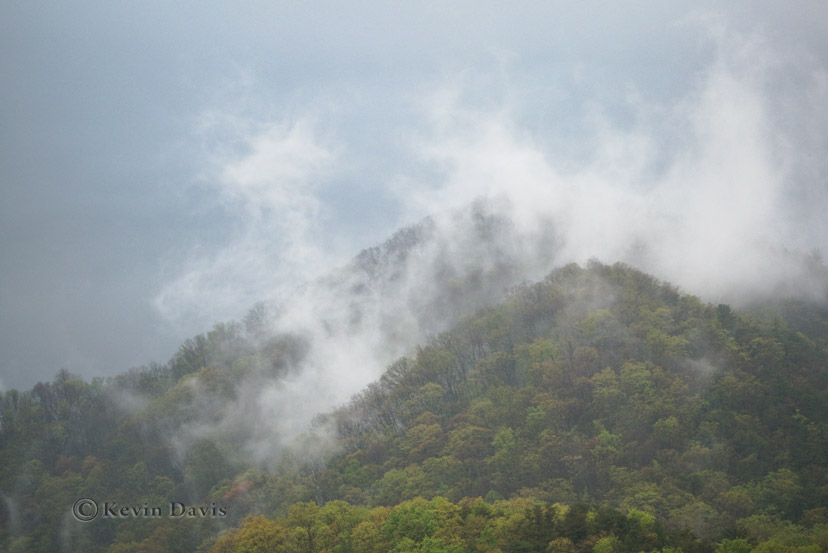
A couple photos attached here from this morning. As shown here, this is how the Smokies got the name.
Each morning, the weather is unpredictable. Rain during the night usually means clouds in the morning, but these can clear out rapidly. This morning, the clouds did not clear out; but where the light is not putting on a show, the clouds sometimes do put on a show of their own.
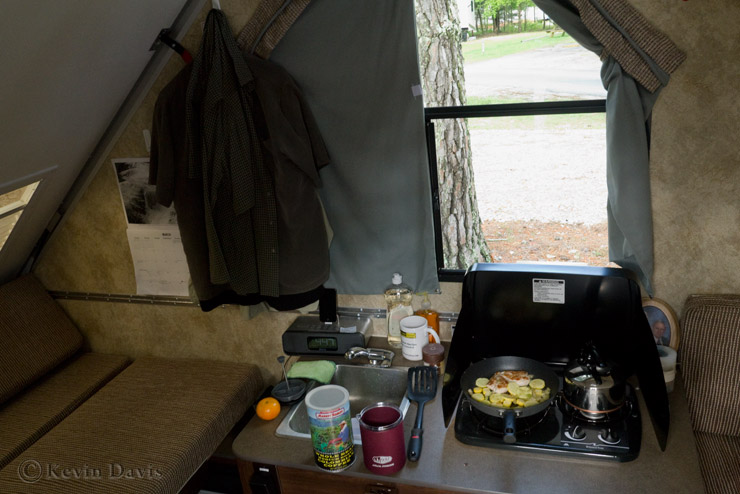
A photographer has to travel. Staying in hotels can be expensive. So here is my alternative, a camper.
Famously, outdoor photographer John Shaw has said that a nature photographer’s idea of a six course meal is five granola bars and an apple. That’s because a nature photographer has to be out in the field when most people are back at the lodge eating breakfast or eating dinner. But this pace cannot be maintained every day. Today I was post-processing images from yesterday and doing laundry. So I had the luxury of cooking dinner.
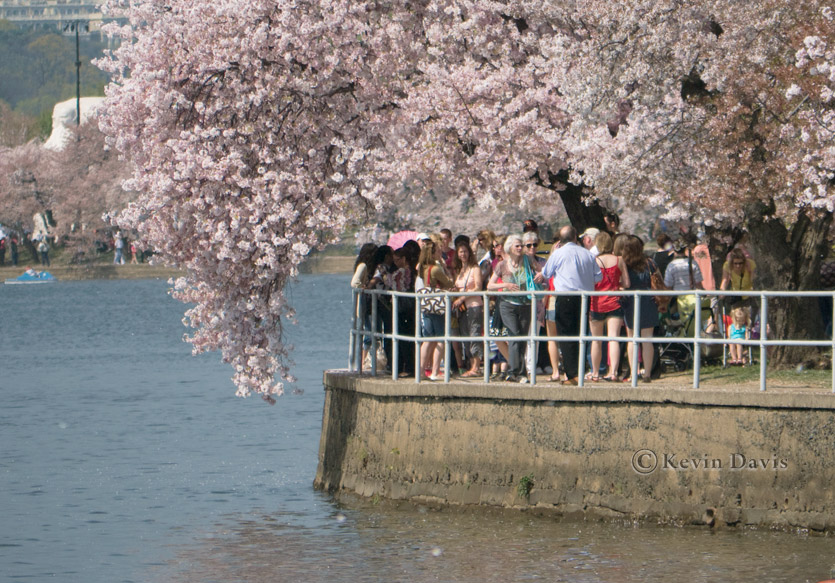
2012 is the 100th anniversary of a gift. The Mayor of Tokyo Japan gave 3000 cherry trees to the people of Washingington DC. That’s a lot of trees. And as they bloom (all at the same time), that’s a riot of pink color that draws a pretty big crowd. But this year, if you did not come to this party early, you missed most of the show.
Normally, the magnificent flowers of these cherry trees begin to bloom around March 24 and peak during first week of April. This year, the warm weather in March caused the trees to bloom far earlier. And the show was over on March 25.
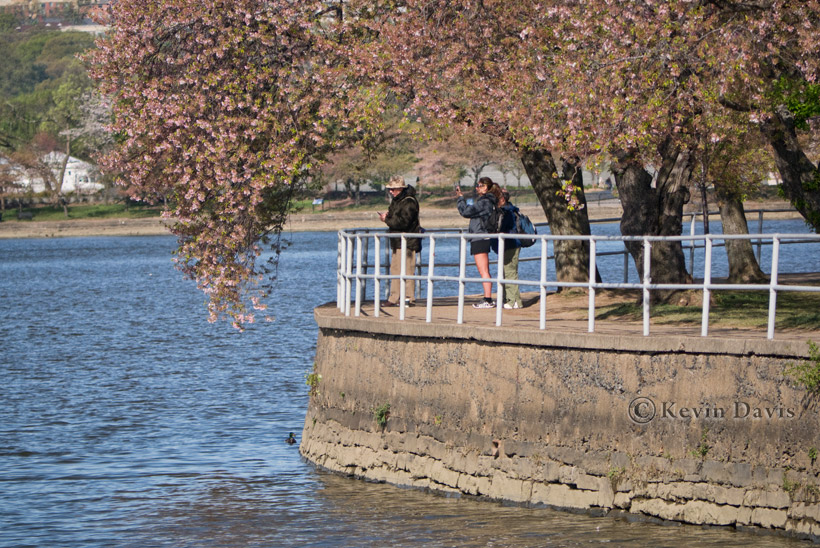
The first photo here is from March 23. The second was shot this morning, March 27. You can see what happened due to rain and wind over the weekend.
The crowd of people on Friday was crazy. Almost like the Esplanade in Boston on the Fourth of July (almost).
Not all is lost. These cherry trees here are the famoush Yoshino cherry trees. But there are a few other species that are still blooming nicely, for example the Kwanzan cherry trees are stunning (though there are not nearly as many). The area around the Jefferson Memorial is quite nice. And D.C. is looking quite green these days as deciduous trees are beginning to leaf out.
Photoshopworld opens with pre-conference workshops the day before the conference really starts. Yesterday, I participated in Real World Concert Photography. That was serious fun!
Today, opening day, began with the keynote address. At PSW, these things always involve a great deal of joking around … mixed with some serious stuff. The joking comes from the good folks at Kelby Training (official sponsor of PSW); the serious stuff comes from Adobe.
Well, just taking a break here to share a photo (from my phone) of the expo floor. I am missing out on some good info and inspiration, so I’m heading back in now.
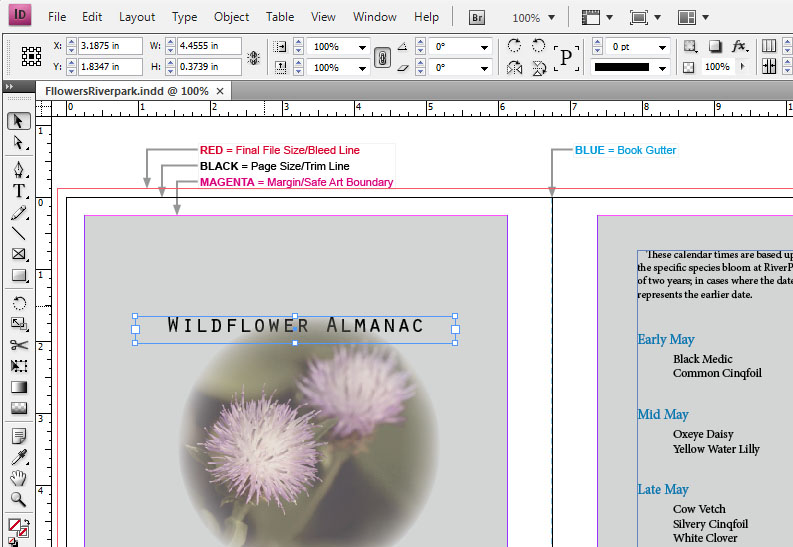
Typically, to create a print-on-demand custom photo-book, you download easy-to-use free software from the vendor/printer, layout your book pages, then upload the result for printing. But, alternatively, some vendors allow you to use other page-layout software. For my latest book, I used Adobe InDesign.
Having used the free software from three different vendors, I found them all quite similar and mostly intuitive to learn. On the other hand, Adobe InDesign is just a bit more complicated to learn, but much more flexible. If you can imagine it, you can do it. For example, a frame can be virtually any shape at all (a frame is a container for text or images). I used this flexibility several times throughout my book.
Adobe InDesign
There is one important difficulty to be aware of. The printing equipment used to print your book is almost certainly based upon CMYK inks, not RGB. All images must be converted to CMYK. When you use free software (downloaded from your PoD vendor), this conversion is done automatically for you. But when using other layout software, such as InDesign, you are responsible for doing conversion to CMYK.
Converting images from RGB to CMYK can be ugly. The conversion will necessarily shift some colors. And because CMYK is a smaller color space than RGB, some colors simply cannot be represented in CMYK.
In the case of my recent book, Wildflowers of RiverPark, I converted each image to CMYK using Adobe Photoshop. In general, rich green colors did not convert well to CMYK; no matter which conversion method I used, greens became horribly muted. With practice, I learned how to compensate for this. I was able to create a custom action to help this process, but it was still annoying and time consuming. Furthermore, one image in particular features vivid purple-magenta (flower is Deptford Pink) that could not be represented in CMYK.
In doing the conversions myself, and using the soft-proof feature in Photoshop, I gained one important benefit. The colors in the printed book are very accurate. If you rely upon your PoD vendor to automatically convert your images, you may get some unexpected color shift in your final printed book.
Specifically using InDesign provides another small benefit: InDesign works well with Adobe Bridge and Photoshop. From InDesign, create an emtpy frame, then hop over to Adobe Bridge, click on an image and choose: Place into InDesign. The image is inserted into the frame you created. After the image has been added to your book, making changes to the image is simple. Right click on the image and choose: “Edit Original” to edit the image in Photoshop. When you save your Photoshop changes, InDesign automatically picks up your changes and updates your InDesign document.
Having acquired a stellar small tripod last fall (Mo’ Gitzo) I subsequently needed to outfit these legs with a small-ish ball head. What is small-ish? It should weigh no more than 1 lb and should support a camera (with lens) of 20 lbs.
Because I equip my cameras with a quick-release system that called “Arca-Swiss compatible”, I immediately eliminate any possible choices that will not support Arca-Swiss quick-release. (So, for example, I rule-out some tripod heads by Manfrotto, Giotto, Benro, etc.)
Markins Q3T ball head is designed with a diameter that is perfect match for a Gitzo GT1541T tripod. However, while the Q3T is ideally suited for the GT1541T, it offers no particular advantage when paired with the GT1542T, which I have. (If you are taller than 5’7, the GT1542T is a better choice than the shorter GT1541T
Some other possible choices include Really Right Stuff BH-30, Fiesol BC-40D, and Induro BHL1. But, in the end, I chose the PhotoClam PC-36NS. The size is perfectly suited for the GT1542T and it only weighs just a bit more than 12 oz (350g). The variable friction is extremely smooth and requires no break-in period. Includes a built-in bubble level. $209 from reallybigcameras.com.
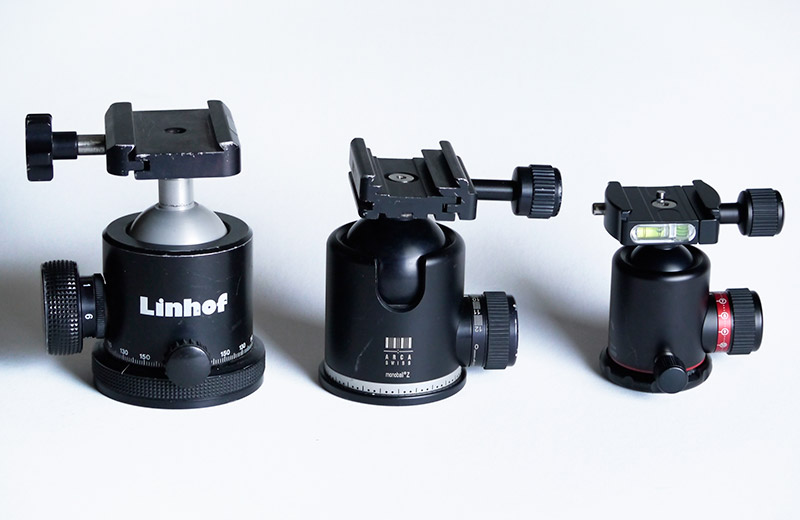
Three terrific ball-heads
Shown in the photo above: Linhof Profi III (big, very expensive, smooth like butta) with a Kirk Enterprises clamp, Arca-Swiss Z1 (the standard in professional ball heads), PhotoClam PC-36NS.
Last year, I shared the beginnings of a project with you, a book documenting the wilflowers that grow at a local buisiness park. Since I there is not much opportunity to create new wildflower images between November and March, I had planned to begin the book layout in December. Now February, I am finally piecing together the book layout.
In the past, I have used book layout software provided by the book printer (Mpix, Blurb, PhotoBook America). This time, I am using Adobe InDesign. This being the first project of any significant size for which I have used InDesign, I have found that the learning curve was not particularly difficult. I quite like InDesign.
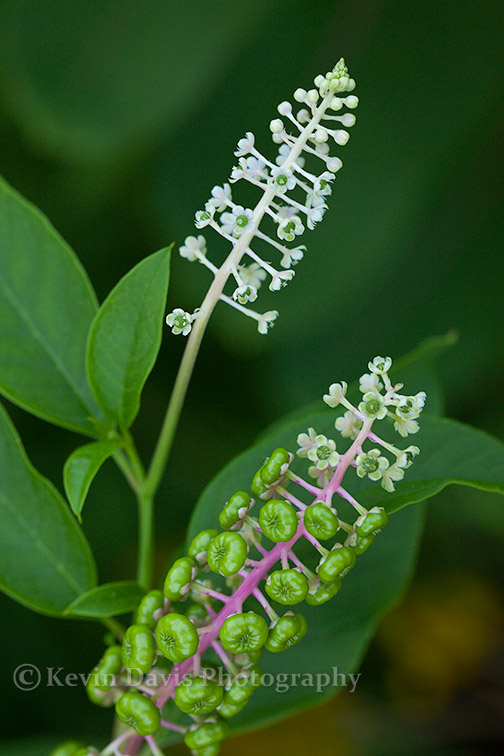
Pokeweed
Here are a couple images that I am including in the book.
The first is a relatively common weed, but I find it very interesting because it looks like small green peppers. I really like this image because it shows two slightly different stages and because the background is very soft, not distracting from the foregound subject.
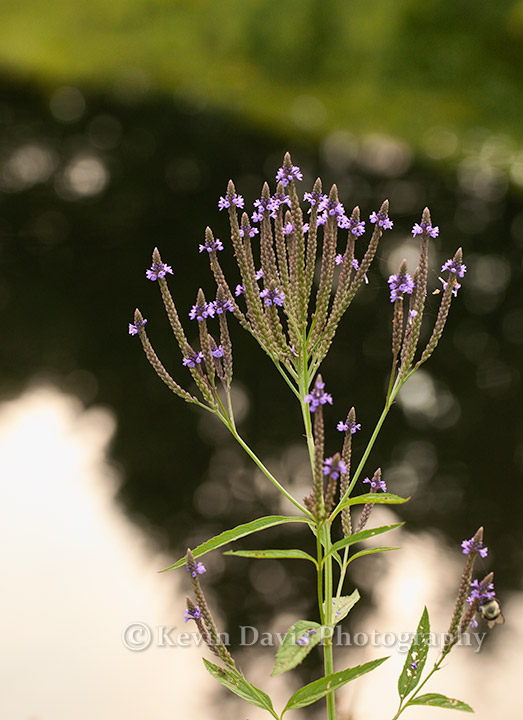
Common Verbena
Click on either image for a larger view.
The second image is Common Verbena (which is not particularly common in my experience). The flowers begin at the bottom of the flower spike and progressively bloom toward the top of the flower spike. I really like this image because of the somewhat unusual background, which I think is not readily obvious. There is a pool of water, with trees reflecting in it, and a grassy embankment.
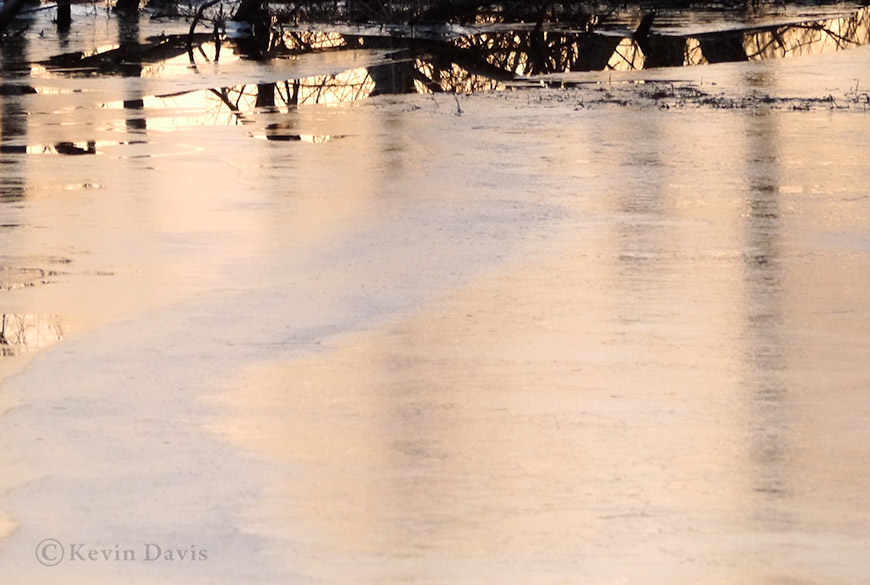
When snow covers the landscape like a white crystal blanket, it is an undeniable visual transformation. But when the deciduous forests are not blanketed in white, they are dominated by greys and faded browns; it can be photgraphically challenging.
Lumix G3 - ISO 400 - f 7.1
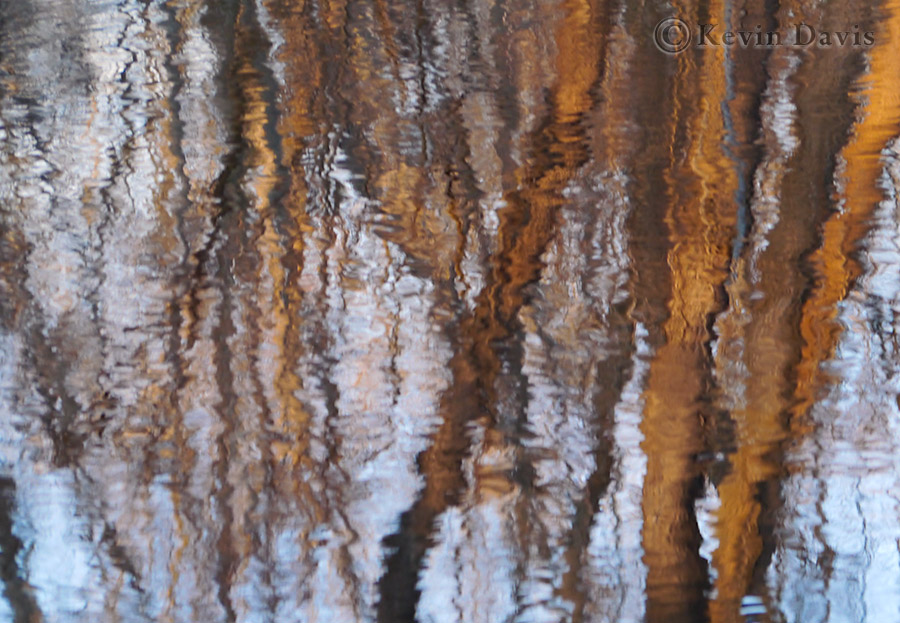
The warm light of sunrise and sunset adds a burst of color to an otherwise bleak pallette. And reflections in the river add an ever-changing texture that is unpredictable and full of surprises.
Somedays, I happen by the river and see something interesting. On other days, I anticipate a visual image, with the sun low on the horizon or the changes in the ice.
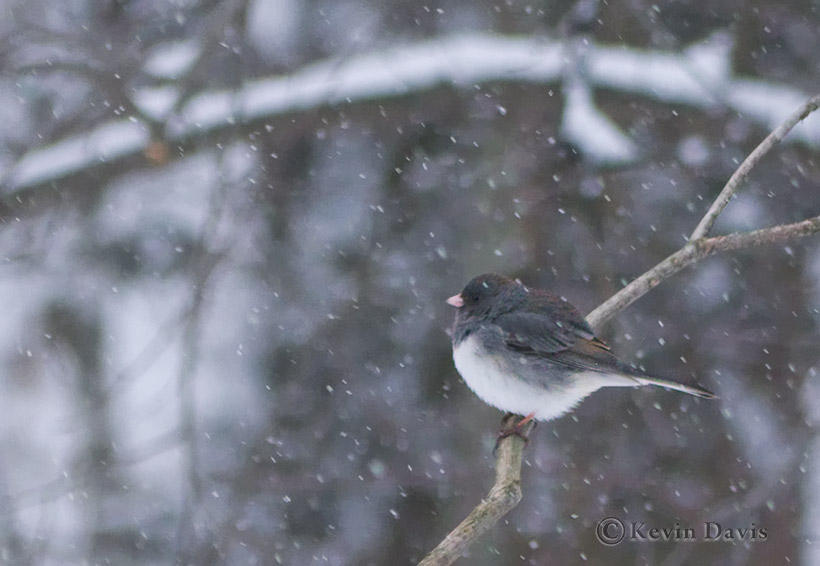
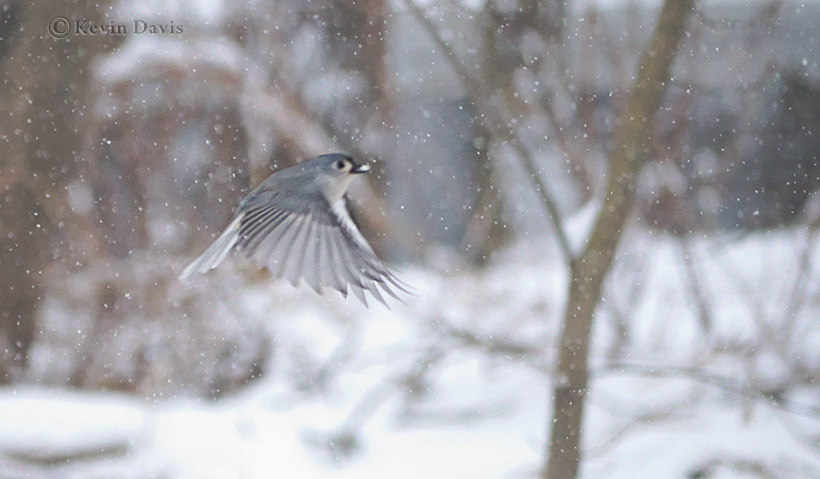
In 2011, wildlife photographer Jeff Wendoff told me that I must add wildlife to my photography portfolio. Got some tips on basic backyard bird photography from Jeff and photographer David Middleton. The wheels of my progress may move slowly, but they do move.
( Click on any image to see a larger view )
By end of 2011, I had prepared a place to hang bird feeders within clear view of my home windows and I hung my first bird feeder. Within two weeks, the birds began to find the new feeders. However, having created natural perches for the birds in precise locations where I wanted them to land, they were not perching here.
A few days ago, I saw the birds begin to perch in the places I had prepared. When I awoke this morning, there were many birds and they were perching in the right locations. So I photographed backyard birds for the first time. It just so happened that snow was falling, which added an extra special touch of beauty.
Sitting next to a window and photographing from the comfort of my home, these birds are perhaps 35-ft away. I found that my telephoto lens did not have quite enough reach. The birds appear quite small in the original images; so the photos attached here are cropped about 50% from original size.
I used a class of camera known as Micro Four-Thirds (MFT) with a 45-200mm lens at maximum telephoto (200mm). If I had used my Full-Frame DSLR, I would have needed a 400mm lens to capture the same field of view. That’s because the image sensor on any MFT camera is 1/2 the size of Full-Frame (for you Nikonians out there, that means “FX” format). To get a tighter shot, I will need big glass.