You have three primary options for printing digital photographs on paper; I will offer a bit of insight to each of these.
- Have a photo lab print it onto photographic paper
- Have a photo lab print it via inkjet printing
- Print it yourself via inkjet printing
Photo lab – print on traditional photographic paper
Traditional photographic paper has been used since before digital photography existed. Embedded within the paper, a chemical process reacts to light. With the advent of digital photography, the method of projecting the image onto the paper has changed, but the paper itself is basically the same technology as was used forty years ago. Once the paper has been exposed to light, it must be processed through several chemicals, washed, and dried. Though it may seem to be a complex process, the process is typically done by machines and is inexpensive. Because a the image is formed by a chemical change within the paper, no ink or dye is applied to the paper surface.
The light sensitive paper (produced by Kodak, Fujifilm, Ilford, and others) is available with a glossy surface, matte surface, of something in between, typically referred to as semi-gloss or luster. Some paper produces black & white (a.k.a. grey-tone) image, while other papers produce a color image. Metallic color paper is a widely available option that has reflective specs embedded in the paper; an image on metallic paper can be quite stunning, but should be displayed under very good light to achieve the best effect.
Photo lab – print via inkjet printing
Inkjet paper is a far more simple material compared to light-sensitive paper. There is no chemical process built into the paper; it is basically just paper, made from wood fiber, cotton fiber, etc. However there are many options available with varying characteristics of surface sheen, surface texture, tonality, brightness, and contrast. Each photo printing lab will offer a limited range of paper options, papers with which they have experience and of which they understand the characteristics. If you are uncertain which paper to choose, you can discuss this with the lab, particularly considering the specific image(s) you want to print.
Though I can print images on my own inkjet printer, I have sometimes chosen to use a professional print lab for a few different reasons.
- Printing can be a pain. For example, when printing on thick paper, I have to feed paper into my printer one sheet at a time.
- To print on a paper size larger than my own printer capability.
- To experiment with some different papers, without buying a full package of that paper.
Just because you send your images to a professional print lab, doesn’t guarantee that what the print will look like the image on your display screen … what you see is what you get (wysiwyg). You still need to do some work BEFORE you send your image to the lab. The necessary preparation is the same as printing it yourself, so jump ahead to Print it yourself.
Photo lab – print via dye sublimation
Dye sub printing is far less common than other methods. I have not used it and we’ll just leave it at that.
Print it yourself
As inkjet printers are widely available for personal and business use, making photo prints is entirely within your grasp. If you are unsatisfied with prints made by photo labs, you can take matters into your own hands.
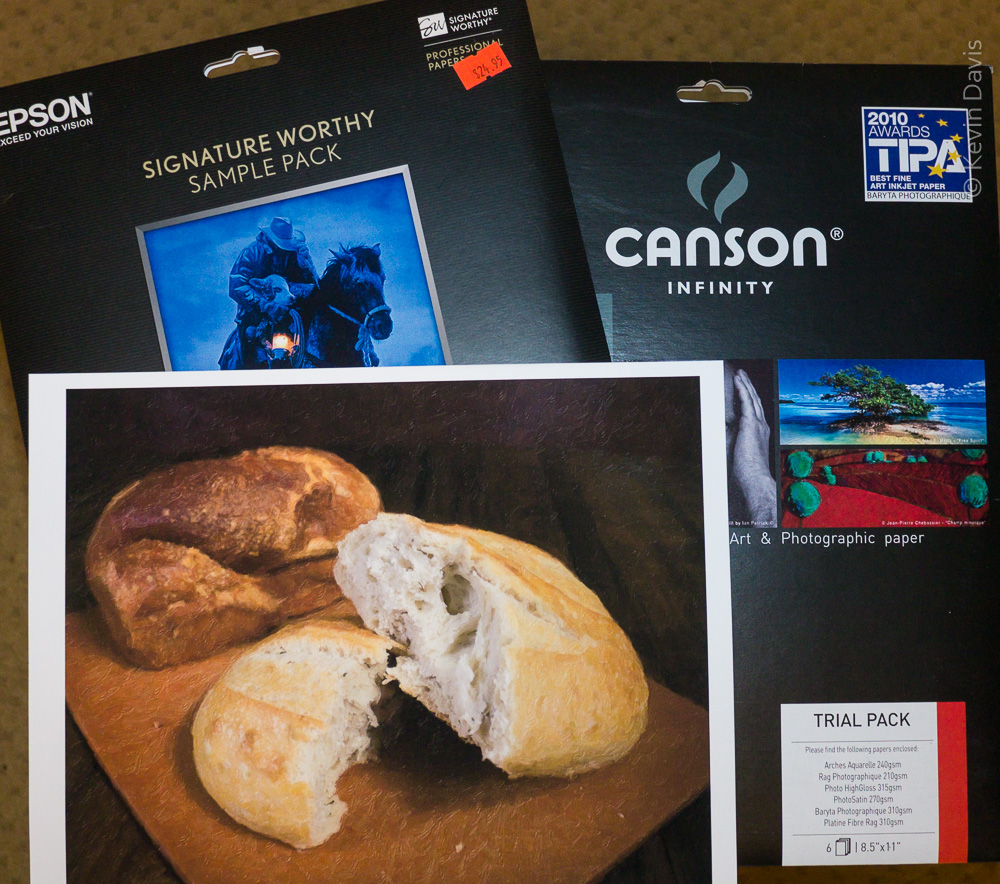
Manufacturers of inkjet paper may offer a sample pack containing a variety of different papers. See the image at top of this post.
Most digital photographs are represented via RGB color space … red, green, blue. In general, inkjet printers do Not use RGB inks. This implies that a conversion is necessary. Your printer likely will attempt this conversion. Your computer software may also attempt this conversion. Very possibly, the resulting print will not be quite as you hoped.
How can we best insure that the print will be as we expect? Achieving a good print requires a few steps BEFORE sending the digital image to print.
Color-manage your computer display
In general, most computer displays do not render colors accurately. What you see on your display screen can be very different to what comes out of your printer. To insure that your display is accurate, use a device called a colorimeter. This device measures the actual colors coming out of your display screen and then places a correction table into your computer so that colors are corrected. The two most popular brands are ColorMunki (by Xrite) and Spyder (by DataColor).
Who you gonna trust?
You can either trust your printer to manage color properly, or trust your computer application to manage color properly. If both are trying to manage colors, then that’s going to be a problem. Pick one or the other.
If you choose to trust your printer, then be certain that your computer application (that which is sending the image to the printer) is Not managing color. Then, depending upon the ink and paper you choose to use, you may need to update the RIP firmware of your printer, if that is even possible.
The more common approach is to control color within the computer application. In the printer settings, disable the printer’s own color processing. With this feature disabled, the job of insuring correct color is entirely in the realm of the computer software application. Not all applications have this ability. (I generally print from Adobe Lightroom or Adobe Photoshop.)
Three things can impact print color: the specific printer are you using, the specific ink, and the specific paper. For example, you might be using a warm-tone paper or a bright-white paper. A “color profile” includes everything your computer application needs to make a print using the specific combination of printer + ink + paper. For example, if I am printing with an Epson 3880 printer, with Epson ink, printing on Canson Infinity Photo Satin paper, the paper manufacturer provides a “color profile” absolutely free. After downloading the color profile from the paper manufacturer, I can specify this color profile when sending an image to my printer; this insures that the colors are rendered accurately for that specific combination of printer, ink, and paper.

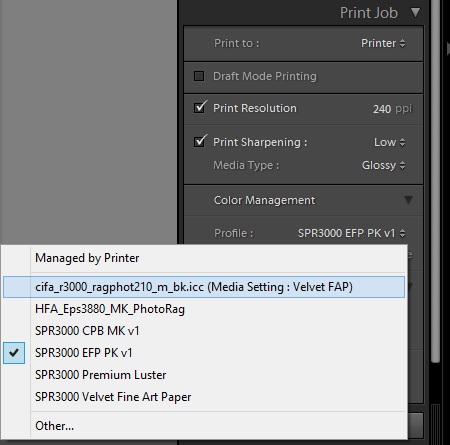
In the screen snapshot here (Lightroom), notice that the first option is “Managed by Printer”; the remaining options are all different color profiles, meaning the printer is Not managing color.
If the paper manufacturer does not have a color profile for your specific printer+ink combination, then you have a problem. You might experiment with some available profiles and find one that that seems to produce good results. Else, you have to make your own color profile. This requires the use of a colorimeter. This may or may not be the same device you used to profile your display screen. The difference here is that the device must measure light reflecting off printed paper rather than measure light emanating from a display screen. If you want to, you could print on a white paper shopping bag – there is no color profile for that, but you could potentially make your own using a colorimeter.

Pingback: Options for Displaying a Photo Print | Kevin Davis Photography