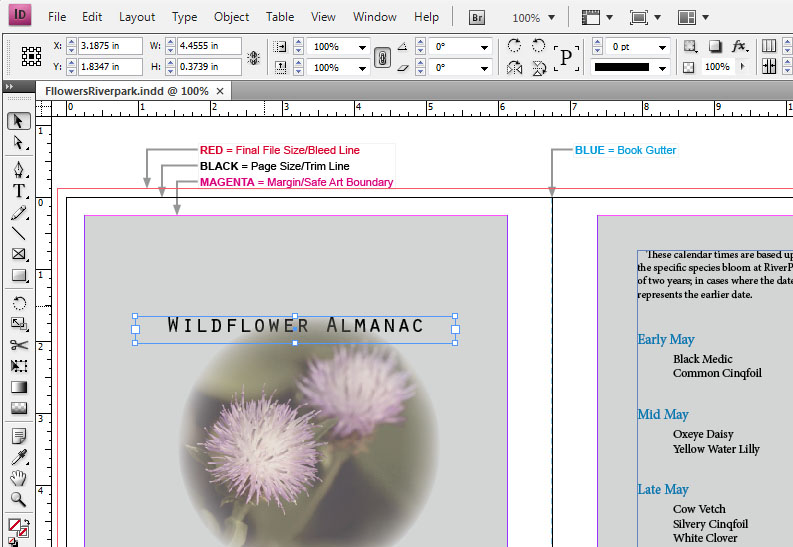
Typically, to create a print-on-demand custom photo-book, you download easy-to-use free software from the vendor/printer, layout your book pages, then upload the result for printing. But, alternatively, some vendors allow you to use other page-layout software. For my latest book, I used Adobe InDesign.
Having used the free software from three different vendors, I found them all quite similar and mostly intuitive to learn. On the other hand, Adobe InDesign is just a bit more complicated to learn, but much more flexible. If you can imagine it, you can do it. For example, a frame can be virtually any shape at all (a frame is a container for text or images). I used this flexibility several times throughout my book.

There is one important difficulty to be aware of. The printing equipment used to print your book is almost certainly based upon CMYK inks, not RGB. All images must be converted to CMYK. When you use free software (downloaded from your PoD vendor), this conversion is done automatically for you. But when using other layout software, such as InDesign, you are responsible for doing conversion to CMYK.
Converting images from RGB to CMYK can be ugly. The conversion will necessarily shift some colors. And because CMYK is a smaller color space than RGB, some colors simply cannot be represented in CMYK.
In the case of my recent book, Wildflowers of RiverPark, I converted each image to CMYK using Adobe Photoshop. In general, rich green colors did not convert well to CMYK; no matter which conversion method I used, greens became horribly muted. With practice, I learned how to compensate for this. I was able to create a custom action to help this process, but it was still annoying and time consuming. Furthermore, one image in particular features vivid purple-magenta (flower is Deptford Pink) that could not be represented in CMYK.
In doing the conversions myself, and using the soft-proof feature in Photoshop, I gained one important benefit. The colors in the printed book are very accurate. If you rely upon your PoD vendor to automatically convert your images, you may get some unexpected color shift in your final printed book.
Specifically using InDesign provides another small benefit: InDesign works well with Adobe Bridge and Photoshop. From InDesign, create an emtpy frame, then hop over to Adobe Bridge, click on an image and choose: Place into InDesign. The image is inserted into the frame you created. After the image has been added to your book, making changes to the image is simple. Right click on the image and choose: “Edit Original” to edit the image in Photoshop. When you save your Photoshop changes, InDesign automatically picks up your changes and updates your InDesign document.