A Flying Camera – DJI Mavic Pro

A Flying Camera – DJI Mavic Pro

If you are a photographer or videographer and you are interested in the Mavic Pro drone primarily as a flying camera, then this article is for you. This is a run-down of camera controls and options, without discussing flight controls.
Documentation included with the Mavic Pro is minimal and help for the DJI Go app is non-existent.

First of all, let’s point out the obvious. The Mavic Pro has unmatched portability; it folds to a size that can fit in a large coat pocket. The gimbal that stabilizes the camera is probably the smallest in the world.

This drone can be flown using using the hand-held controller alone, or in conjunction wtih a smart-phone and the DJI Go app. You do need the Go app for access to numerous configurable options, but after configuring what you need, it is possible to fly with just the controller and no app. During flight, the Go app gives you a live video feed and camera exposure information, but you may not need to interact with the app except maybe to set the focus.

Not all available features shown here.  These are just some features I wish to point out.

The Remote Controller

The hand-held controller includes quite a few camera controls, independent of any smartphone app.

  • Photo trigger (shutter button)
  • Start/stop video recording
  • Camera tilt
  • Exposure compensation
  • Custom button left (e.g. center focus)
  • Custom button right (e.g. AE lock)
  • 5D button – up, down, left, right each has a different meaning that is configurable.
    (For example, zoom in/out. It is a 2x digital zoom; there is no optical zoom.)

DJI GO app

The app shows real-time video and provides in-flight camera exposure information.

  • Real-time image view
  • Exposure histogram
  • Current exposure compensation setting (1/3 ev increments)
  • Over-exposure zebra stripes during video recording
  • Camera: ISO, shutter speed, white balance, remaining SD card number of photos
  • Video: resolution, FPS, remaining SD card recording time

The app provides extensive camera configuration options.

  • auto/manual exposure
  • ISO (100 to 6400)
  • shutter (up to 1/8000)
  • AE lock
  • touch screen for AF spot
  • touch screen for exposure spot

video menu ___

  • NTSC or PAL
  • size&fps (e.g. 720p @ 120fps, 4K @24fps)
  • White balance (auto, sun, cloud, custom, etc)
  • Style (brightness, contrast, tint)
  • Color (none, D-cinelike, D-log, Art, Vivid, etc)

photo menu ___

  • Aspect ratio (4:3, 16:9)
  • Image format (jpeg, raw, jpeg+raw)
  • Photo drive (single shot, AEB-3, AEB-5, HDR, interval)
  • White balance (auto, sun, cloud, custom, etc)
  • Style (sharpness, contrast, saturation)

options menu ___

  • show real-time histogram
  • orientation (portrait/landscape)
  • lock gimbal when capture
  • over exposure warning
  • anti-flicker (50Hz, 60Hz, auto)
  • format SD card

The app alerts you if a firmware update is available. The update can be applied with a simple touch; the download comes via your wi-fi, through the phone, down to the drone. The time to complete the upgrade was more than ten minutes and consumed about 18% of the drone battery charge.
Bearskin Neck
Bearskin Neck
Compare JPEG to RAW
Compare JPEG to RAW

Photo Quality

For photos, you can shoot RAW, JPEG, or RAW+JPEG. Of course, I recommend either RAW or RAW+JPEG.

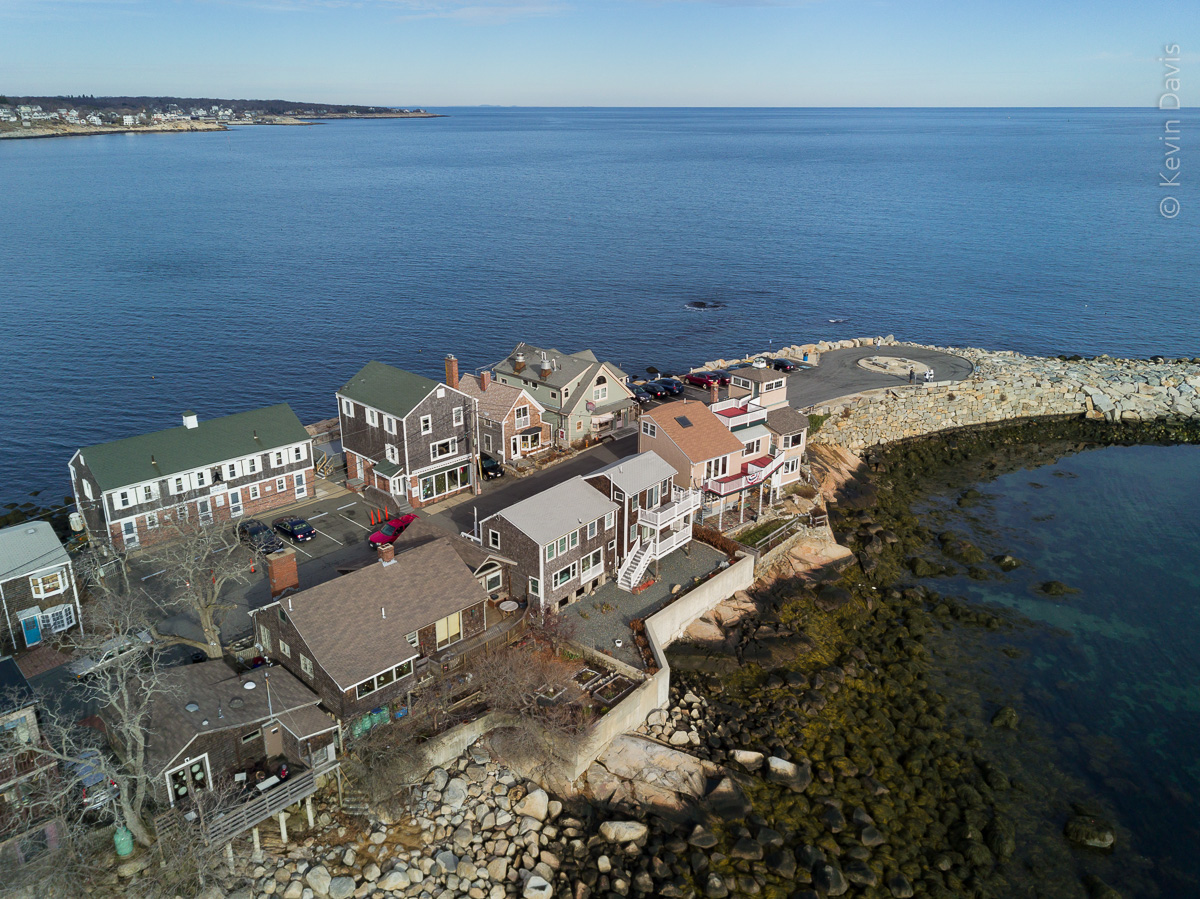
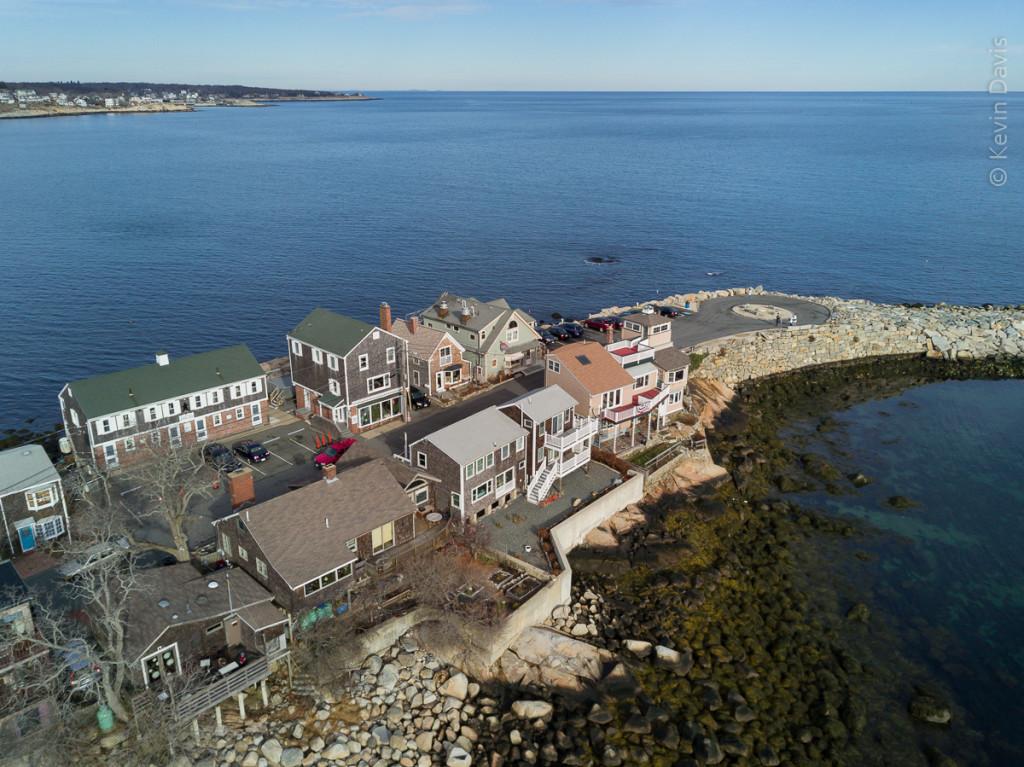
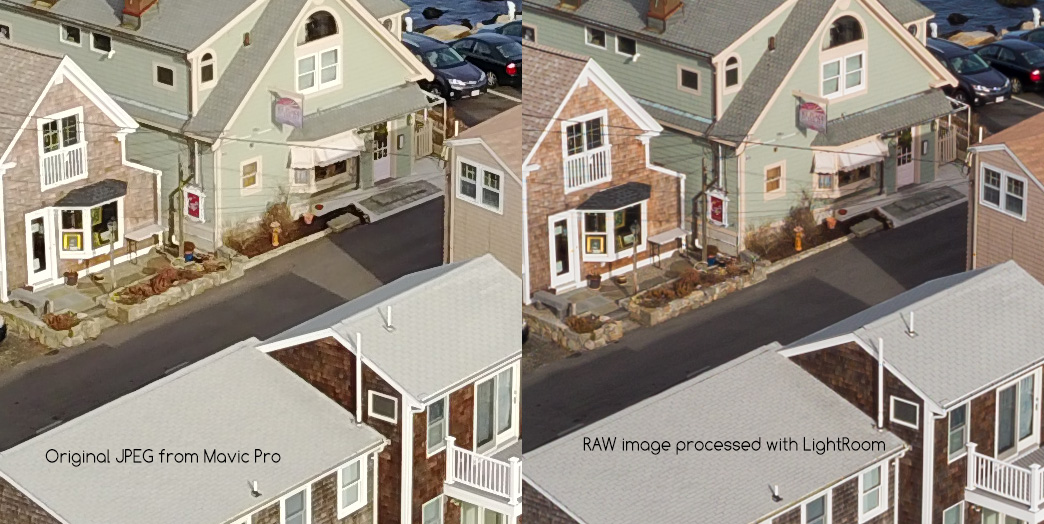
I shot the photo above (Bearskin Neck, Rockport MA) recently with the Mavic Pro set to record both JPEG and RAW.  The second photo is a 200% crop from the center, comparing the original JPEG to the RAW file processed as I normally would in Adobe Lightroom.  Overall, the JPEG is good.  I think it is a bit green, looking at the short stone wall.  Signs on the buildings are not legible in either case, but the JPEG is slightly worse than RAW.

With only a half dozen flights thus far, I have observed a couple specific image quality problems.  For still photos, the very small image sensor is no match for a larger DSLR or MFT camera.  I have read that the image sensor is Sony Exmore (wikipedia.org/wiki/Exmor), but I cannot confirm that. The maximum resolution is a respectable 12 megapixels, in 4×3 aspect ratio (4000×3000). You can choose to capture 16×9 ratio, but that is a crop down to 9 megapixels (I personally tested that just now; that’s real, not a guess.).

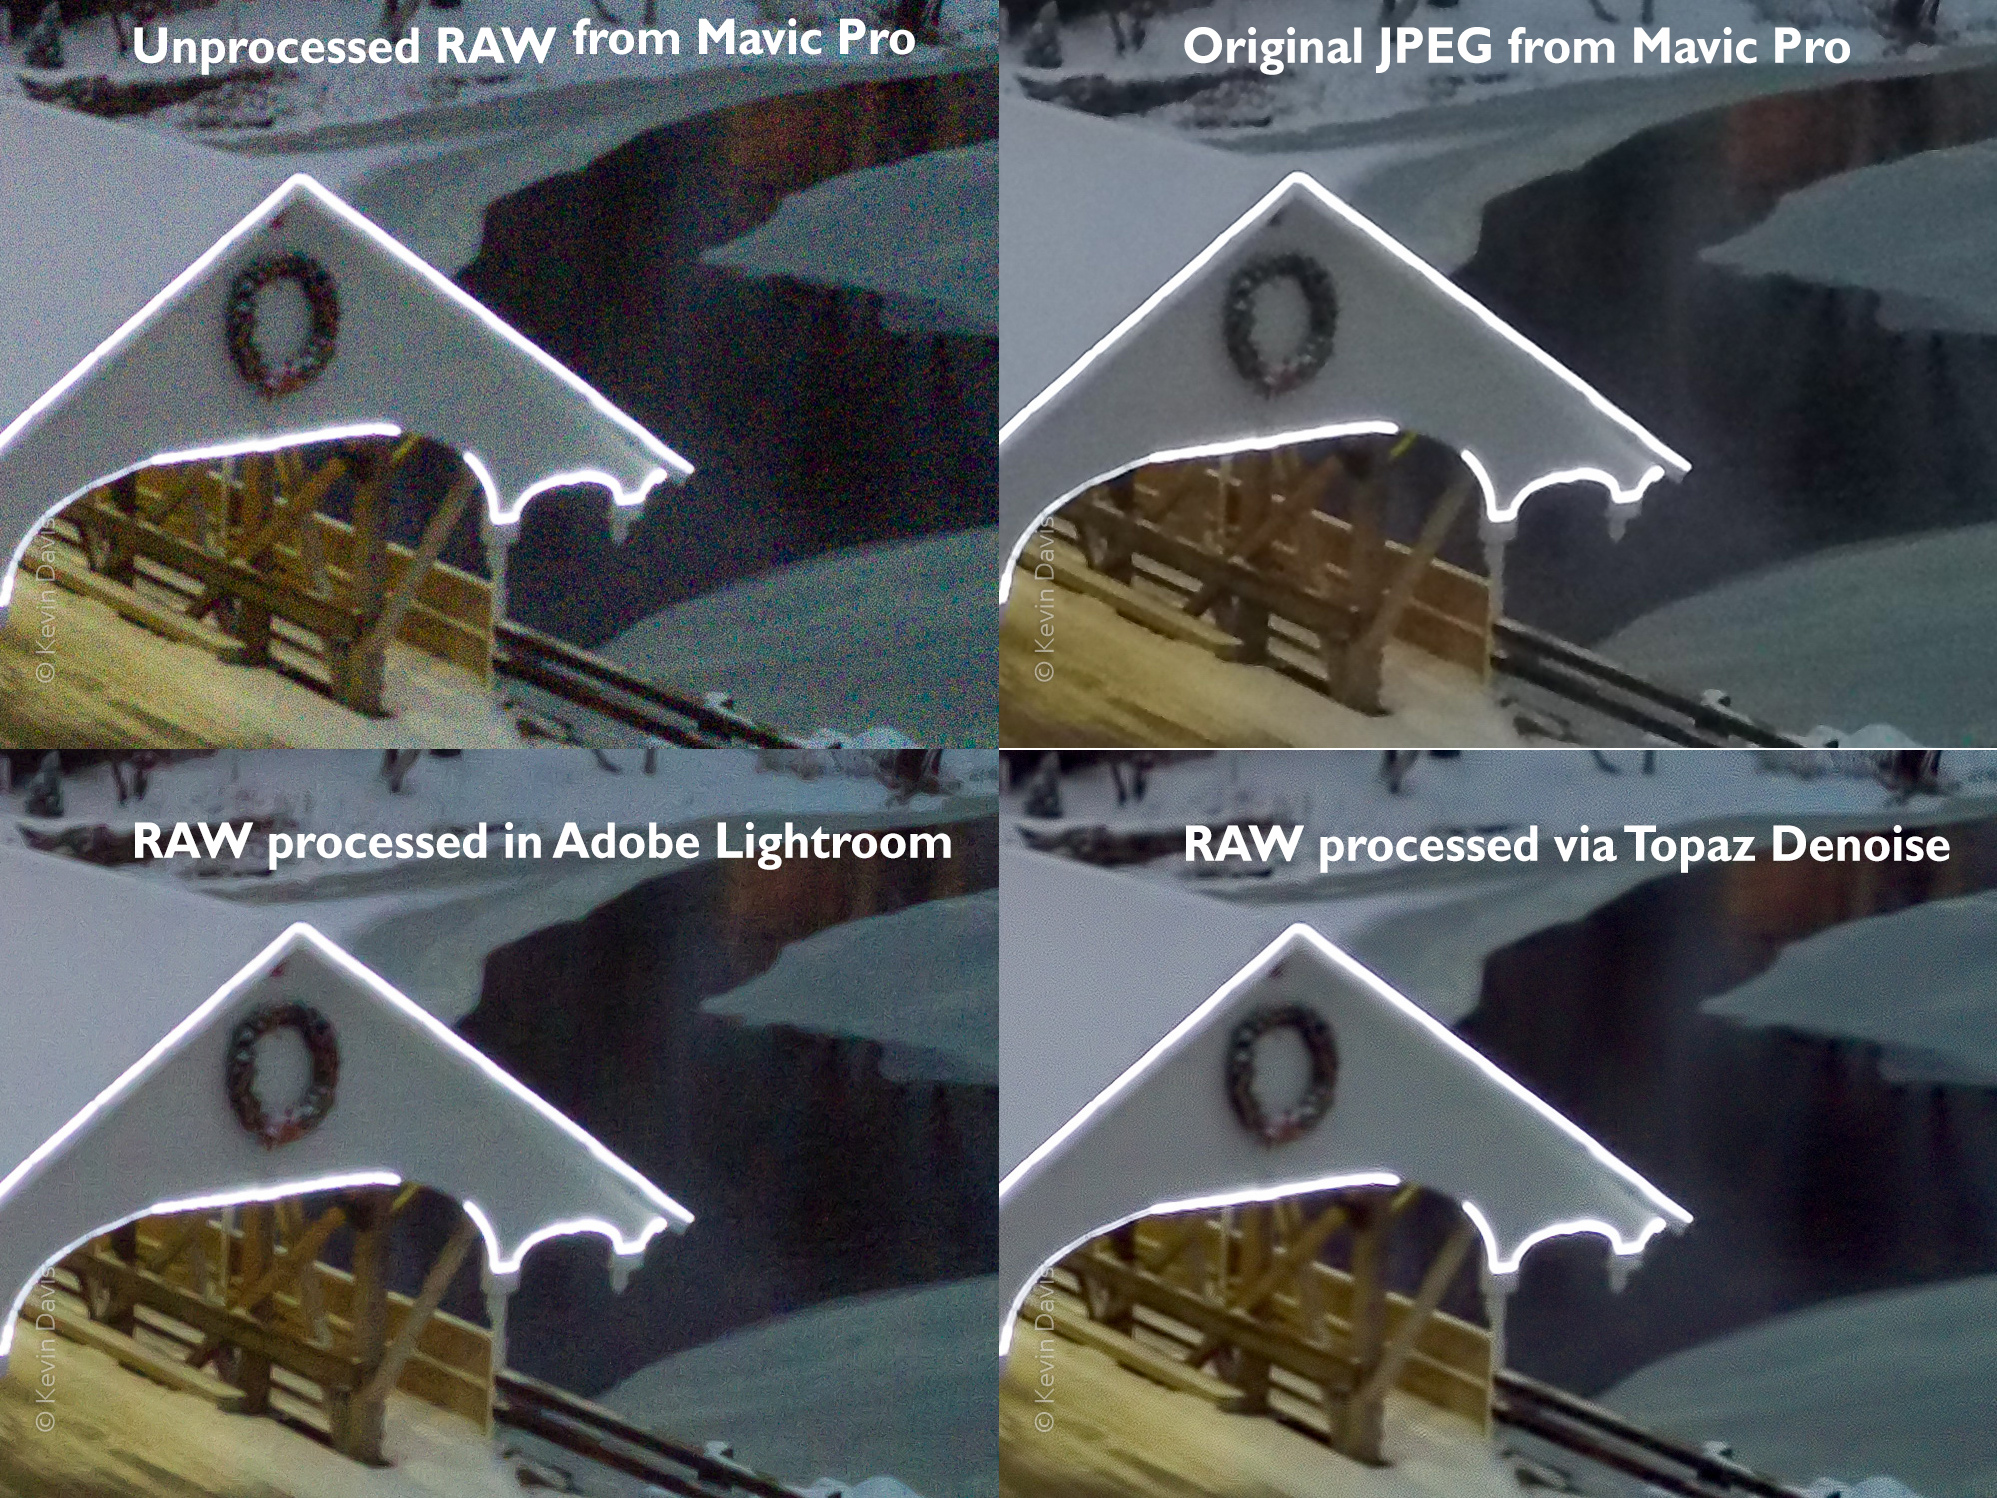
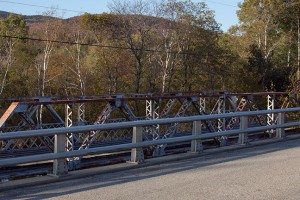
Photos can exhibit some amount of digital image noise at just about any ISO. Images shot during the low-light of dusk, around ISO 1600, exhibit a high amount of chroma noise.  Samples are shown here below.  For stills, Adobe Lightroom has the best noise reduction I know. While the JPEG processing in the Mavic does a reasonably good job of smoothing large areas, there is loss of detail inside the bridge.  The Topaz Denoise plugin for Adobe is similar.  Processing via Lighroom’s built-in noise reduction allows better control and retains better detail inside the bridge.

Coping with low light

Video Quality

In good light, the video quality is probably on par with a GoPro Hero 3 or 4.  Moire problems may occur when scenery includes detailed patterns, but I have not tested this with different capture resolutions.  As with still photos, low light and high ISO exhibits a high amount of chroma noise.   A product called Neat Video can do a good job of mitigating noise.

The video clip of the snowy mill (at the beginning of this article) was captured at 1080 without a problem.  However, on a separate shoot, I did see a problem.   Several people contributing to on-line forums have reported that 1080 does have problems, including a “pastel effect” which seems an apt description of the problem I saw. People experiencing problems at 1080 also report that the problem does not occur at higher 2.7K or 4K resolution. I have switched to shooting 2.7K and subsequently downsample to 1080 in post processing. However, the higher resolution does not support a frame rate faster than 30 fps; and downsampling does require additional compute time.

For video, I’ve been shooting the “None” color profile, modified with sharpness set to -1. Some pros are recommending two of the color profiles, DLOG (very flat) and ART (not as flat). Alternatively, some people have suggested color profile D-Cinelike and then customized to -2, -1, -1 (sharpness, contrast, saturation). All those suggestions create an intentionally flat result that necessitates some post-processing.

A clear plastic dome can optionally be used to protect the camera. Very first time I captured video with the Mavic Pro, I could see glare due to the plastic dome. Since then, I never fly with the dome attached. Potentially, I might use it if there some risk of water or dust in the air, for example, flying near a waterfall.


Pre-flight

Each time you fly, here’s the basic pre-flight steps:

1) Unfold the propeller arms and propellers
(Obviously, attach any propellers that you detached for transport/storage.)

2) Remove the camera gimbal clip

3) Optionally, connect your smart-phone to the hand-held controller

4) Turn on the controller and start the DJI Go app

5) Turn the antennae upwards, which is typically a 45-degree angle

6) Turn on the drone

7) To connect your phone with the drone, touch the “Camera” button on the DJI Go app

8) Check the aircraft status information, including available battery charge

9) If this is a different location than previous flight, calibrate the compass

10) Obviously, check your environment for obstacles or hazzards.
Make sure you are not in restricted airspace.


DJI includes a plastic clip to secure the camera gimbal when not in use. Always remove this clip BEFORE turning on the drone. If you fail to do so, the app warns of gimbal overload.

Initially, the Go app will display the “Aircraft Status”. Tap the “X” to close this display.

  • Overall status … Latest Firmware
  • IME … normal
  • Compass … normal
  • Motor ESC status … normal
  • Radio Channel Quality … good
  • Flight Mode
  • Remote Controller mode
  • Aircraft battery
  • Remote Controller battery
  • Remaining SD card capacity


What you need to know about blank DVD discs

techdaisy-090403-0002What is the difference between DVD-R and DVD+R ?

The DVD-R standard (pronounced: DVD dash R) pre-dates DVD+R (pronounced: DVD plus R). Today, most DVD players can read both. A DVD burner may be specific to one or the other. Use discs that are compatible with your burner.

DVD+R has a few technical advantages; notably, DVD+R supports both single layer discs and dual layer discs.

DVD-R discs are typically the least expensive.

What about DVD-RW, DVD+RW, and DVD-RAM ?

Rewritable discs (RW) can be erased and re-written. These discs contain a phase-change metal alloy. R formats utilize an organic dye (non metalic); once it has been written, it cannot be erased.

RW discs typically take more time to write/burn. DVD-RW or DVD+RW discs are commonly rated either 2x or 4x speed, while DVD-R discs are commonly 16x.

DVD-RAM discs are relatively uncommon or obsolete. DVD-RAM is typically not compatible with the DVD player attached to your television.

What is 2x, 4x, 8x, etc. ?

This indicates the speed at which the disc can be written.
Time to write an entire single-layer disc
2x = 30 min
4× = 15 min
8× = 8 min
16× = 5.75 min

What is dual layer ?

Dual layer discs have an embedded second layer, so have twice the storage capacity of single-layer. Some DVD burners can write both single-layer discs and dual-layer discs. A standard DVD player attached to your television likely does support dual-layer, unless it is a particularly old machine. Many Hollywood movie DVDs are actually on dual-layer discs.

Which should I use for compatibility with most DVD players ?

Most DVD players can read any R or RW disc. The following list begins with the highest compatibility.

(1) DVD-R should be compatible with 95% of all DVD players.
(2) DVD+R should be compatible with 85% of all DVD players.
(3) DVD+RW
(4) DVD-RW

Once again, DVD-R is typically the least expensive.

What about Blu-Ray ?

While Blu-Ray discs are the same physical size (as DVDs), Blu-Ray is higher density (more storage capacity), and capable of much higher data rates. For HD 720p or HD 1080 video, you need Blu-Ray.

DVD players cannot play Blu-Ray discs. Many Blu-Ray disc players can play both Blu-Ray and DVDs, but this is not universally true.

Which disc should I use to save computer files ?

For use on a single computer, you can use any disc that it can write. For sharing with other computers, single-sided single layer discs are the most compatible.

4.7GB – single sided, single layer DVD
9.4GB – double sided, single layer DVD
8.5GB – single sided, dual layer DVD
17.1GB – double sided, dual layer DVD
25GB – single layer Blu-Ray disc (BD)
50GB – dual layer Blu-Ray disc (BD)

I want a custom image on the top of the disc; How do I do that ?

There are three methods.

Inkjet printable disc label

Adhesive disc labels are generally frowned upon. Adding a label can cause problems for some DVD players. If you do apply a label, always use a donut-style round label and be very careful to insure the label is centered on the disc. An off-center label can cause a disc to wobble at high speed.

Inkjet printable disc

Most printable discs are plain white on the top surface. Some inkjet printers include the ability to print on discs. Alternatively, specialized disc printers are capable of printing many copies very quickly.

If the blank printable area extends almost to the center of the disc, this is referred to as “hub printable”. On a regular printable disk (not hub printable), the printable area stops about 3/4-inch from the center hole.

LightScribe disc

A LightScribe disc includes a reactive dye (in the top surface) that allows imprinting using a LiteScribe-capable DVD burner. In my experience, the print always fades, even to the point of disappearing.
Lightscribe has apparently been discontinued; both discs and burners are increasingly difficult to find.

When saving video for a disc, what video bitrate should I use ?

The ability of a DVD player to sustain playback at a given bitrate is highly variable from across different models.
You can choose variable bitrate (VBR) or constant bitrate (CBR). If you use VBR, then the average bitrate should be comparable to CBR. Here are very vague guidelines.

Standard definition 480p : 10 MB/minute

High definition 720p : 20 MB/minute

High definition 1080p : 35 MB/minute


Audio Microphones for a DSLR or Compact System Camera

DSLR audio
DSLR audio

Many digital photography cameras have included the ability to record high-definition video, beginning with the Nikon D90 in 2008. The Canon 5D mk II (2009) was the first DSLR to be widely employed in film and television. Because video recording is usually accompanied by audio recording, these cameras necessarily include a microphone. But depending upon your own need for high-quality audio, the in-camera microphone can be a poor choice for professional quality.

(For a larger view, click on the photo here.)

Film and television production typically record audio on dedicated audio recording equipment, rather than relying upon the video camera to record audio. The separate video and audio recordings are brought together in post-processing.  However, in-camera audio recording is practical for one-person or two-person teams recording video at events or for ENG (electronic news gathering).

Broadly speaking, you have two choices: a “video mic” or a general-purpose microphone with a pre-amp. “Video microphones” include some small amount of amplification such that they connect directly to your camera, for example a DSLR, with no additional equipment required. This is a simple compact solution. Video mics are available from Rode, Sennheiser, and Sure.

Alternatively, if you employ an audio pre-amp, then you can use any microphones you want and can use different microphones in different situations. However, this adds another piece of equipment, making the total solution more bulky.

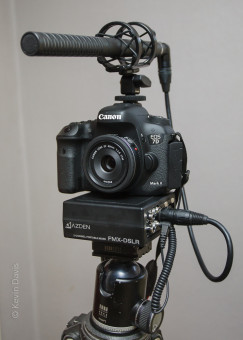
The photo here shows a general-purpose shotgun microphone, connected to a mixer/pre-amp, connected to a DSLR camera (Rode NTG2, Azden FMX-DSLR, Canon 7D mk II). The shotgun is mounted in a shock-absorbing mount that isolates the microphone from any camera noises, including operation of controls, auto-focus motor, or accidental knocking around.

Comparing this setup to the built-in camera microphone, there are four big differences. The external is directional, rejecting off-axis sounds, whereas the camera built-in mic is unidirectional, picking up sounds even from behind the camera operator. The external mic is cleaner, producing less unwanted background noise. And the external mic generally does not record camera noises, because it is mechanically isolated away from the camera.  Lastly, as you can see in the photo, this is far more bulk than just the camera alone.

Power for the NTG-2 can be provided either by the FMX preamp or by an optional AA battery within the NTG-2. I have tested both setups and find no difference in audio quality. Either way is far better than the camera’s built-in microphone, particularly in situations where the audio source is quiet and requires significant gain.

You may be able to connect an external microphone directly into your camera without use of a pre-amp.  Not all microphones require a pre-amp, but it is typically required for condenser microphones.   Although I had partial success with this technique on a different camera, the combination of NTG-2 with Canon 7D mk II requires a pre-amp.  In this specific case, I configure the camera internal gain setting to 25% and then use the adjustment knobs on the FMX.  Alternatively, you can enable camera automatic gain; in this case, be sure to inform the pre-amp using the switch for this purpose.

Here is a short list of some popular audio pre-amps:  Azden FMX-DSLR, Beachtek DXA, JuicedLink RM222, JuicedLink RA333, Sound Devices MixPre D.


Ultra-HD – Cameras For 4K Video

Until now, 4K (also known as ultra-high-definition, or UHD) was the realm of cinema … movie theaters.  But 4K televisions began to enter the retail stores in 2013.  We will surely see more of this in 2014.

In parallel, we have been seeing consumer cameras that support 4K, many of them selling for less than $1000 US.  This poses a technical challenge for small film makers … a data rate four times higher than HD.  (May have to update your video-editing equipment.)

Here is the history of 4K cameras costing $5000 or less.

Blackmagic Production Camera  (2012)
JVC GY-HMQ10   (2012)
GoPro Hero3        (2012)
GoPro Hero3+      (2013)
Sony PXW-Z100   (2013)
Sony FDR-AX1      (2013)
Sony A7s               (2014)
JVC FDR-AX100   (2014)
JVC GY-LSX2        (2014)
Panasonic GH4     (2014)
Panasonic FZ1000 (2014)

Video Edit using Sony Vegas

Last month, I shot video of a stage performance (link: Videography of a Stage Performance).  To edit the video and create a video disc, I have been using new software (different than what I have used in the past), Sony Vegas.

For editing video, there are several software applications that cost less than $200. For example, I used Pinnacle Studio for many years. (I began doing this before Blu-ray discs ever existed.) Then there are a half dozen professional software applications that cost more than $1000. In the middle price range, there seems to be only one; that is Sony Vegas.  (Vegas is currently available only for 64-bit Microsoft Windows.)

I’ve been learning to use Vegas and its companion application DVD Architect. This has not been easy because the tutorial help is a bit lacking and it uses some terminology that wasn’t entirely in my vocabulary. For example, it was not clear to me exactly what Vegas means by an “event” or an “envelope”.

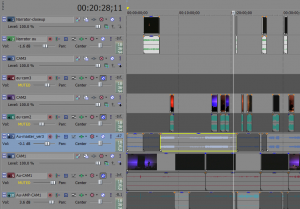
Snapshop of the timeline in Sony Vegas

In editing, I encountered a particular difficulty trying to nudge a video clip (push it earlier in time or later in time). Vegas built-in help doesn’t fully explain this, but searching for the word “move”, I did find the answer under “keyboard shortcuts”. To nudge a clip, use keys on the numeric keypad. That’s not possible on my laptop computer, because it does not have a full-size keyboard; there is no numeric keypad on the right side. To solve this, I bought an accessory keypad that simply attaches via USB; cost $16.

The screen-capture above shows several video tracks and audio tracks in my project.  (This example is perhaps a bit over-complicated and could have been done differently.)

After assembling various video clips and audio variations, “render” will create a single video/audio file. (In some cases, you may have to output a video file and a separate audio file.) In my first six attempts to render my project, Sony Vegas crashed three times. (Perhaps it was not Sony Vegas, but rather the encoder plug-in.)

After laying out the disc content and building menus with DVD Architect, the disc must be rendered. At this point, DVD Architect may present helpful error messages and warning messages. One example is that two menu buttons overlap. A very common warning is that video or audio will be compressed (or re-compressed). Because I had very carefully selected my video output parameters within Sony Vegas, I had every confidence that the video would not need to be re-encoded by DVD Architect. However, DVD Architect reported that re-compressing the video would in fact be necessary. From here after, I have been rendering only HD resolution from Vegas (whether intended for standard def DVD or high def BluRay) with the assumption that DVD Architect is always going to re-render it. But maybe I will continue to poke at this, because re-rendering can take a long time.  Reducing HD down to SD takes twice as long compared with re-rendering without changing the resolution (e.g. re-rendering HD to a different form of HD with different encoding properties).

DVD Architect is a bit easier to learn than Vegas. DVD Architect does support professional disc features such as multiple languages, sub-titles, audio setup options, and multiple camera angles. However, those are all features that I have not used yet.

Inserting a “scene selection” menu was very easy. Place a marker at the beginning of each scene and then choose “insert scene selection menu”.

Well, I have only dented the surface of Sony Vegas. It has been a bit difficult to learn the first time, but the end result is a success.

Videography of a Stage Performance

A few weeks ago, I did photography and videography of a stage performance.  Most of the still photos were shot during rehearsals, so that I had freedom to move around and use electronic flash.  Most of the video was shot during live performance with an audience present in the chairs.

The main video camera angle was captured by a camcorder on a tripod at the back of the room.  This camera captured 90% of the stage, but failed to sufficiently adapt the exposure for an individual person lit by a spotlight.  While I left this camera alone, I captured additional angles using a DSLR.  One angle was from a seat in the front row, right side.  A second angle was from center aisle.  A third angle was from the back of the right aisle (because dancers came off-stage and down the aisle).  A fourth angle was just the band pit.  To do this well would require at least three camera operators, but there was only me because this was a volunteer pro-bono job and no video-savvy operators came to light.

Audio was recorded at the sound control booth.   Unfortunately, one microphone was not recorded, so important monologues were lost.  Additionally, one song with vocal and instruments seemed to only record the vocalist. I partially recovered the missing audio from the camcorder, but had to amplify it to an unreasonable amount; it does not sound good, but it’s better than no sound at all.

In the end, I had three separate audio recordings.  You would think that duration, from first utterance to the last, would be identical … but it was not.    One recording was three seconds longer.   (I can only presume that the clocking devices inside the different recorders are not very precise.)  That means that synchronization of the audio and video (lip synch) is lost.  After several attempts, I did manage to compress that audio such that it aligned with the others.

Lessons

  • When using multiple cameras, use the same make/model if possible
    (so the color is the same).    And if you are borrowing a camera from a friend, absolutely test it first under the same conditions that you will rely upon it.
  • With a DSLR, set the color saturation to low.
    (You can always boost it later during edit.)
  • If you have access to audio & video equipment that supports Time Code,
    that can save you a lot of headaches during subsequent editing.
  • Have a dedicated operator for every camera.
  • Redundancy.  Shoot every scene from two camera angles.
  • For smooth panning, use a tripod with a “fluid head”.
  • Record your own master audio; don’t assume the sound board will capture it perfectly.  Unless you have a professional-grade video camera with a good quality audio pre-amp, use a separate audio recorder (don’t use the mic that is built-in to the camera).

New cameras for HD, 2K, and 4K video

In 2008, Vince Laforet shocked the film-making world with a short film called “Reverie” (http://vimeo.com/7151244).  He shot this in just two days using a borrowed Canon EOS 5D mk II (borrowed from Canon) before the camera was released.

Since then, the 5D mk II has become a serious tool for film-makers, particularly because it is much smaller than existing cameras (those specifically designed for cinematography) … and also because the cost is a small fraction of those cinematography cameras.
Recently, Canon announced a successor for 2012, the EOS 5D mk III.

The overwhelming success of the 5D mk II for video purposes was somewhat surprising to everyone, including Canon and Nikon.  Just a couple months prior to introduction of the 5Dm2, Nikon had introduced the first DSLR that supported 720 HD (not 1080).   By most accounts, Nikon trailed behind the success of the 5D2, but successfully “caught up” with cameras such as the D7000,  D4, and D800, all of which offer excellent 1080 HD video capture.  By some measures, the D800 trumps the Canon 5D mk III.

All these cameras are built around CMOS image sensors that are far larger than what you find inside video camcorders.  When combined with a system of interchangable lenses, film-makers can create effects and quality not possible with consumer or prosumer video camcorders.

Since the success of the 5D mk II, Canon has been on a mission to create new cameras specifically for cinematography (movies & television).  Enter … the new EOS C300, EOS C500, and EOS 1D C  (“c” is for cinema).  Both the C500 and EOS 1D C can capture at digital resolutions higher than 1080 HD.  While the EOS 1D C is an SLR that can shoot still images and video, the C300 and C500 are pure video machines that will capture 12-bit 4:4:4 color, compared to 8-bit 4:2.2 color in any DSLR.

While the EOS 1D C is the same size as the EOS 1D and 1Dx, it can capture 4K video at 24 fps or 1080 video at 60 fps.  That’s a data output somewhere around 500 Megabytes/sec. 
Canon recruited film-maker Shane Hurlbut to test out the new camera.  He created a short film, entitled “The Ticket“.
http://www.hurlbutvisuals.com/blog/2012/04/looking-inside-the-canon1dc-dslr-4k-capture-project-the-ticket/

Canon’s new cinematography play is priced well for serious indie film-makers, but not for consumers.  So, another interesting camera for 2012, is the new Blackmagic Cinema Camera, which shoots 2.5K video and costs less than $3K.


720 HD  = 1280 x 720  (16:9)
1080 HD = 1920 x 1080 (16:9)  Panavision Genesis, Sony CineAlta, Canon C300
           and DSLRs: Canon 5D mk II, Canon 5D mk III, Canon 1Dx, 
                               Nikon D7000, Nikon D800, Nikon D4

2K   = 2048 x 1080 (17:9)   Ari Alexa, Silicon Imaging SI-2K, Canon C500
2.5K = 2432 x 1366 (16:9)   Blackmagic Cinema camera
4K   = 4096 × 2160 (17:9)   RED One, Red Scarlet, Canon C500, Canon 1D C


River Video using a DSLR and CineMover

Recently travelling through northern New Hampshire, I was driving along the Ammonoosuc River shortly before sunset.  This short video is a compilation of shots all filmed that evening along the river.  The key scene is a dolly move along a metal bridge. 

Driving that evening, I was looking for photo opportunities along the river when I spied the new bridge next to the old bridge.  Then I noticed the long smooth railing and and remembered that I had the CineMover dolly with me. 

 The CineMover is an inexpensive dolly created by J.G. Pasterjak.  Take a look for yourself here:

http://moveyourcamera.com

The CineMover is designed with vertical wheels and horizontal wheels, ideal if you have a long flat rail with a square profile.  However this railing here did not entirely favor the CineMover as the railing shape is basically a half oval.  There is nothing here to insure that the wheels track straight.  Additional care was required because the rail had a significant dent that could easily cause the rig to jump a bit.  But after several attempts, I managed to keep the rig mostly level along the 12 or 15 feet of uninterrupted rail; this move is not flawless, but it is pretty nice shot!