My new book is now available as a Kindle ebook via the Amazon on-line store. Readable on any device (iOS, Mac, Android, Windows) using the Kindle app (free).
This is Maine, not Miami. On Vinalhaven, you won’t find loud night clubs or crowded marinas jammed with pleasure boats. You will find miles of walking trails and superb waters for paddling kayaks.
The book includes roughly 22 color photographs. The only “manipulated” image is on the cover, shown here. I nudged the foreground boat just a tiny little bit in order to make more room for the title box.
Honestly, I had thought this would be finalized a month or two ago, but … life happens. And then there were a few final edits, including a couple tweaks to the island map. An interactive map would be nice, but current e-reader devices don’t support that functionality (yet).
Until now, 4K (also known as ultra-high-definition, or UHD) was the realm of cinema … movie theaters. But 4K televisions began to enter the retail stores in 2013. We will surely see more of this in 2014.
In parallel, we have been seeing consumer cameras that support 4K, many of them selling for less than $1000 US. This poses a technical challenge for small film makers … a data rate four times higher than HD. (May have to update your video-editing equipment.)
Here is the history of 4K cameras costing $5000 or less.
Blackmagic Production Camera (2012)
JVC GY-HMQ10 (2012)
GoPro Hero3 (2012)
GoPro Hero3+ (2013)
Sony PXW-Z100 (2013)
Sony FDR-AX1 (2013)
Sony A7s (2014)
JVC FDR-AX100 (2014)
JVC GY-LSX2 (2014)
Panasonic GH4 (2014)
Panasonic FZ1000 (2014)
The lens included with a GoPro Hero 3+ has a focal length of 2.5 mm and has a field of view akin to a 14mm lens on a full-frame DSLR. It is “fisheye”. You can set the camera to a narrow capture setting, but this will crop the image, discarding some of the pixels.
Replacing the lens mount in a GoPro Hero3+
Super wide is fine if you are attaching the GoPro to your helmet or a surfboard. For me, the stock Hero3 lens is too fisheye and I want a narrower field of view.
There are many available replacement lenses, but most lack the quality required to capture 10 megapixel images. Most lenses are good enough quality to capture 5 megapixel images. I found two companies that sell a 5.4mm lens, having a 60 degree field of view, and rated as being sufficient for 10 megapixel images: RageCams (USA) and Vision/Dimension (Germany).
On paper, these two products seem equivalent, but there are a few important differences.
The 5.4mm lens from RageCams is easier to install. The lens from Vision/Dimension requires disassembling the camera and replacing the lens mount.
If you do it yourself, the cost of a 5.4mm lens from RageCams is higher than the cost of a 5.4mm kit from Vision/Dimension.
If you don’t want to mess with the camera yourself, you can pay RageCams to do the replacement for you. The cost of parts and labor is more than the cost of the GoPro Hero3+ camera
The Vision/Dimension lens includes infrared filter for daylight use. The RageCams web site states that an IR filter will cost you an extra $55.
Huh? What’s the problem deal with the lens mount?
The lens mount is a standard M12 lens mount, a simple threaded barrel. To change the lens, you theoretically unscrew the existing lens and screw in another lens. However, if I understand this correctly, there is a subtle quirk to the GoPro lens mount, which may mean that your new replacement lens will not focus properly. The lens mount is a female-threaded tube, but apparently the full length of the tube is not threaded; the front-most part lacks threads. If your new replacement lens has a short barrel length, you will be able to screw it in, but the distance to the image sensor will be too close for proper image focus. The 5.4mm lens from RageCams has a slightly longer barrel than the same lens from Vision/Dimension.
Lens replacement options
Option 1:
Ship your GoPro Hero camera to RageCams and have them replace the lens. This is both the simplest option and the most expensive option.
Option 2:
Buy a replacement lens from RageCams and replace it yourself.
To grip the lens with a pliers, you first need to remove the decorative plastic ring on the outer body of the GoPro. This part is quite simple and you can find videos on YouTube that show how it is done.
The lens is fixed in place with a bit of thread-lock. To unscrew the lens, you probably have to apply heat to the lens with a heat gun (without melting anything). Again, there are helpful videos on YouTube.
Option 3:
Buy a replacement kit from Vision/Dimension and replace it yourself. This kit includes the lens and a lens mount that is fully threaded. Replacing the lens mount is a bit difficult www.vd-shop.de/instruction-replace-gopro-lens-a-80.html
Option 4:
Install an adapter that allows you to use almost any lens. While this enables the use of high-quality lenses and allows the use of variable-aperture lenses, it necessarily makes your GoPro physically larger and heavier. Refer to this link: www.back-bone.ca
I bought the Vision Dimension kit. While the price of this kit seems significantly less than cost of a comparable lens from RageCams, there are hidden costs. Shipping from Europe to the USA cost me $45 and then I received a bill from Federal Express for an import duty of $20. In the end, buying from Vision Dimension did not save me as much money as I had thought it would.
Looking at the photo at the top of this blog, you can see “10MP” (10 megapixel) is printed on the lens. Also printed on the lens (not visible in this photo) is “IR Cut”, indicating that a daylight IR filter is present.
Disassembling a $400 camera, that has really tiny parts, is not a task for the faint of heart. A video from Vision Dimension demonstrates the procedure; you can view that before making your decision. To avoid this hassle, pay a bit more money and buy the lens from RageCams.
If you replace the lens yourself …
You have somehow replaced the lens … and now need to adjust it for sharp focus.
Start by setting the approximate focus; load the GoPro app on an iOS or Android device to achieve a live preview of what the camera is seeing. When the focus looks good, here is an extra step to ensure that the focus is as good as possible.
Temporarily make a few markings on the outside of the lens; I attached five small pieces of white tape. Adjust the lens to each mark, one at a time, and capture a photograph.
Study the resulting photos at high magnification and pick the sharpest photo. Adjust the lens to the corresponding lens mark.
Repeat the procedure on a finer scale. I captured three photos, one on center, one slightly to the left, and one slightly to the right.
You do need a dab of glue or thread-lock to prevent the lens from turning inadvertently. You might put this on the threads before inserting the new lens. I was afraid that this might inhibit lens adjustment, so I adjusted the lens first, then unscrewed the lens, added a dab of glue to the threads, and re-inserted the lens. The trick to this is to count the number of revolutions when unscrewing the lens, so that you can easily get back to the point of sharp focus. Personally, I counted 13.5 turns of the lens. (In retrospect, the glue I used did not set quickly and I could have applied it before first inserting the lens.)
Finally, note that the new lens sticks out a bit further from the Hero camera body, compared to the original lens. It’s probably not going to fit in the waterproof housing. The Vision Dimension kit includes a spacer ring that you put between the Hero and the housing. The RageCams web site advises that you remove the foam cushion from the rear door of the housing.
In the end, I am disappointed with the image quality from the Hero3+. While I believe this is largely due to the camera, I have not as yet proven/disproven the claim that this lens is good enough for 10 megapixels.
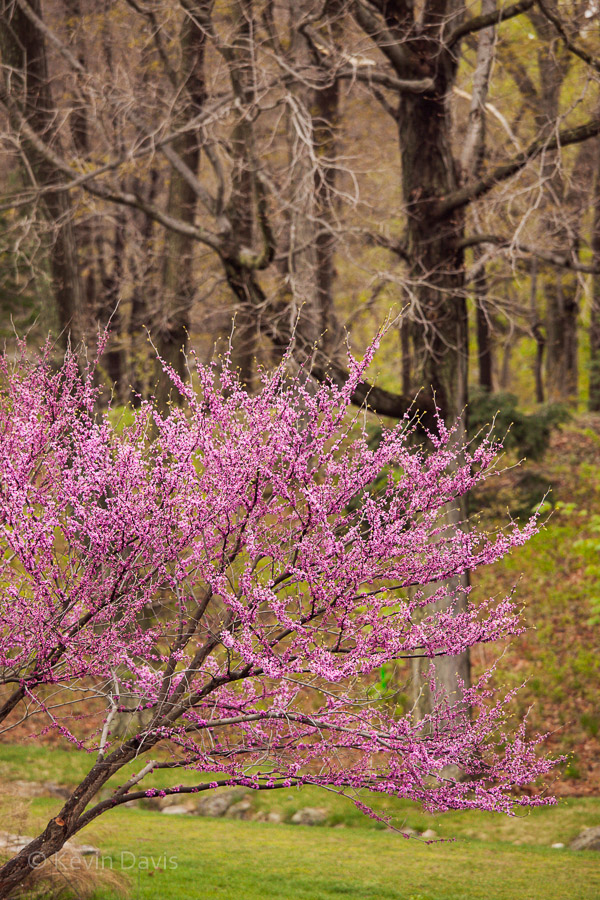
May is the month for flowering trees! You’ve probably seen a few lately. Some of my friends don’t seem interested in specifically what type of tree they are looking at … but I certainly am interested.
How about the photo here at the top – do you know this one? Magenta flowers with green leaves. Flowering crabapple.
How about the next one? Pink & magenta flowers, clustered close along the branches, and the leaves aren’t particularly showing yet. Eastern Redbud.
Pink / magenta flowers, closely following the branches.
(Click on either image for a larger view.)
As for trees with magenta flowers, there are only two others that are common. Magnolia flowers can range from mostly magenta, with a bit of white, to mostly white with a bit of magenta. (The latter is more common.) Uniquely, magnolia flowers are larger than any of our other common flowering trees.
The last one is tricky. The flower buds, before blooming, can be magenta color. The flowers in bloom look like bright pink carnations. That’s a Kwanzan Cherry; there is nothing else like it.
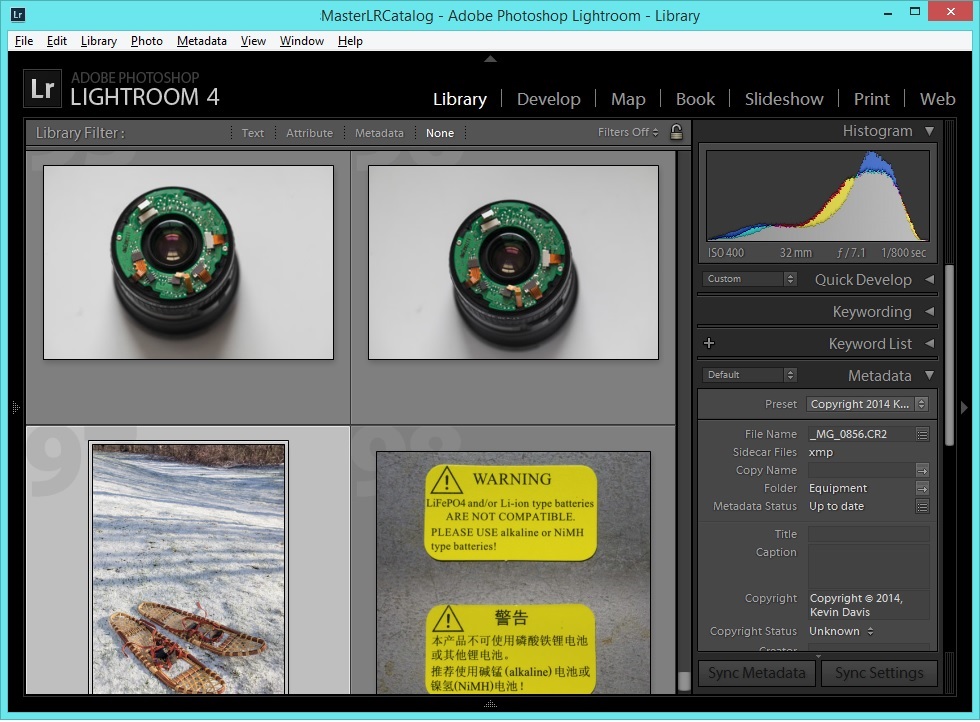
THE must-have application for photographers, Adobe Lightroom, is now available for mobile devices. The version for iOS devices (iPhone and iPad) is released and the version for Android devices is still in beta test. The beta for Android devices is available to KelbyOne members (http://kelbyone.com/android/).
1) FLASH TRIGGER GUIDE – MANUAL RADIO TRIGGERS
2) FLASH TRIGGER GUIDE – TTL & REMOTE MANUAL RADIO TRIGGERS
3) PORTABLE FLASHES WITH BUILT IN RADIO TRIGGERS
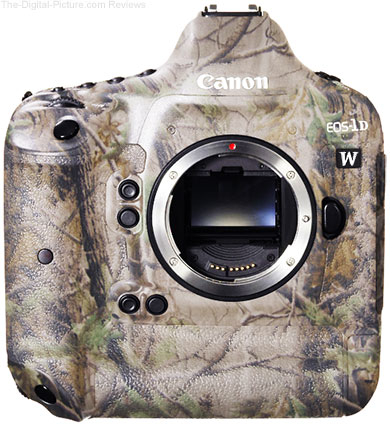
TheDigitalPicture.com breaks news of a top-of-the-line DSLR for wildlife photographers.
Reading some of the features, I arrived at … Birds in-flight focusing mode!? Wow! Animal Eye Tracking!? Amazing. A built-in sound generator to produce animal calls. Incredible … maybe literally, not credible.
But of course, today is April Fools day. Well played, Sean and Bryan.
Photographers are crying foul, rightfully so … but let’s try to understand what’s going on by stepping back and looking at the big picture. Why has Getty done this … and will other agencies follow suit?
Toying around with some software filters, I arrived at a painterly effect that I really love … in just 5 minutes. I’m not trying to put painters out of business – just having fun.
I started with an image from Lexington Massachusetts this past Patriots Day weekend. My first experiment did not yield a compelling result. Tried a second image, applied different filters, and shown here are all the phases of transformation.
The second step is done with Topaz Adjust. Adjust is one of my favorite tricks for adding a bit of “pop” to an image that seems a bit dull, however, here I used a preset called “Low key”, which I have never found any use for until today.
Processed with Bokeh, then Topaz Adjust, preset = Low Key
The last step is an painterly effect using Snap Art by Alien Skin.
Click on the image to see the larger view!
Processed with Bokeh and Adjust, then Snap Art
That was rather easy. Honestly, such experimental transformations are usually more difficult and end up with a result I don’t love … so, delete. I really like this one.
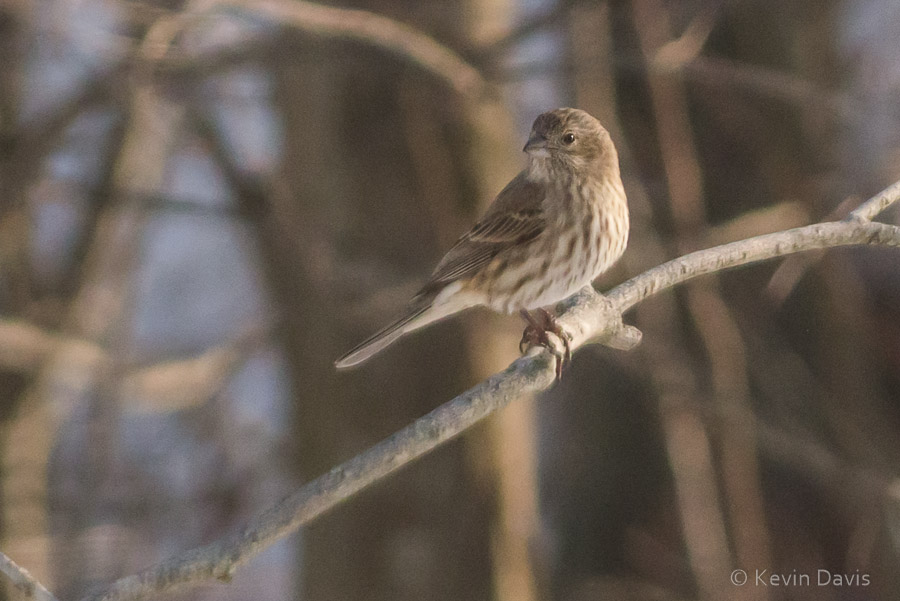
Last winter, I did a bit of backyard bird photography. Attached here is one of those images, where the bird looks quite good, but the background is distracting. As this was shot from my kitchen window, there was nothing I could do about the background (except maybe hang an artificial backdrop in the background trees
original image – shot with a MFT 45-200 zoom at f/8
Perhaps the background would be less distracting if the depth of focus was more shallow. A wider aperture might do the trick. This image was shot at f/8. The widest aperture on the lens is f/5.6.
Enter … a software filter called Bokeh2, by Alien Skin. The term ‘bokeh’ refers to the characteristics of an out-of-focus lens. Some lenses have a more visually appealing bokeh than others. The Bokeh 2 software simulates the bokeh effect and includes several presets that emulate specific lenses. So here is an edited version of the image, using Bokeh 2 to simulate an aperature of f/2.8 to soften the background and make it a bit less distracting.
Background softened using Bokeh 2
Although this does not entirely remedy the distracting background, it does reduce the distraction by softening it. You might achieve a similar effect with a basic Gaussian Blur filter, but Bokeh 2 aims to simulate characteristics of real lenses. This would be very significant if the background here had specular highlights, as real optical bokeh has a different effect than simple blur.


")