Custom PhotoBook

My most recent book was created with Photobook.  Photobook has several branches all over the world; I used Photobook America, located in Toronto.  Time to print with Photobook was significantly longer than past experience with Blurb and MPIX.  Perhaps related to two factors.  This latest book has a silk cover with a photo inset into a center window.  And I ordered multiple copies.  Blurb will print a book with full-bleed photo cover in just a few days. And  have seen MPIX (outsourced to DigiLabs) create books literally overnight.

At the time I printed with Photobook, both Photobook and Blurb had recently begun offering a new premium paper option called “luster”.  I tried it.  But honestly, looking at four books printed over a time span of 18 months, printed by three different companies …  I don’t see a significant difference in image quality.  They all have a slight sheen to the surface. Maximum black density is similar.  Image quality is entirely comparable.  As near as I can tell “premium” paper options provide only two differences: thickness and opacity.  All three companies print with an HP Indigo digital press. 

Photobook’s downloadable software is called Photobook Designer.  I found it easy to use; very comparable to Blurb BookSmart and (MPIX/DigiLabs) My Photo Books.  However, there was one problem.  For my title page, I created a graphic image with transparent areas, saved as a PNG file. The Photobook Designer software recognized PNG files with no problem.  The preview (prior to upload) looked great.  But when the book was printed, the title-page graphic was unrecognizable.  (I also used a PNG on the final page of the book and this printed just fine.)

I contacted Photobook support twice via email, including a screen-capture from the book preview (what it should look like), but received no responses; apparently their support systems were down for more than a week.  Upon calling via telephone, someone readily worked to assist me with the problem.  The book is actually printed from a PDF and they shared this PDF with me; my title page graphic was mutulated.  The problem was not the press.  The problem was not on my end. Something went wrong in upload or translation to PDF.  But because their web site states only support for JPG and TIFF, they suggested that PNG files are not guaranteed.  Photobook would not reprint the books at zero cost to me.  They did reprint the books at a deeply discounted price, after I replaced the PNG with a JPG.  (This was not a trivial replacement. I originally used PNG because it supports transparency; JPEG does not.)

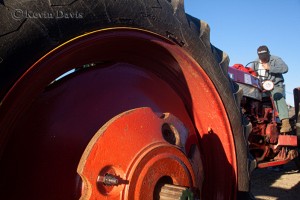
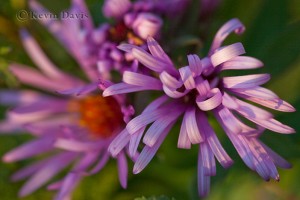
This latest book was simply a personal collection of favorite images from the past year.  A couple of the images are shown here.  Click on the image for a larger view.

For more information about comapanies that help you create custom photobooks,
I recommend PhotoBookGirl.com.  (I am not affiliated with PhotoBookGirl; but I find
it is a good source of information.)

Essential Guide to Memory Cards


The two most common types of memory cards are Compact Flash (CF) and Secure Digital (SD).  Compact Flash was first introduced 15 years ago and is still used in many new cameras.  SD format is physically smaller and is more suitable to smaller cameras.  For larger cameras that can accomodate CF, some people find that the larger size of CF cards is easier to manage. Many SD cards today will actually be SDHC (Secure Digital High Capacity).  If you have an older camera, be careful to read the camera specifications to understand if you can use SDHC cards. 

From a technical perspective, both CF and SD/SDHC have evolved to offer increasing speed and storage capacity. In general, CF supports a maximum storage capacity 128 gigabytes. (The newest revisions can support far more.)  The original SD supports up to 4 gigabytes. SDHC supports up to 32 gigabytes. SDXC supports up to 2 terabytes (1TB = 1000GB).

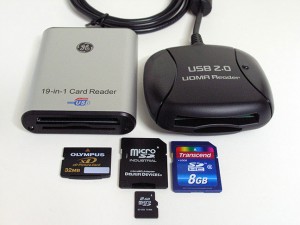
The photo attached here shows three memory cards: xD, micro SD, and SDHC.  Micro SD cards are commonly used in mobile phones and come with an SD adapter, which is essential if you need to insert the card into a card reader. xD has been used by some Olympus and FujiFilm cameras, but both these vendors seem to be phasing out the xD cards in 2010 (see: http://en.wikipedia.org/wiki/XD-Picture_Card).  The xD card in this photo was taken from an 4-year-old Olympus camera that accepts both xD and SD cards.

Historically, Sony cameras have exclusively used a proprietary card type called Memory Stick.  This decision by Sony (to ignore standard card types such as CF and SD) has been a nuisance to camera buyers for a decade.  In a very significant and obvious change, new Sony camera models introduced in 2010 support both Memory Stick and industry standard SD/SDHC cards.

Not all cards are created equal.  Some memory cards will read or write faster than others.  The write speed can affect how fast your camera can save an image to the card.  Furthermore, if your card is too slow, it may not be compatible with some newer high-resolution cameras, that require high-speed cards in order to save fat megapixel images.  Before buying a memory card, I highly recommend that you check Rob Galbraith’s memory card database (www.robgalbraith.com/bins/multi_page.asp?cid=6007). 

To copy photos from your camera, you have four options. Most cameras can connect to a computer via a USB cable. Doing so, the camera appears to the computer as a simple external storage device, just like a flash drive or external disk drive.  Altneratively, you can remove the card from the camera and use a card reader, connected to your computer.  If your camera is built-in to a cell phone or tablet, you may be able to send your images via email (possibly incurring fees for large amounts of data). Finally, some cameras support a wireless connection, such as BlueTooth.  For some cameras, wireless connectivity may be available via a camera accessory that must be purchased separately.

Not all memory card readers are equal.  In the photo shown here, both card readers connect to a computer via USB.  Both accept a variety of different cards.  The big difference between the two is speed.  One supports Ultra DMA and the other does not.  Be careful to read the fine print before purchasing a card reader.  Using a slow card reader can be frustrating, particularly if reading 8GB or more.

Lastly, a particular note regarding video cameras.  With the advent of newer memory cards offering both fast write speed and high storage capacity, video cameras have quickly moved away from magnetic tape storage in favor of memory cards.  Some cameras allow you to record for indefinite periods of time by providing two card slots and automatically switching when the current card becomes full.

Trees @ Mt.Auburn

Trees @ Mt.Auburn

When you get the urge to make some outdoor photographs, do you have places that you return to repeatedly?  Would one of those places be a cemetary?   Likely not.  But, Mt.Auburn cemetary (in Cambridge Massachusetts) hosts a marvelous array of flowering trees.  It really is a beautiful place, (with or without tombstones).

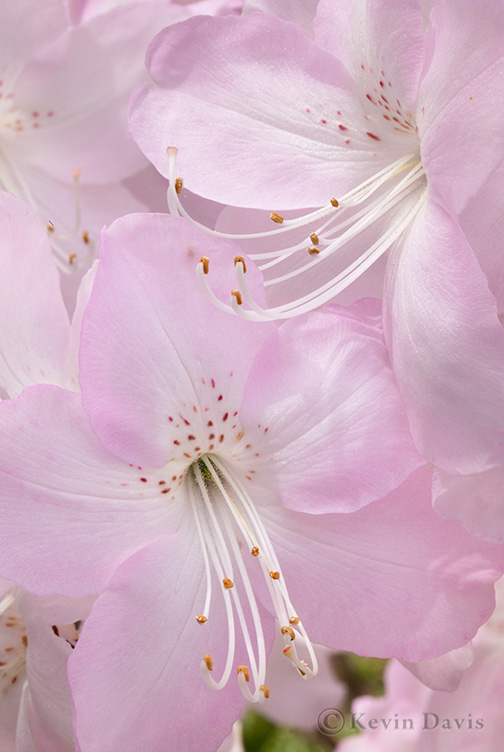
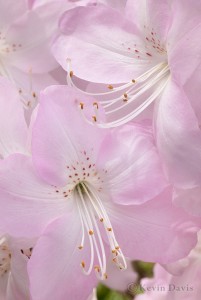
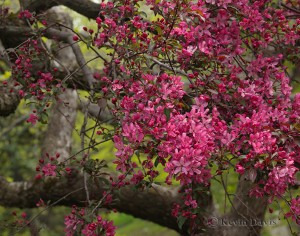
Today, I received another canvas print (from ArtisticPhotoCanvas.com) of an image from Mt.Auburn.  So, I am just sharing this image with you, along with another Mt.Auburn image, which I had printed earlier this year (also printed on canvas by APC).

   (To see a larger version, click on the image)


The most recent print is apparently an azalea shrub, though I do not know the exact species.  It is photgraphed with a Canon 100mm f\2.8L macro lens.  (My experience has been that this lens is superior to using a non-macro lens coupled with an extension tube)

The second is a crabapple tree, photographed with the Canon 70-200mm IS f\4.

WorldWide PhotoWalk

Today was the third annual WorldWide PhotoWalk, sponsored by Scott Kelby.  Although I volunteered to lead a walk in Rockport, someone else beat me to it.  So, instead, I joined someone else’s walk in Boston.

Because we walked through the streets of Beacon Hill in Boston, there were a lot of architectural photographs.  One image I am including here is a wide angle, tight crop, and at an odd angle in order to completely fill the frame.

Click the image for a larger view.

Art Wolfe seminar

Art Wolfe is one of the most famous photographers working today, in part because of his television series Travels to the Edge. I had the opportunity to attend his recent tour as he visited the Boston area.

Art formally studied painting. Interestingly, he draws inspiration from many painters, such as Hopper, Manet, Escher, etc. In numerous examples, Art showed an image by one of these famous painters and then showed some of his photo images which he created specifically because he saw echoes of these painters. Quite interesting really. I have never seen this from any other photographer.

Art readily admits to being technically challenged. He uses Lightroom, but does not know anything about the computer he is using. He has assistants for that sort of stuff. If Art Wolfe was forced to listen to Scott Kelby or George Lepp for ten minutes … well, let’s just say it would not be pretty.

Apart from “My Favorite Lenses”, he did not talk much about equipment. Mostly spoke about composition, patterns, color, light, etc. Different than most seminars. I enjoyed it.

Art often feeds on numerous themes filed in his head. Animal migrations, tribal body painting, etc. Surprisingly, his next book is about dogs. While this may seem a bit trite, it is not quite what you might think. He is drawing from his thousands of existing photos … Burma, Chile, Tibet, even the Yanomamo tribe. (Does not include your Aunt Millie and her groomed Pekinese.) For the first time in his life, four different publishers were bidding for this project; he had to beat them off with a stick.

On my bookshelf, I have one book by Wolfe: Light On The Land. Fabulous.

Photographing a live drama performance

In the past, I have photographed drama productions using high-speed 35mm film. The results were prone to a great deal of grain and visual noise. Last week, I shot a drama production using the Canon 5D mk II DSLR and the results far exceed anything I could do with film.

During the actual performance I used ISO 12800 with no flash. During dress rehearsal, I had freedom to use electronic flash and shoot from different angles not possible during the live performance. I setup a remote flash bounced off of a 36″ reflector; this provides a larger and softer light source. Because the flash was being bounced off a reflector, I configured the flash for higher intensity output than normal/default.

The images shown here provide comparison of shooting with flash and without. The primary light source is always the spotlight. The flash provides fill-light in the shadow areas.

Notice the shadows cast on the wall. Both the spotlight and the flash create shadows. (Here, the shadow from the spotlight appears low on the wall because the spotlight is mounted near the ceiling, probably eighteen feet above the floor.) The shadow from the flash has a soft edge while the shadow from the spotlight has a hard edge. This difference is due to the differing sizes of the two light sources. The bounce flash is giving me a light source 36 inches in diameter at a distance of 25 to 40 feet. The Spotlight is maybe 10 inches in diameter at a distance of 25 feet. Both size and distance of a light source directly effect the hardness/softness of the light.

Neither approach is better than the other. Sometimes you want hard light. Sometimes you want soft light. It can be nice to have both.

Pixels (part 2)

With the information in my blog post entitled Pixels (part 1) [how-many-pixels-part-1], you may conclude that 8×10 inch prints call for a 5 megapixel camera. That’s generally true, but not entirely. It is possible to use computer software to artificially increase the number of pixels. Different software programs may perform differently. The general rule of thumb is you can double the number of pixels. So, you might print very good 8×10 prints though your camera only records 3 megapixels.

Maybe you just bought a new DSLR that records images up to 15 megapixels. Those 15 megapixel images may require three times more storage than 5 megapixel images. If you shoot
some pictures on Tuesday, intended for 11×14 prints, set your camera to record large size. If you shoot some pictures on Wedensday, intended for computer screens only, set your camera to record small size.

Pixels get a little weird when you move to television display. Pixels on a computer are square. A digital image that is 400×400 pixels will display square on your computer monitor. Not so on a television screen. Television pixels (defined by either NTSC or PAL standards) are not square.

Consider an picture aspect ratio of 4:3, meaning the picture is 25% wider than it is tall. Standard television (not HD) has a 4:3 picture aspect ratio. Yet the resolution is 720×480 pixels, which numerically seems to be 50% wider than it is tall. But rest assured it is 4:3 because each television pixel is taller than it is wide. (Take a very close look at a television and you can see this is so. It is more difficult to see on a HD television.) While pixels in a computer or in your camera are equally wide as they are tall (often called square pixels), pixels in television are taller than they are wide.

Fir branch under ice


Hiking in the white mountains of NH on Dec.1, there was no snow at the trail head, but eventually became a foot deep. Having made such a mistake once before (several years ago), I kicked myself for doing it again.

It was a long cold day, but there were rewards. In particular there were a few little streams that crossed the trail with small waterfalls only a few inches in height. The spray of water caused some interesting ice formations, including the one shown here. The fir branch was covered in ice, but the mossy rock beneath it was not, presumably because the movement of the water was enough to prevent freezing.

In retrospect, the choice of aperature plays an important role in the success of this image. Both the extreme foreground and the extreme background are slightly out of focus. However, I wish I had framed the image a bit more to the left to avoid the ice touching the left edge of the frame.

Click on the image for a larger view.

Canon EOS 5D mk II, 70-200mm (@ 170), ISO 800, f/7.1, 1/200 sec

The Third Sheep

Often, I will plan to be at a certain place at sunrise in order to photograph with the warm sunrise light. However, on this particular day, the weather forecast called for cloudy and cold. So I did not leave my motel room until 7:30am and only then found that some sun was dodging through the cloud cover.
Looking at a map, I chose some back roads to explore. The first road followed a river, but I saw nothing that caught my photographic intentions. Then I drove off through some farmland and stumbled upon these sheep, grazing on a hillside covered with frost. Atop the hill, the sun was catching the orange leaves of autumn maple trees. At the bottom of the hill was a still pool catching reflections.
Just a bit of sunlight on the trees, combined with general cloud cover, the conditions were fleeting and did not last. I captured about a dozen images; this is one of my favorites.
Where is the third sheep? Uphill, further toward the trees, out of frame … but appears in the reflection.

Canon EOS 5D mkII; 70-200mm @ 200; ISO 800, 1/320, f/10